This document is a part two of four articles:
II. Adding verification DNS records
III. Assigning a domain name to the site and create a new artifact
IV. Adding DNS records for production
II. Adding verification DNS records
You can use your favourite DNS server. We use Route 53 in this document for an example.
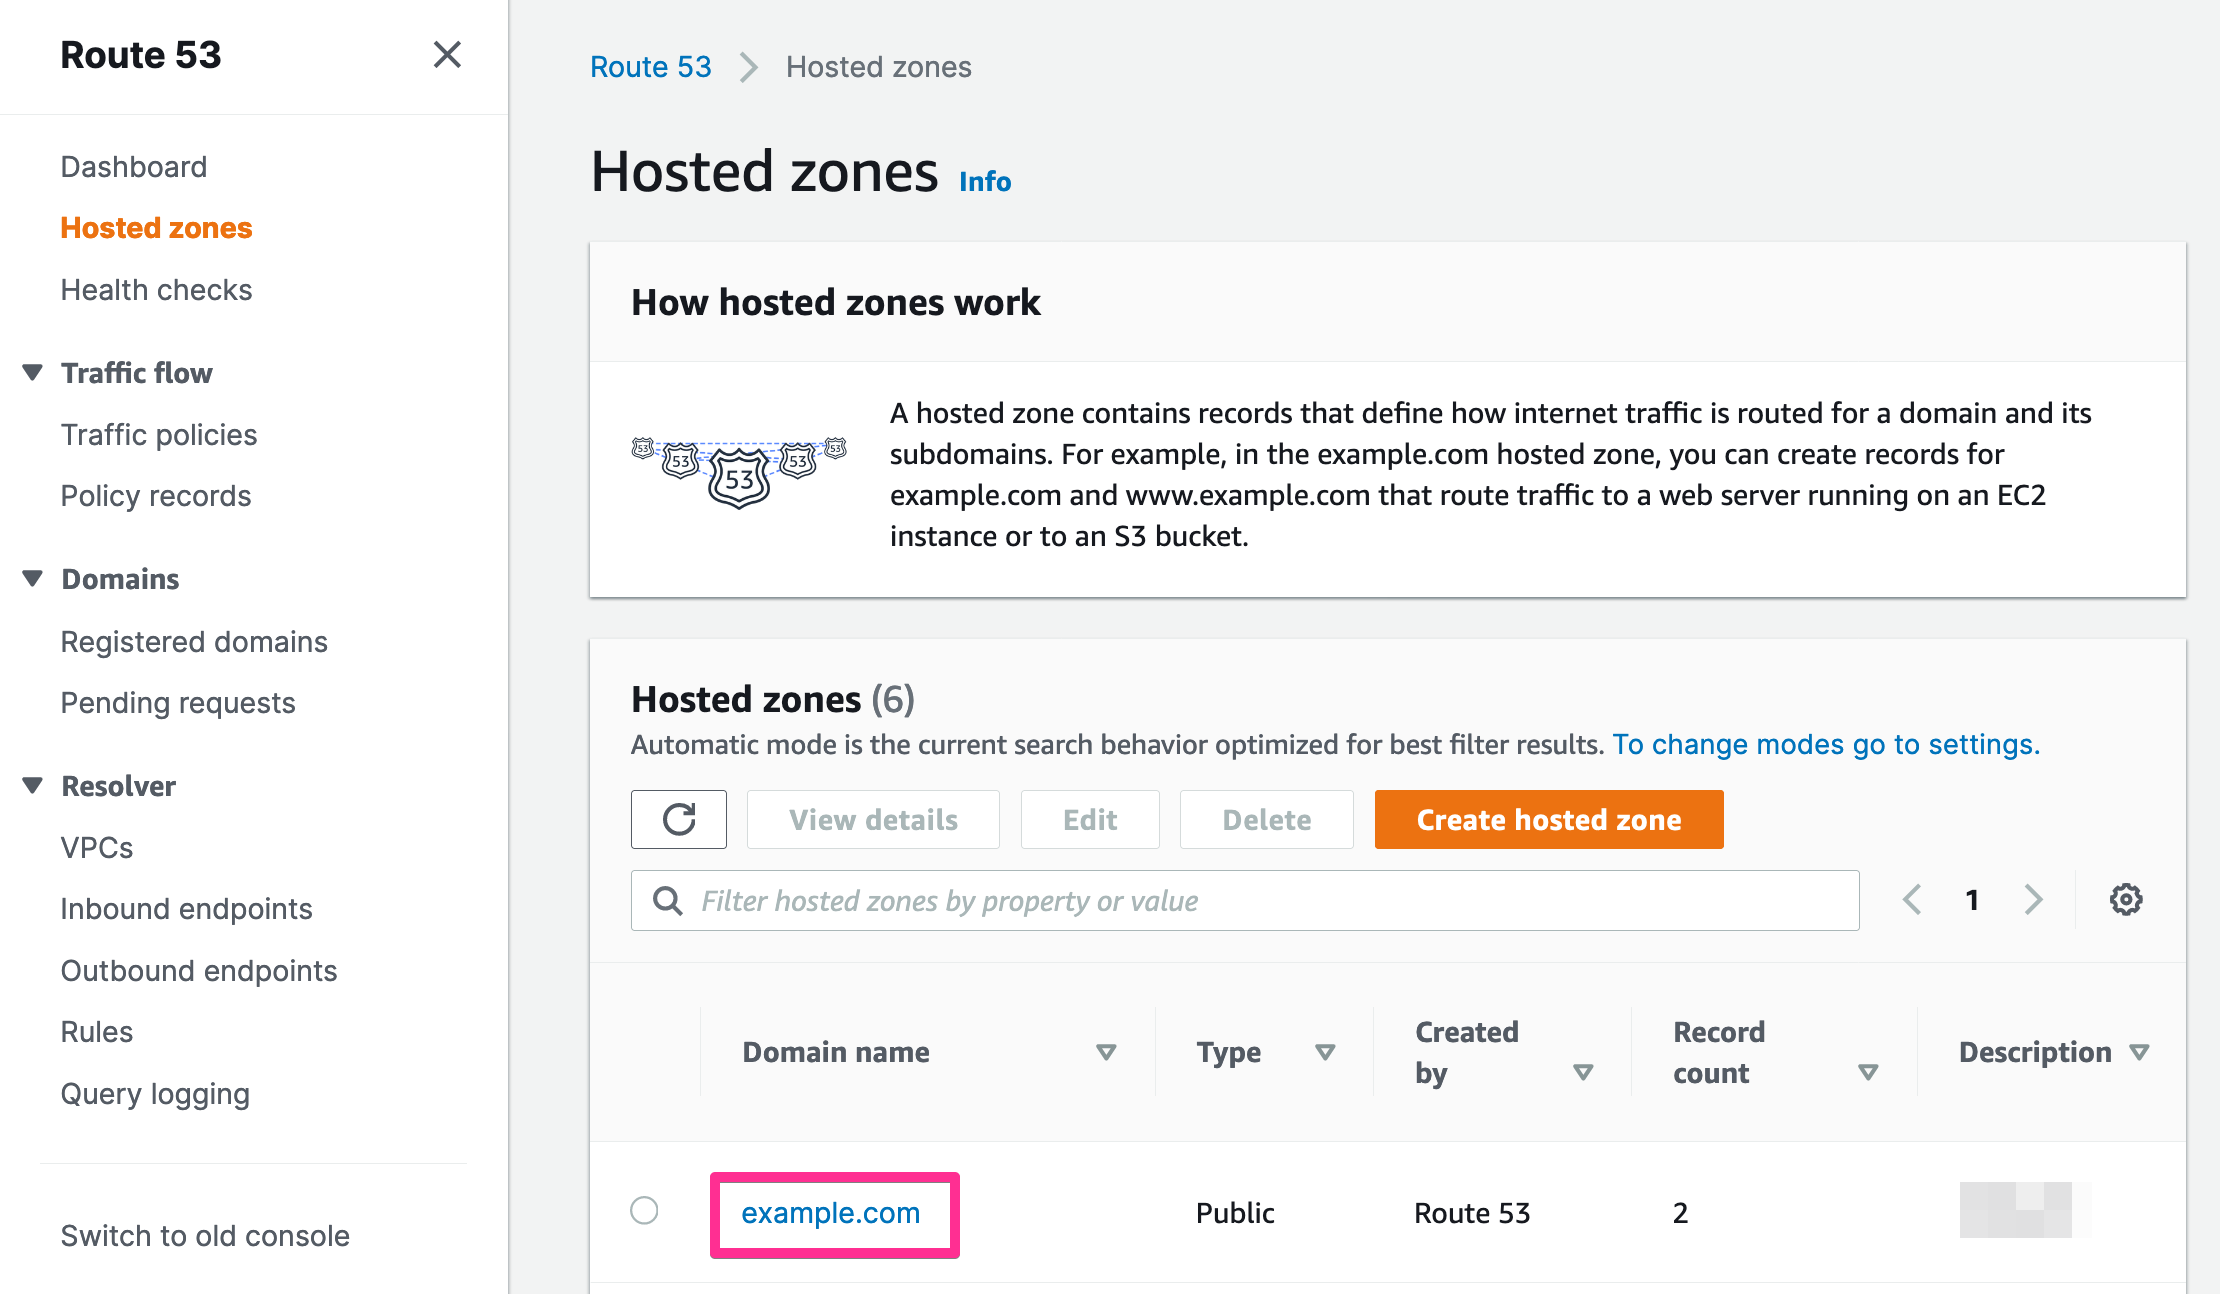
1. Login to ControlPanel
URL: https://console.aws.amazon.com/route53/home
2. Click the domain name you want to edit.
We use example.com on this document as a sample domain.
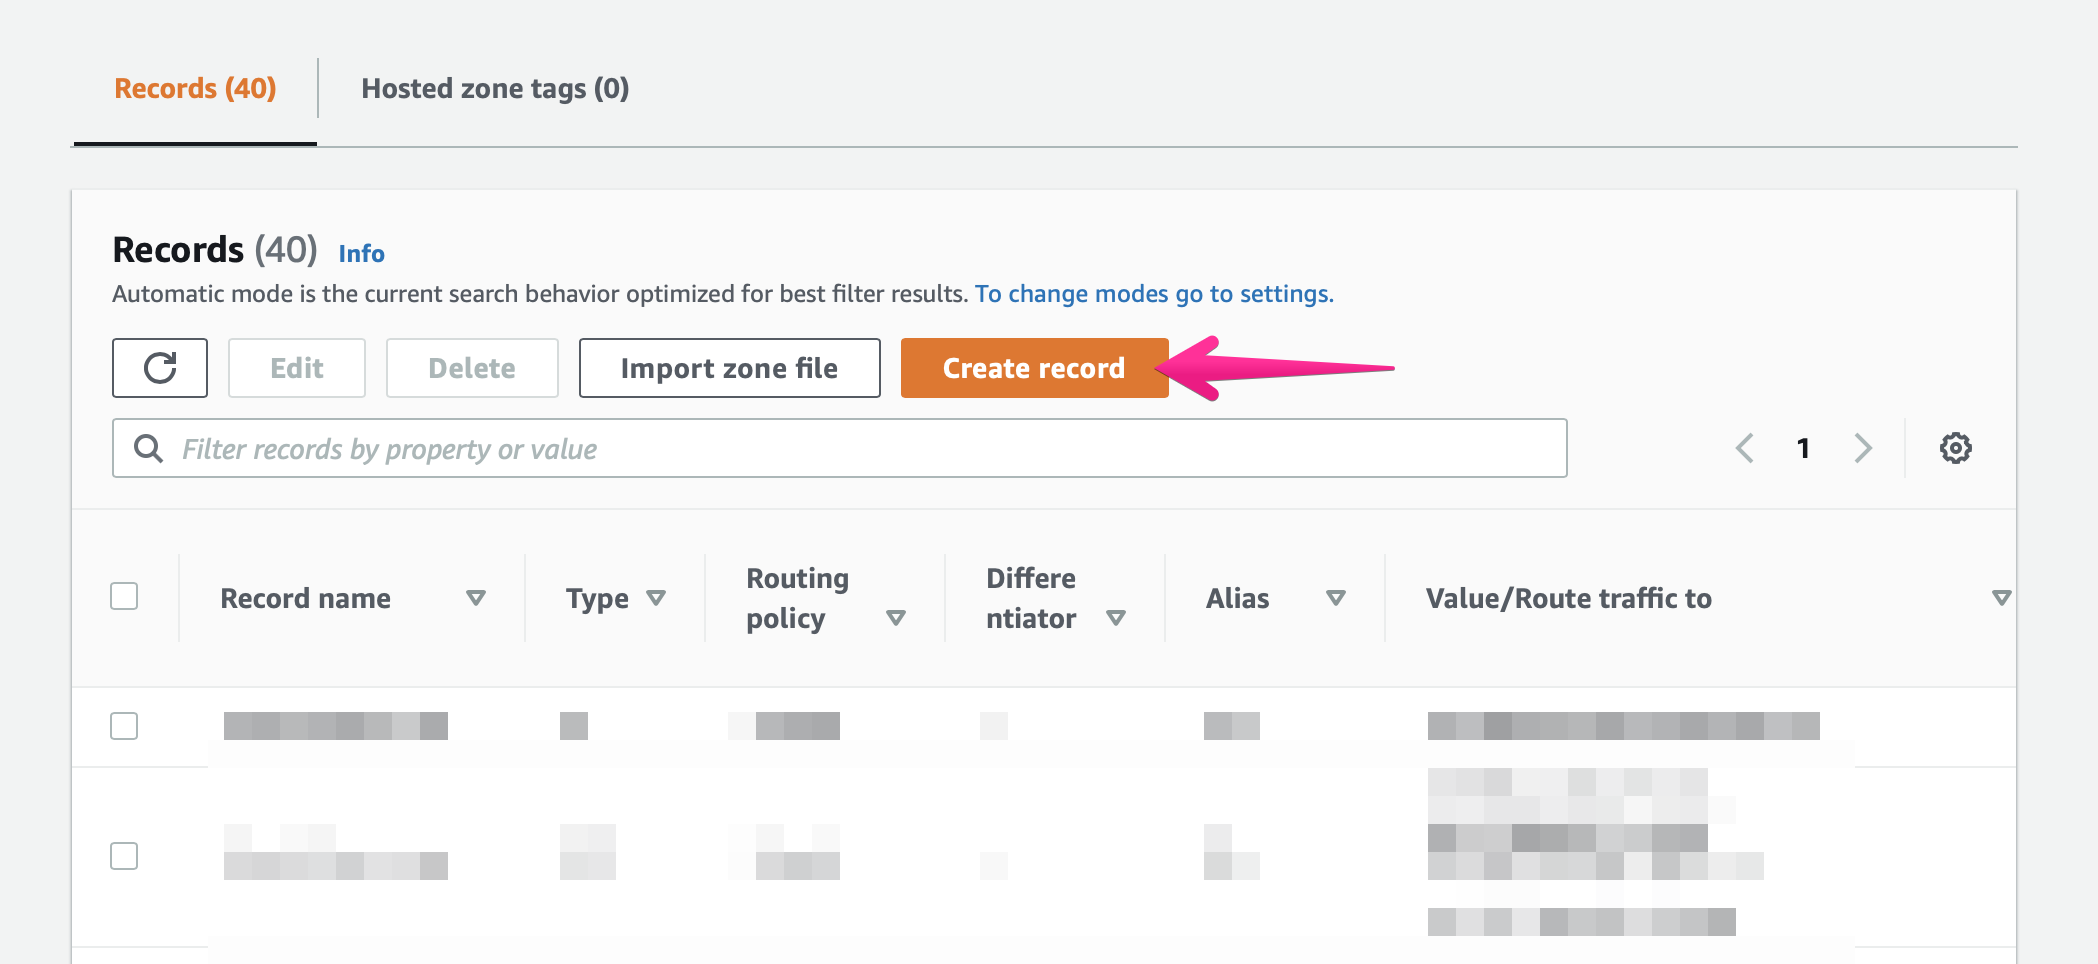
3. Click [Create Record Set] button to add validation DNS records
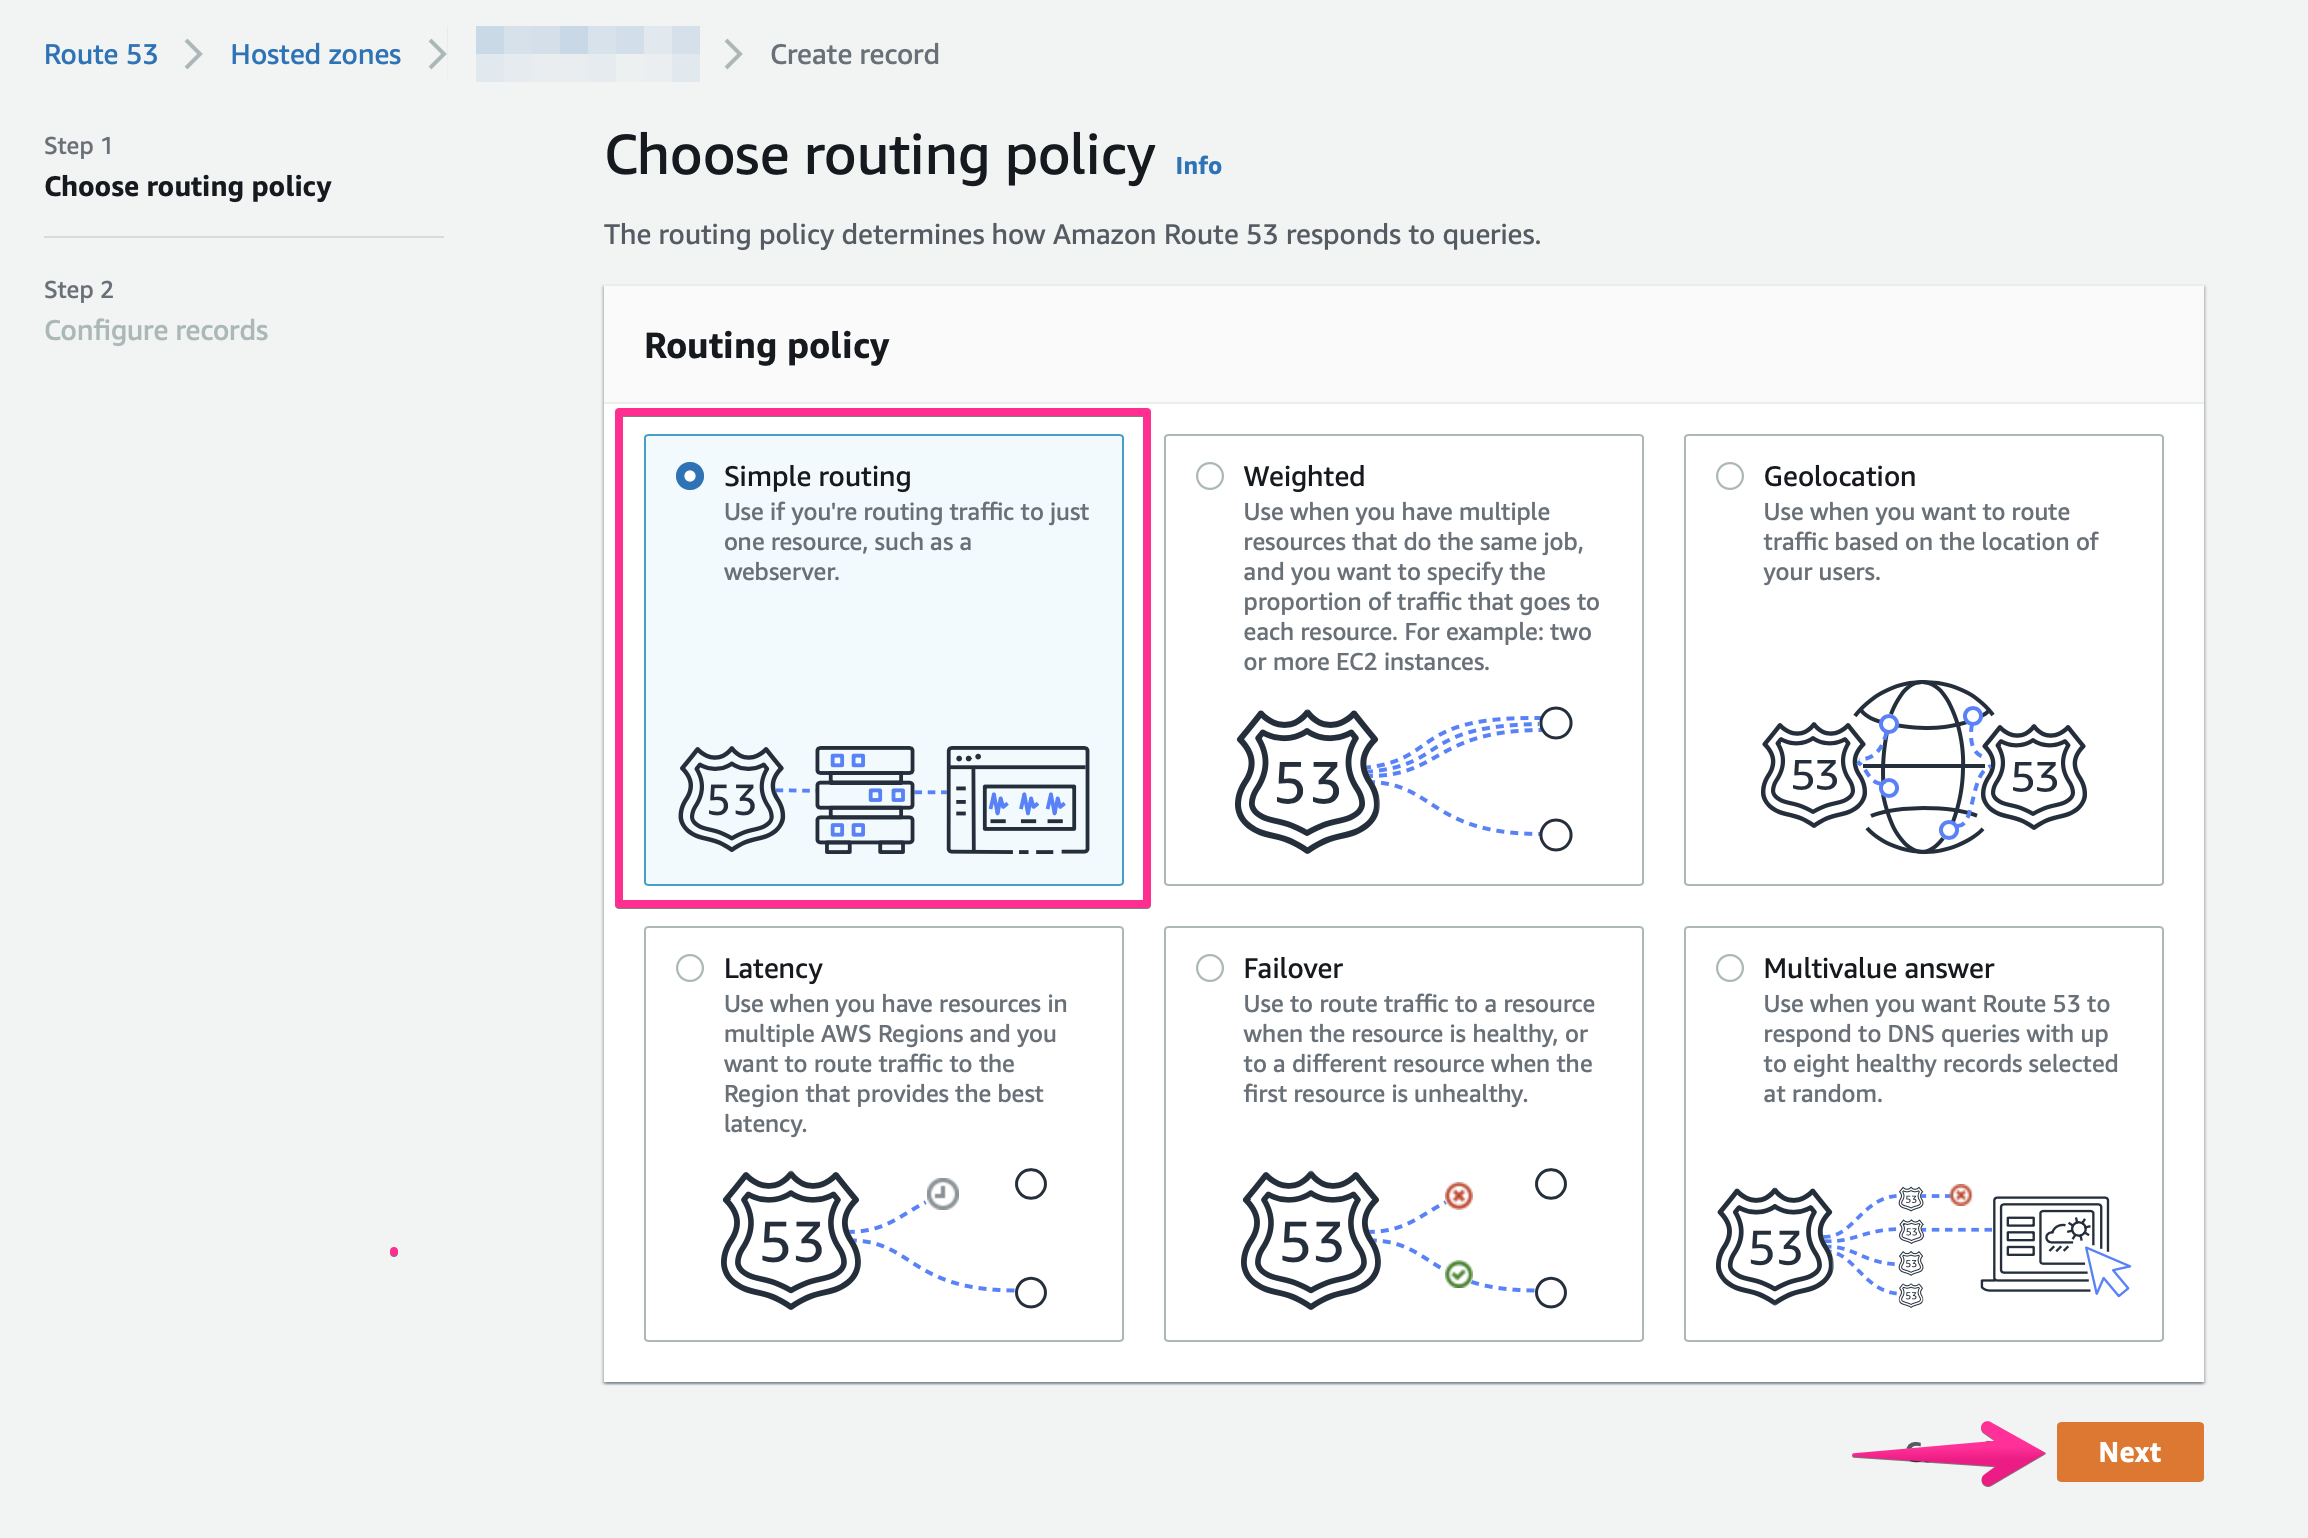
4. Choose routing policy
Select [Simple routing] and click [Next] button
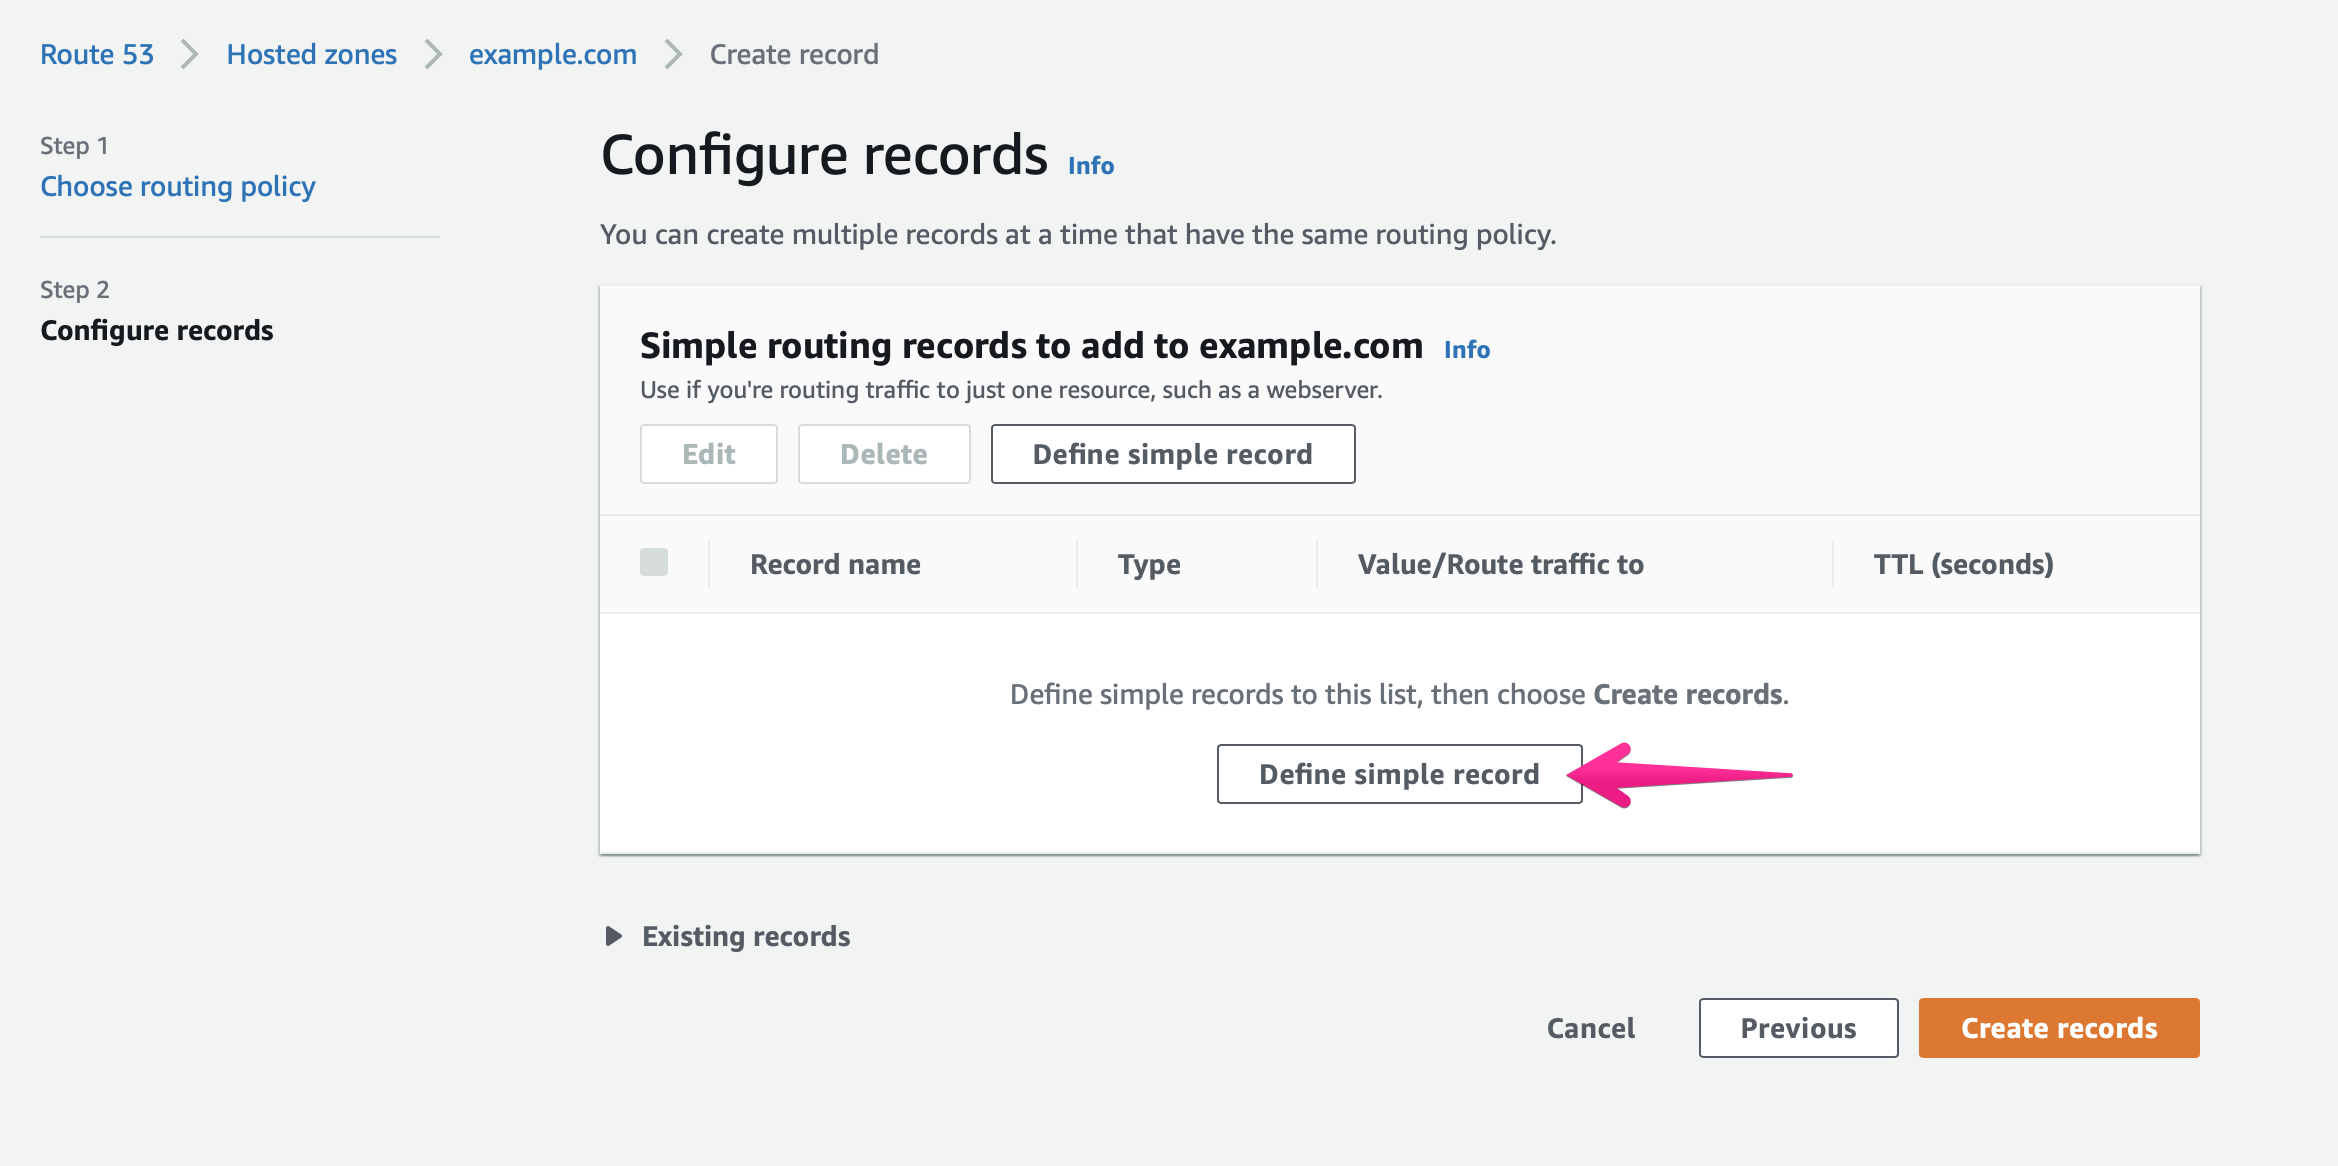
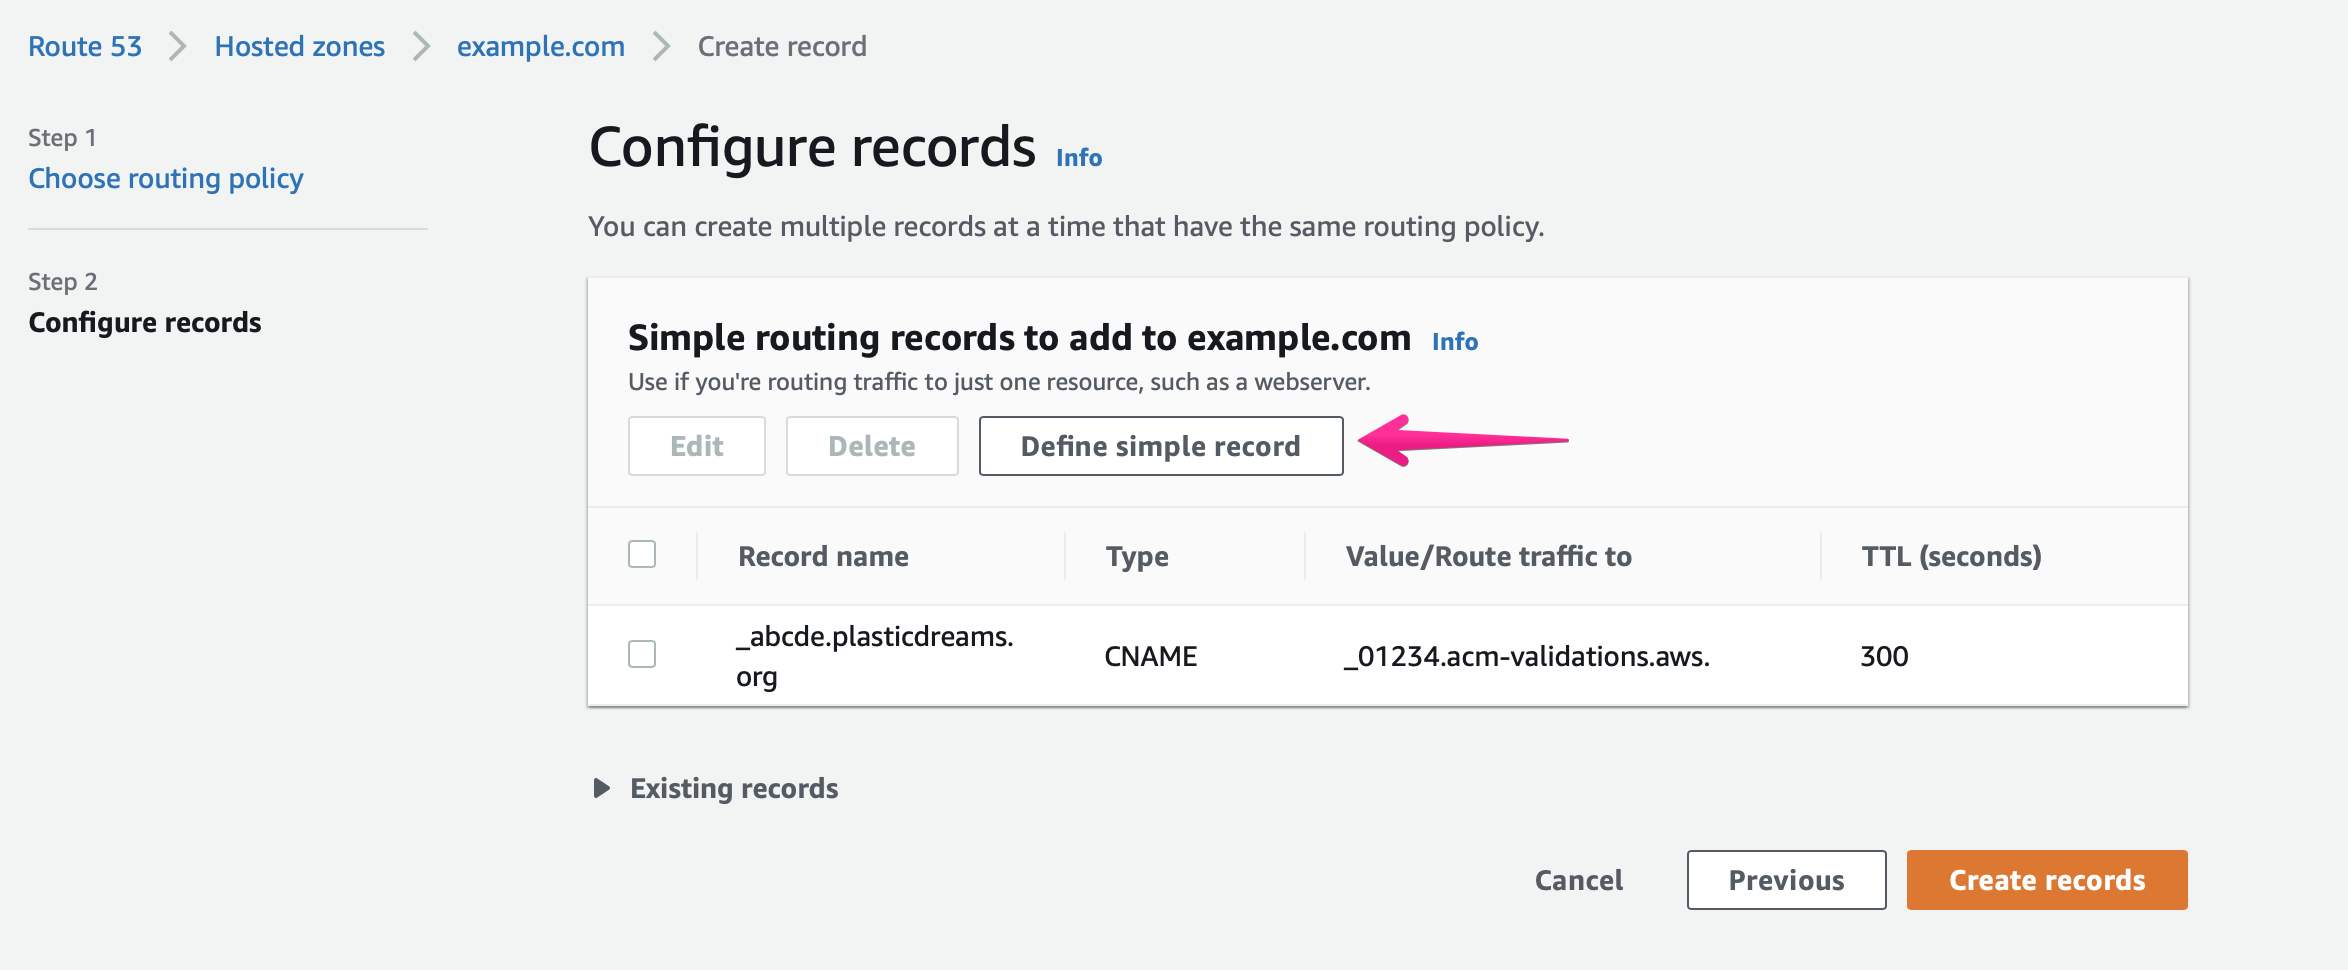
5. Configure records
Click [Define simple record]
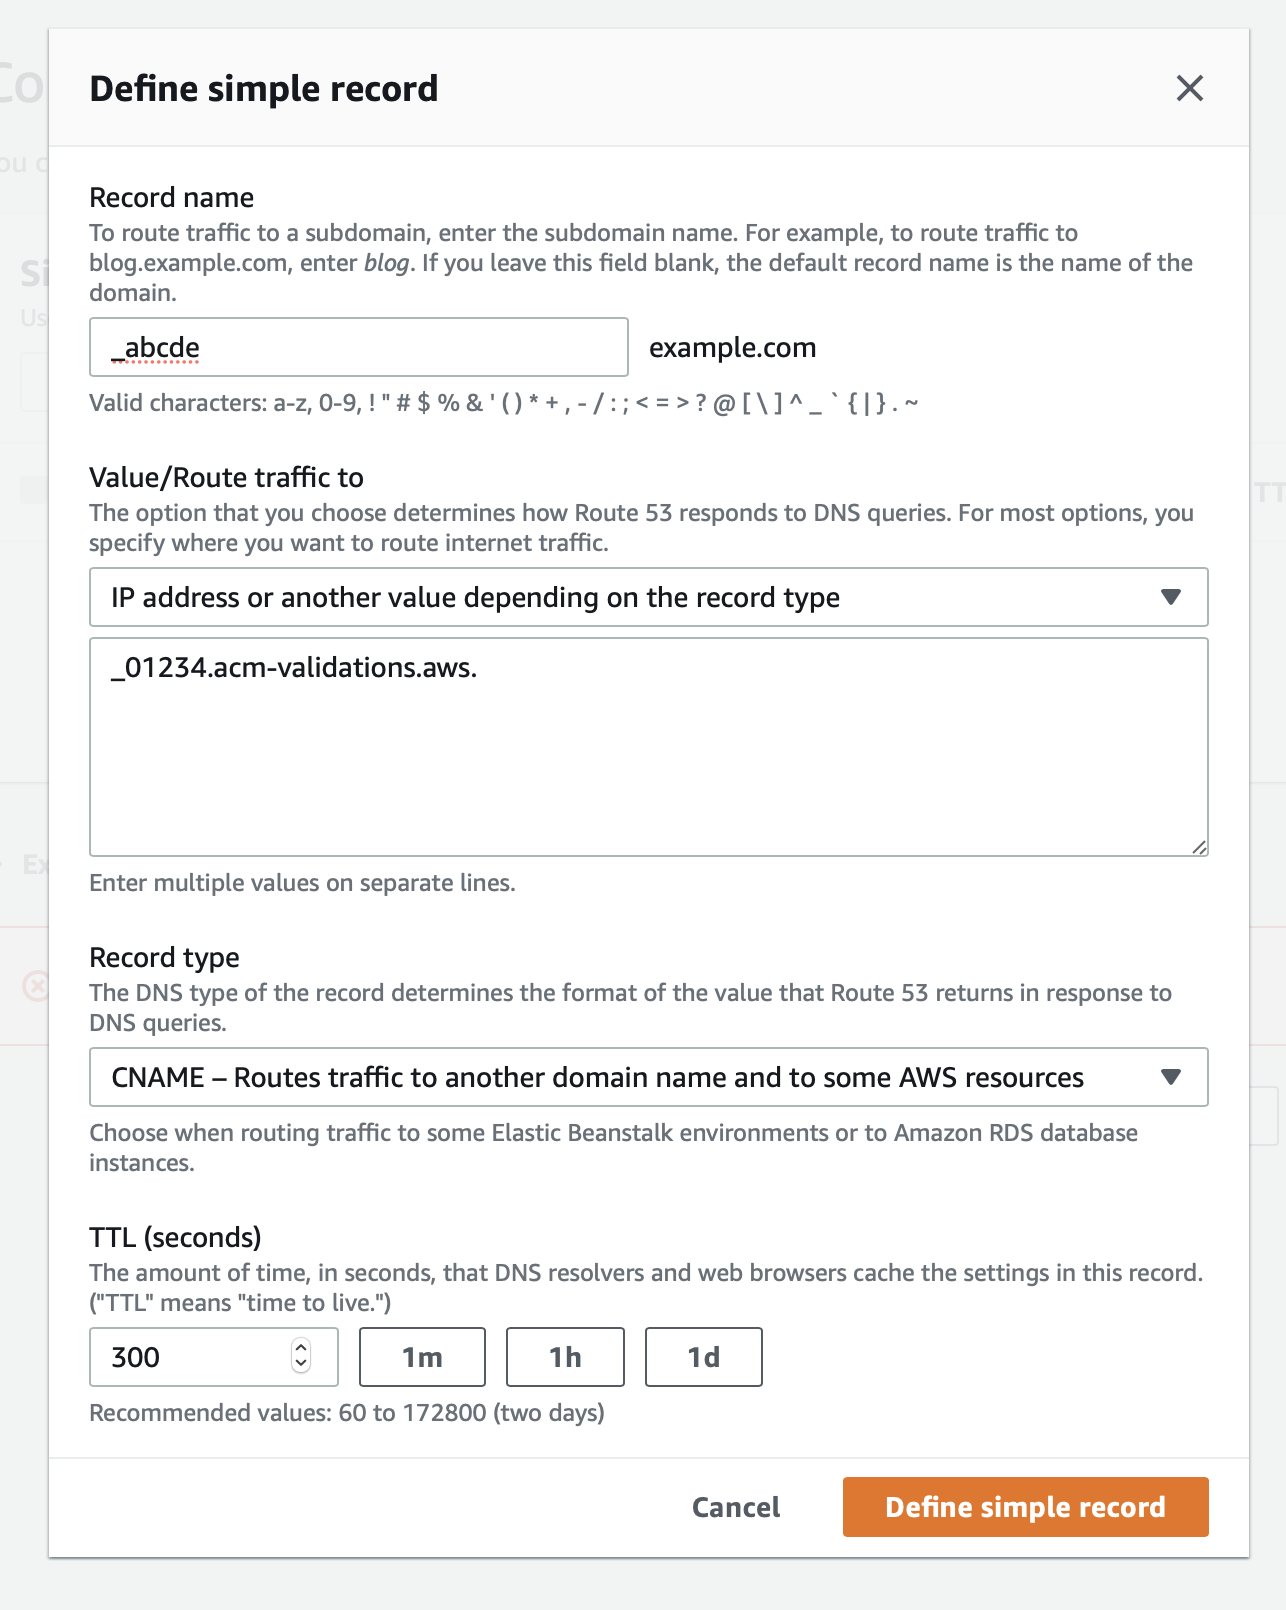
6. Add validation record for example.com
Value to set:
Record name: _abcde
Value/Route traffic to:
Pulldown: [IP address or another value depending on the record type]
Textarea: _01234.acm-validations.aws.
RecordType: CNAME
TTL : 300 (Default)
8. Click [Define simple record] button again
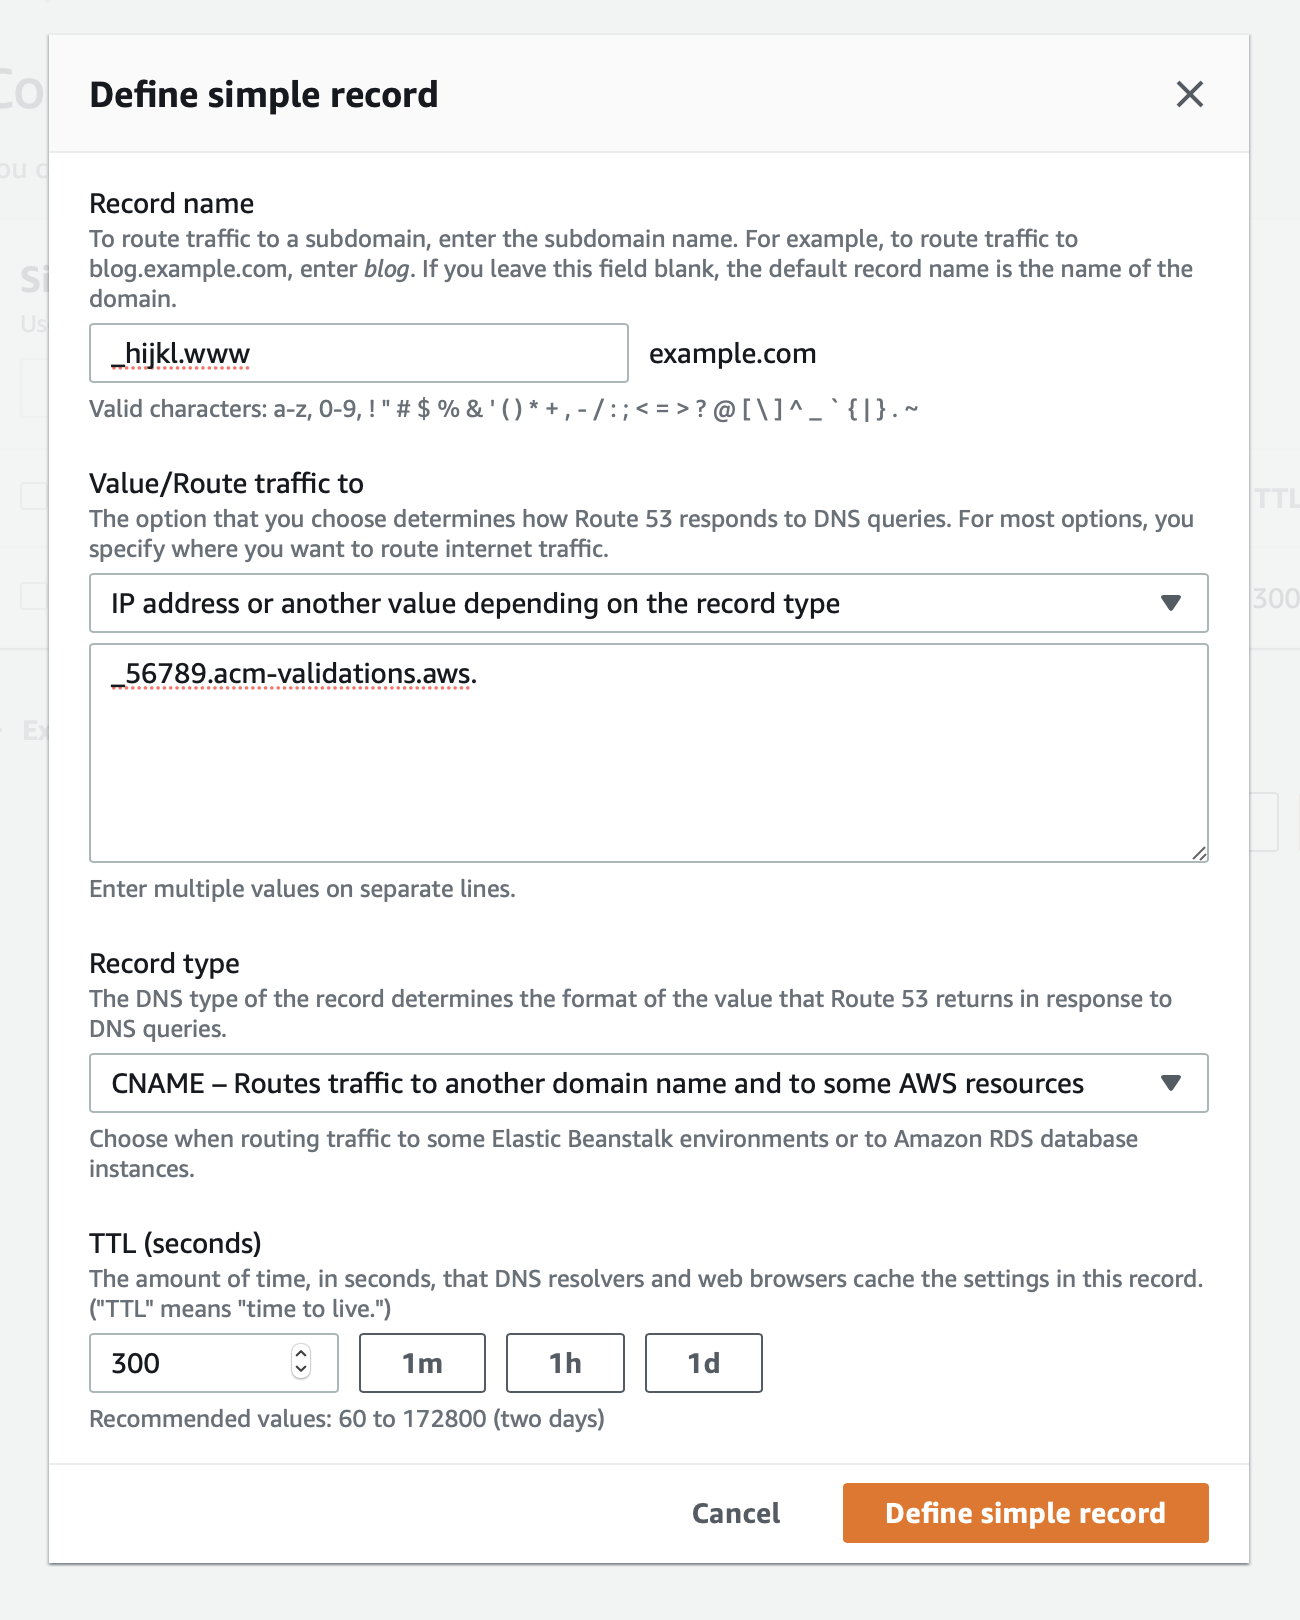
9. Set another verification record for www.example.com and click [Define simple record] button.
Valu to set:
Record name: _hijkl.www
Value/Route traffic to:
Pulldown: [IP address or another value depending on the record type]
Textarea: _56789.acm-validations.aws.
RecordType: CNAME – Routes traffic to another domain name and to some AWS resources
TTL : 300 (Default)
10. Hit [Save Record Set] button
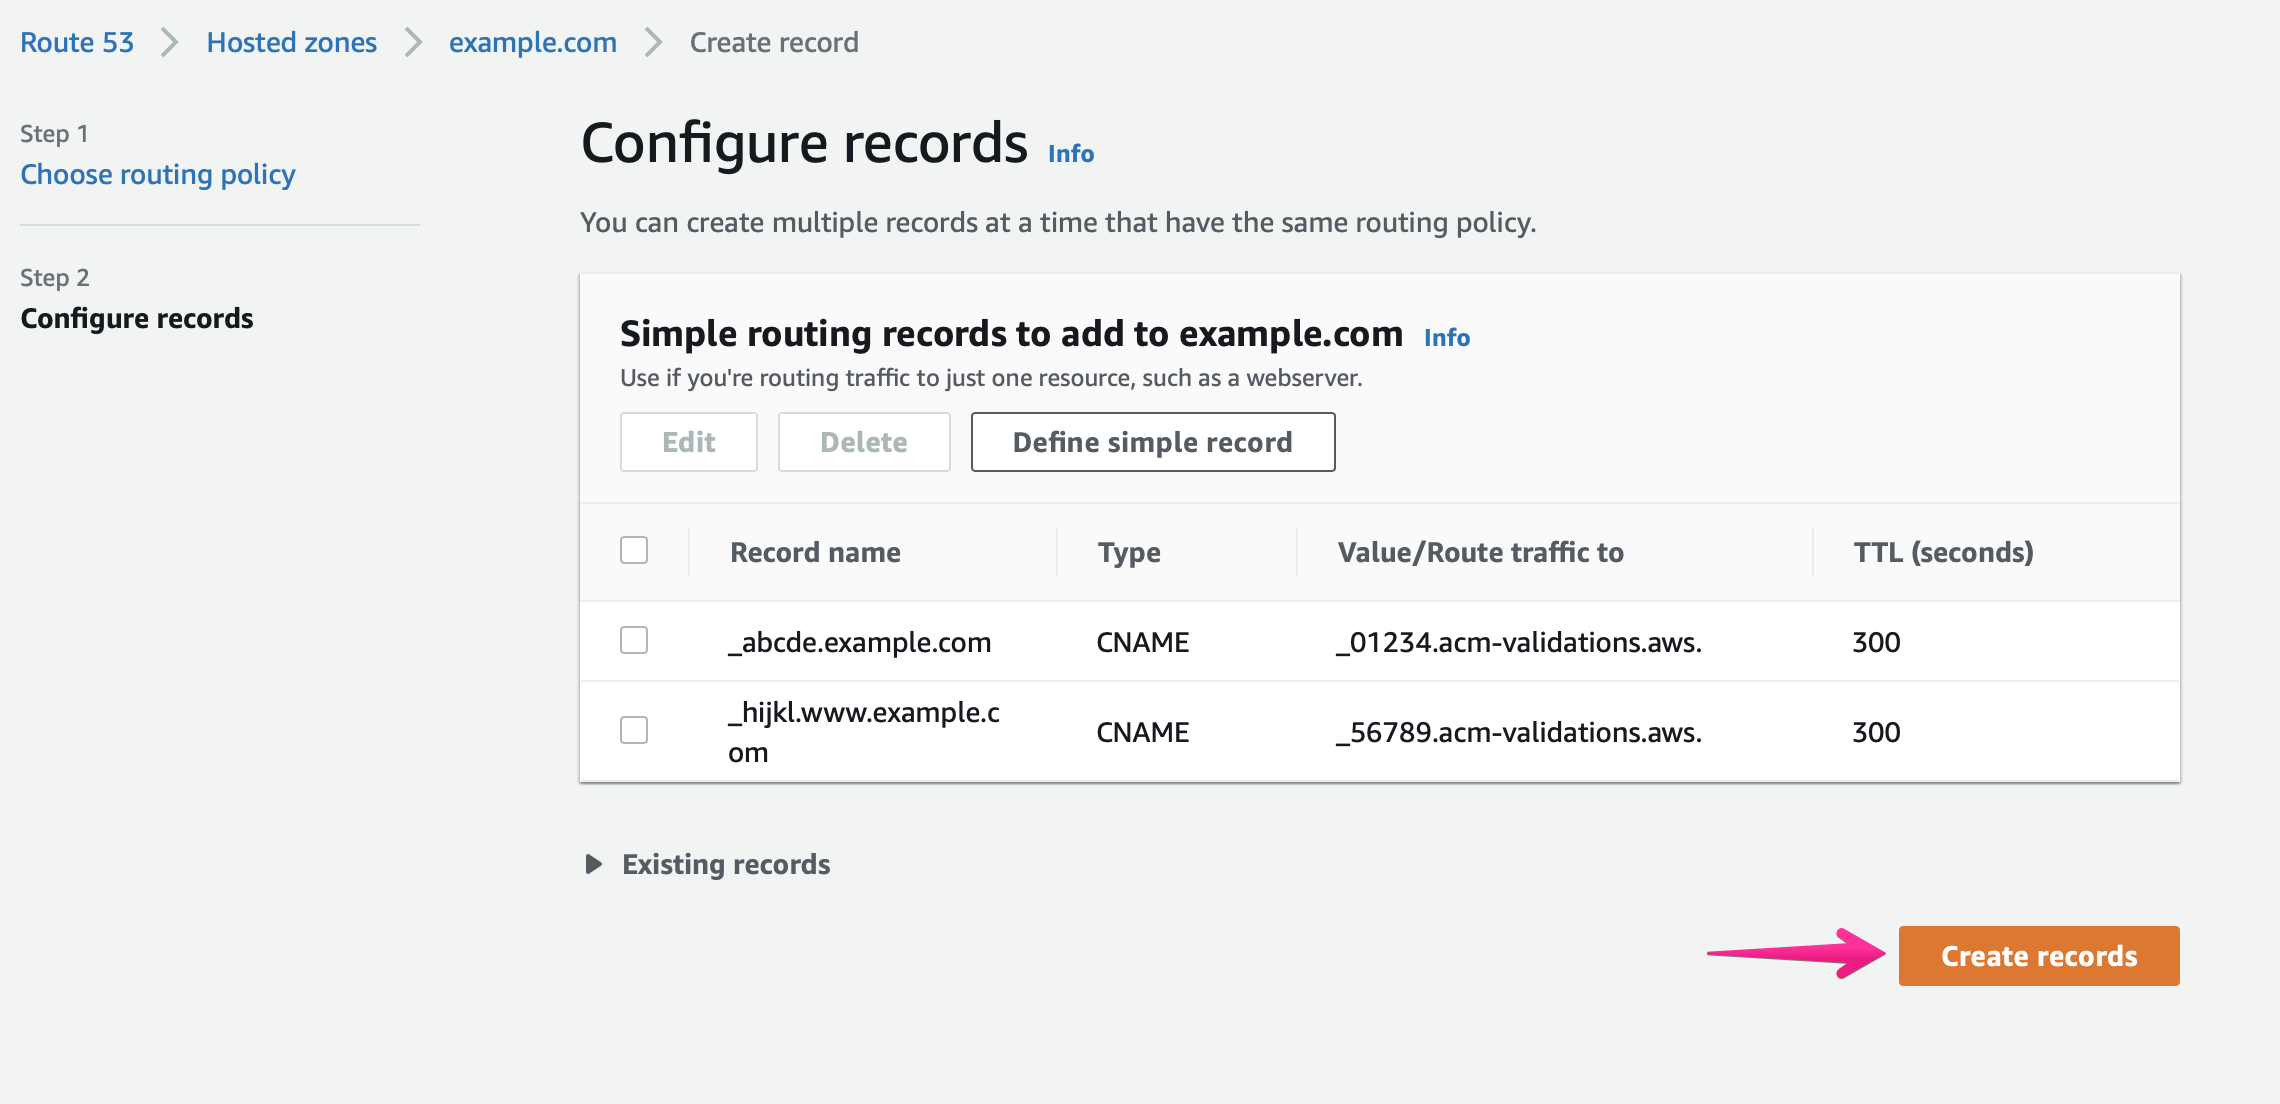
11. All verification records are set.

Go to III. Assign a domain name to the site document after the Status of the domain name on Shifter dashboard turns to “Ready” from “Pending”.
Next: III. Assign a domain name to the site