Requirements
Setting up
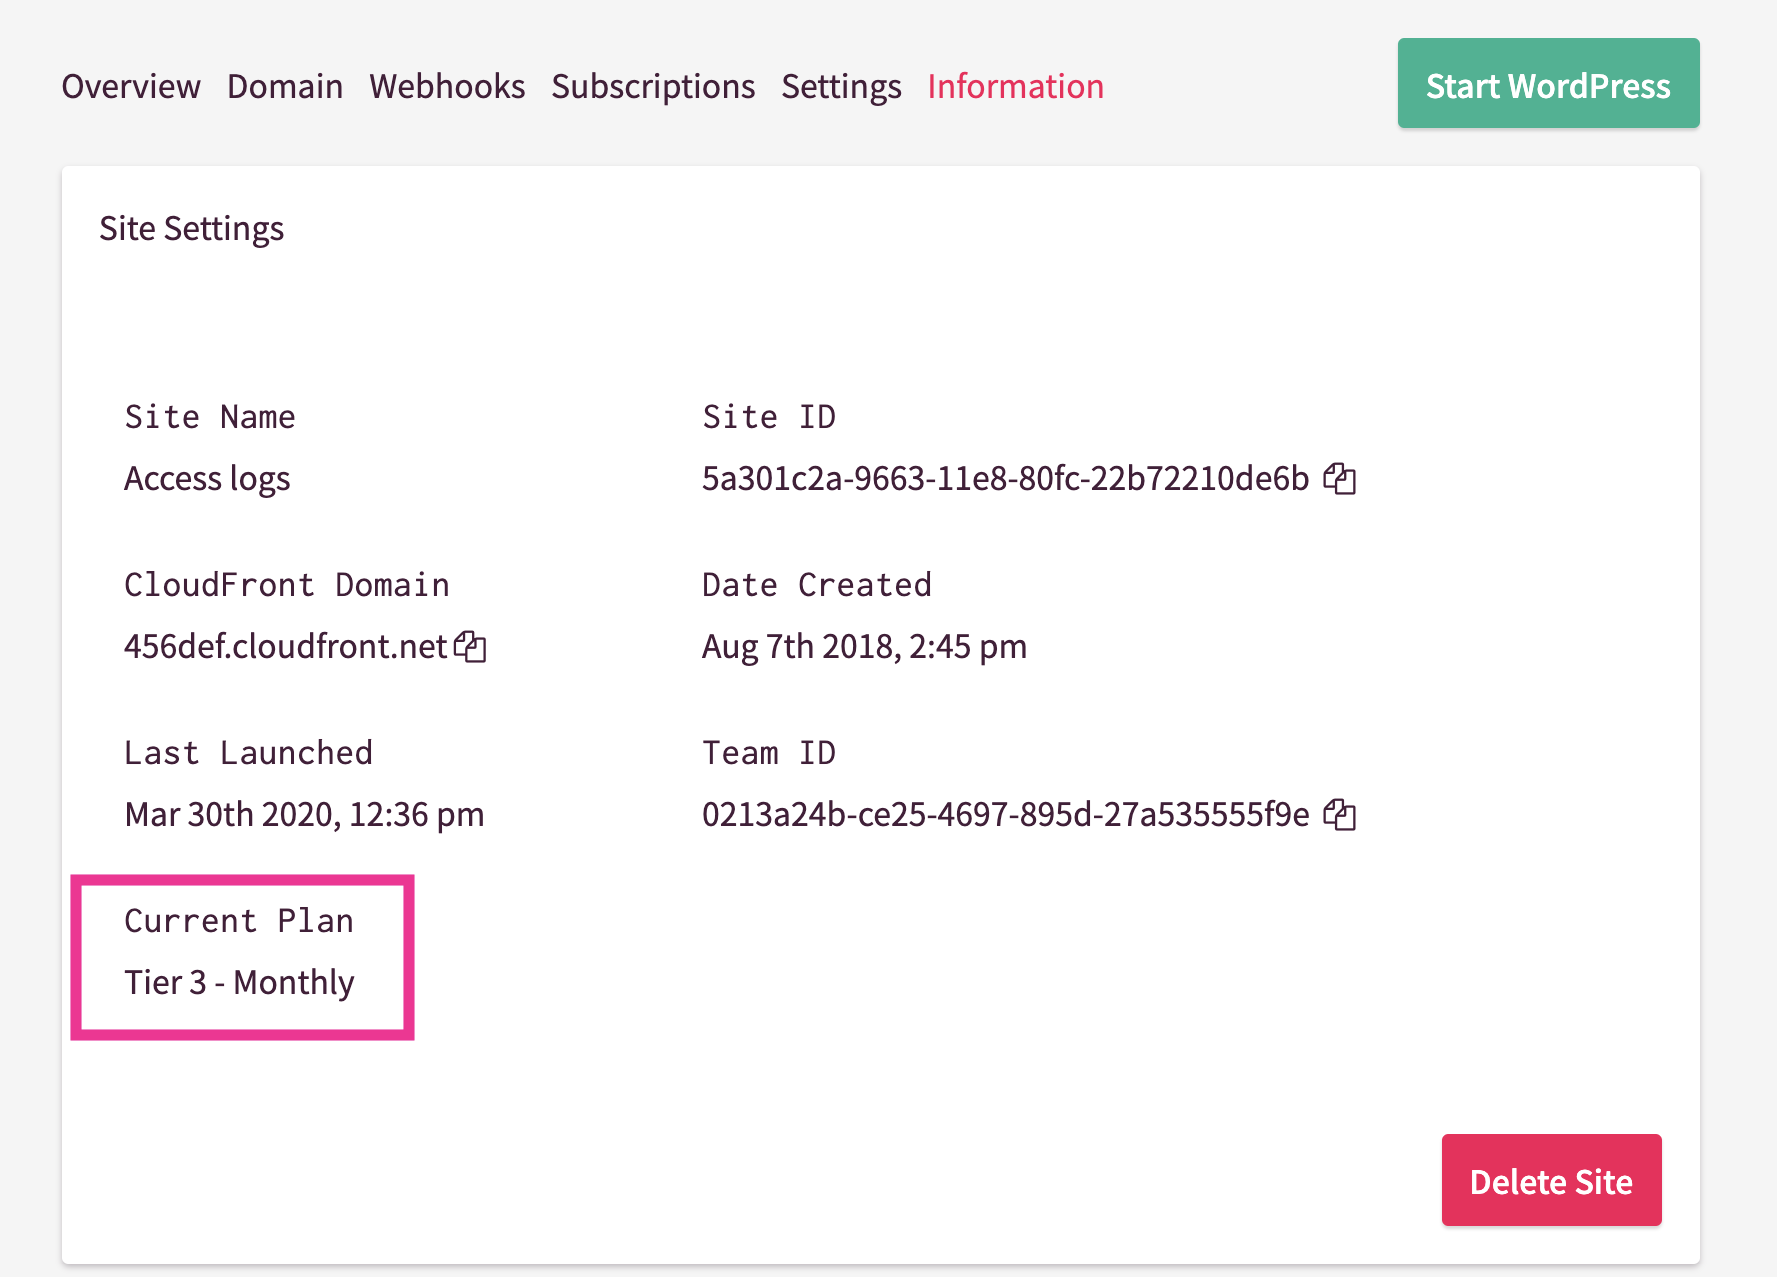
1. Make sure the target website’s plan is Tier 3 on Shifter Dashboard.
2. Create an S3 bucket on your AWS account in AWS Console or AWS-CLI.
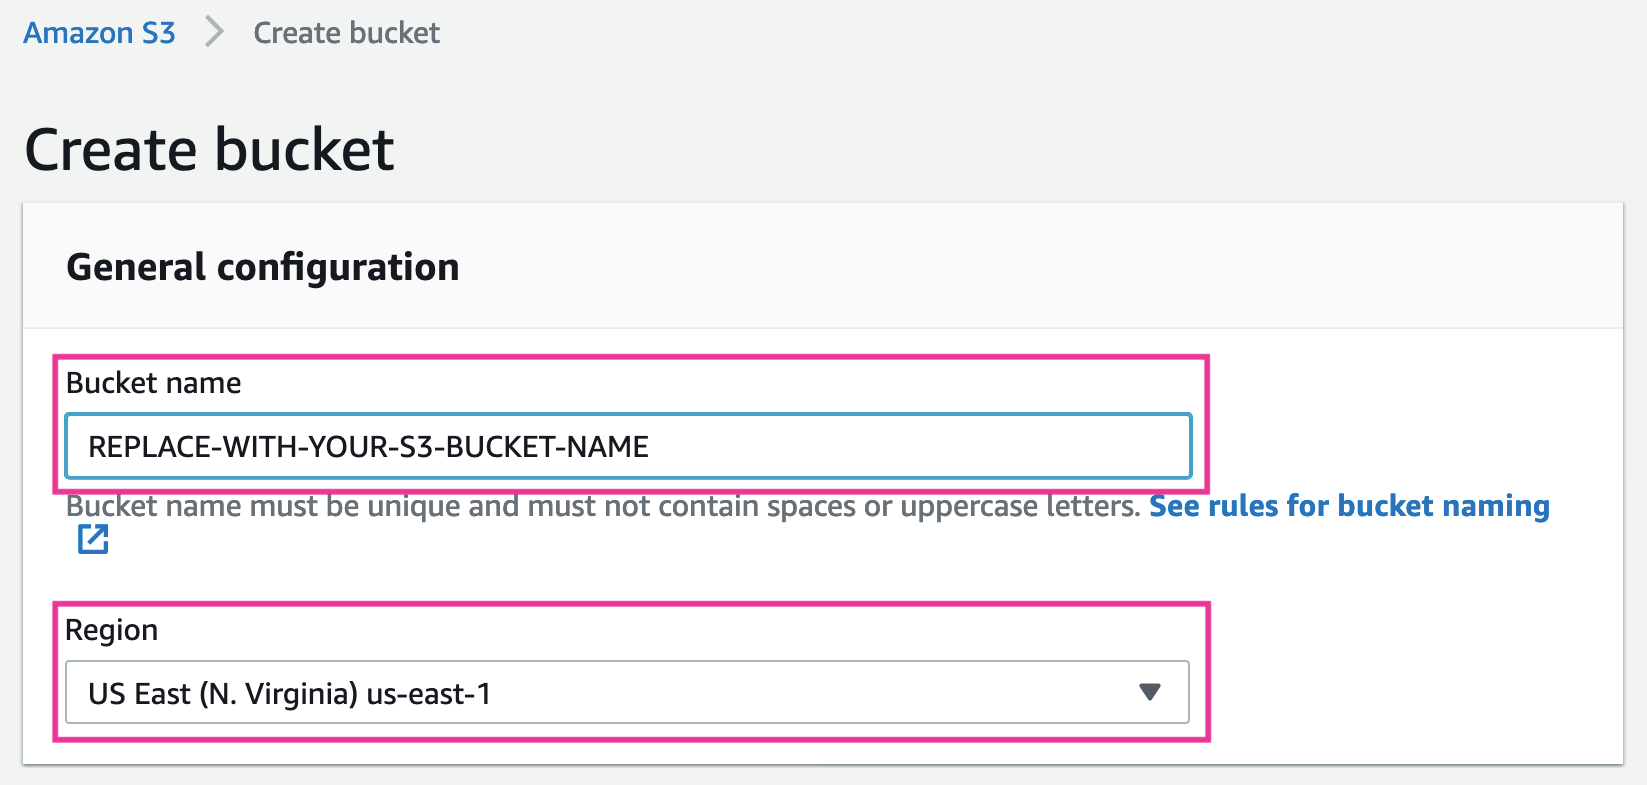
Create S3 bucket with accessing AWS console or using AWS-CLI.
-
Bucket name (required): Choose a name for your bucket, and input it here.
-
Region (required): Select your region from the dropdown menu.
In this sample, Bucket name is set as REPLACE-WITH-YOUR-S3-BUCKET-NAME, Region is US East (us-east-1).
Never forget to copy both values.
For more details for creating S3 bucket, please read and follow official document: Create a Bucket
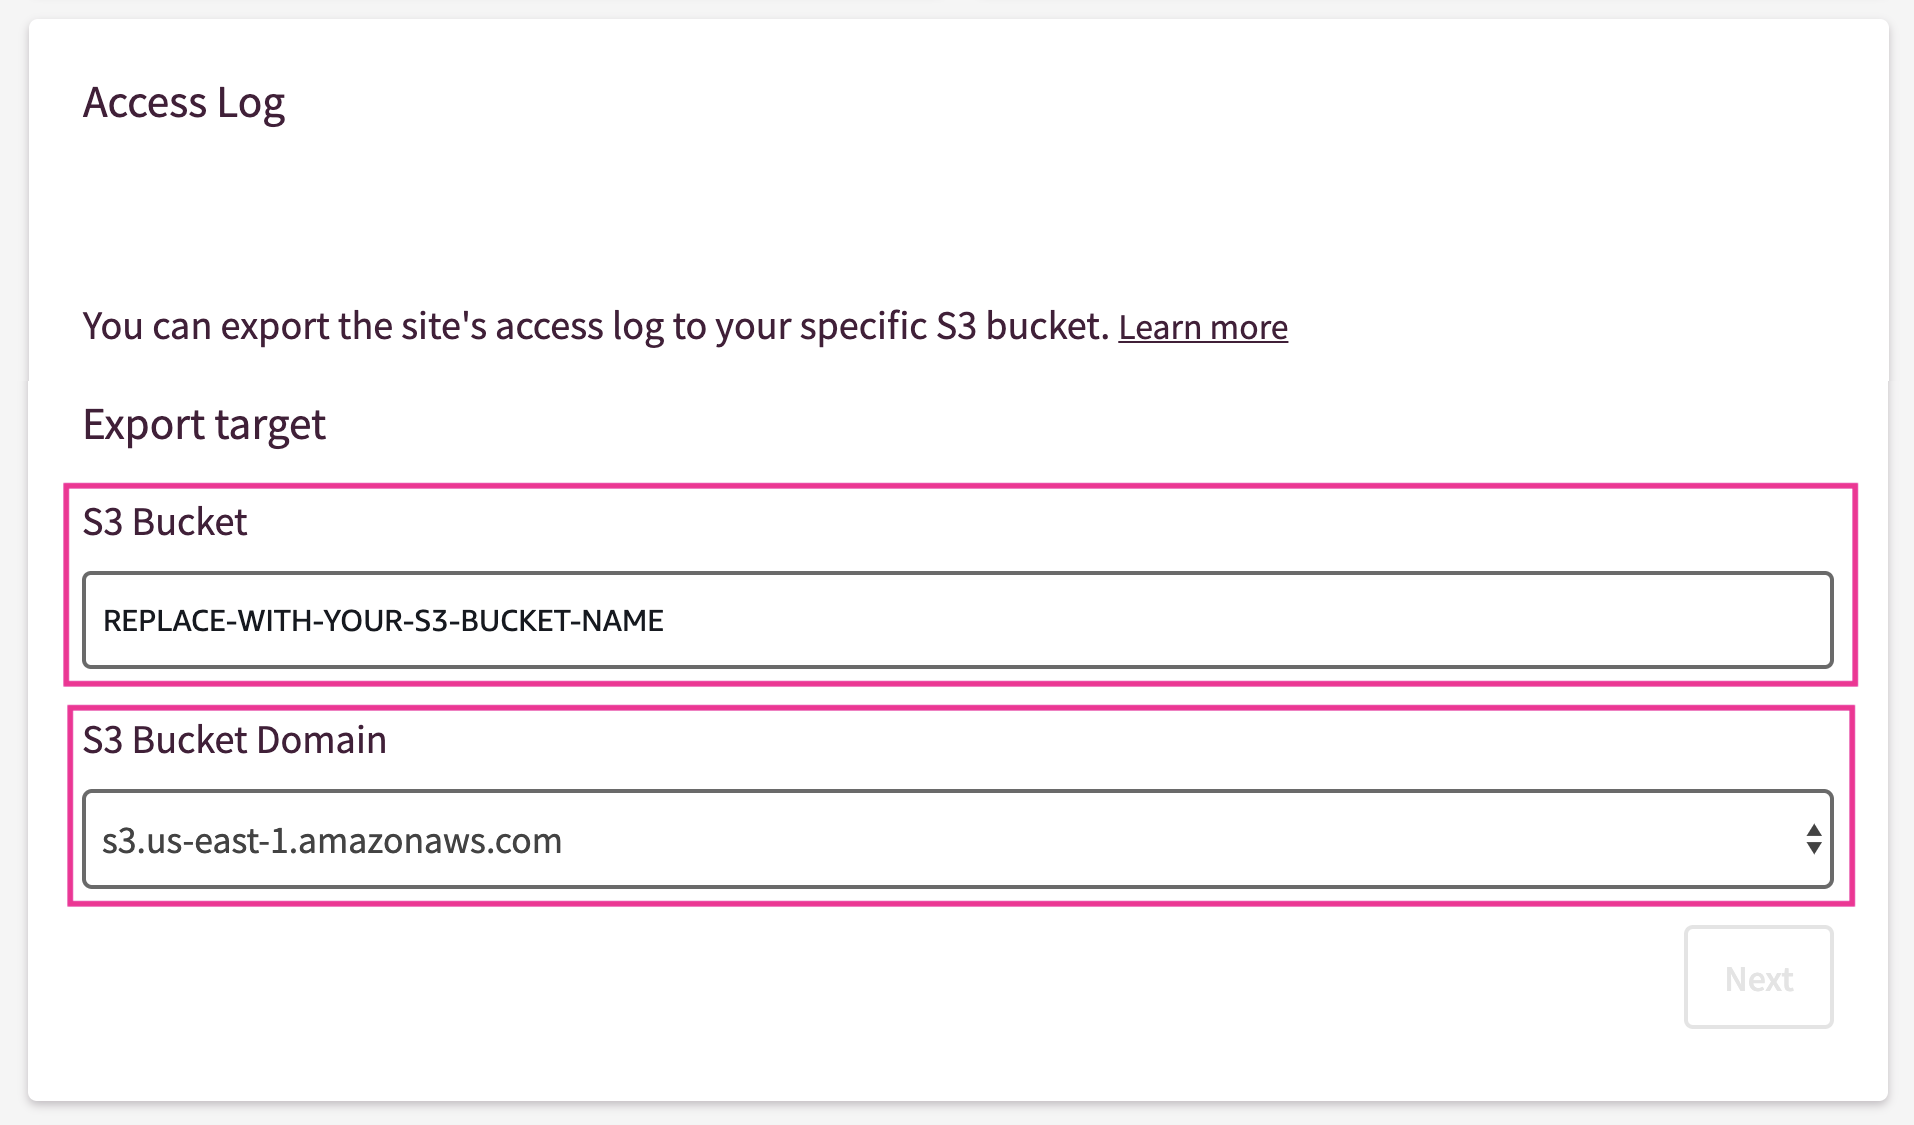
3. Set bucket name on S3 Bucket field on Shifter Dashboard
Navigate back to your Shifter dashboard, then set the value as displayed below.
-
S3 Bucket: Input the bucket name you’ve created above
-
S3 Bucket Domain: Choose the same region as you’ve chosen above
4. Copy S3 bucket policy
Click [Next] button, Bucket policy will be shown.
Let’s copy code.

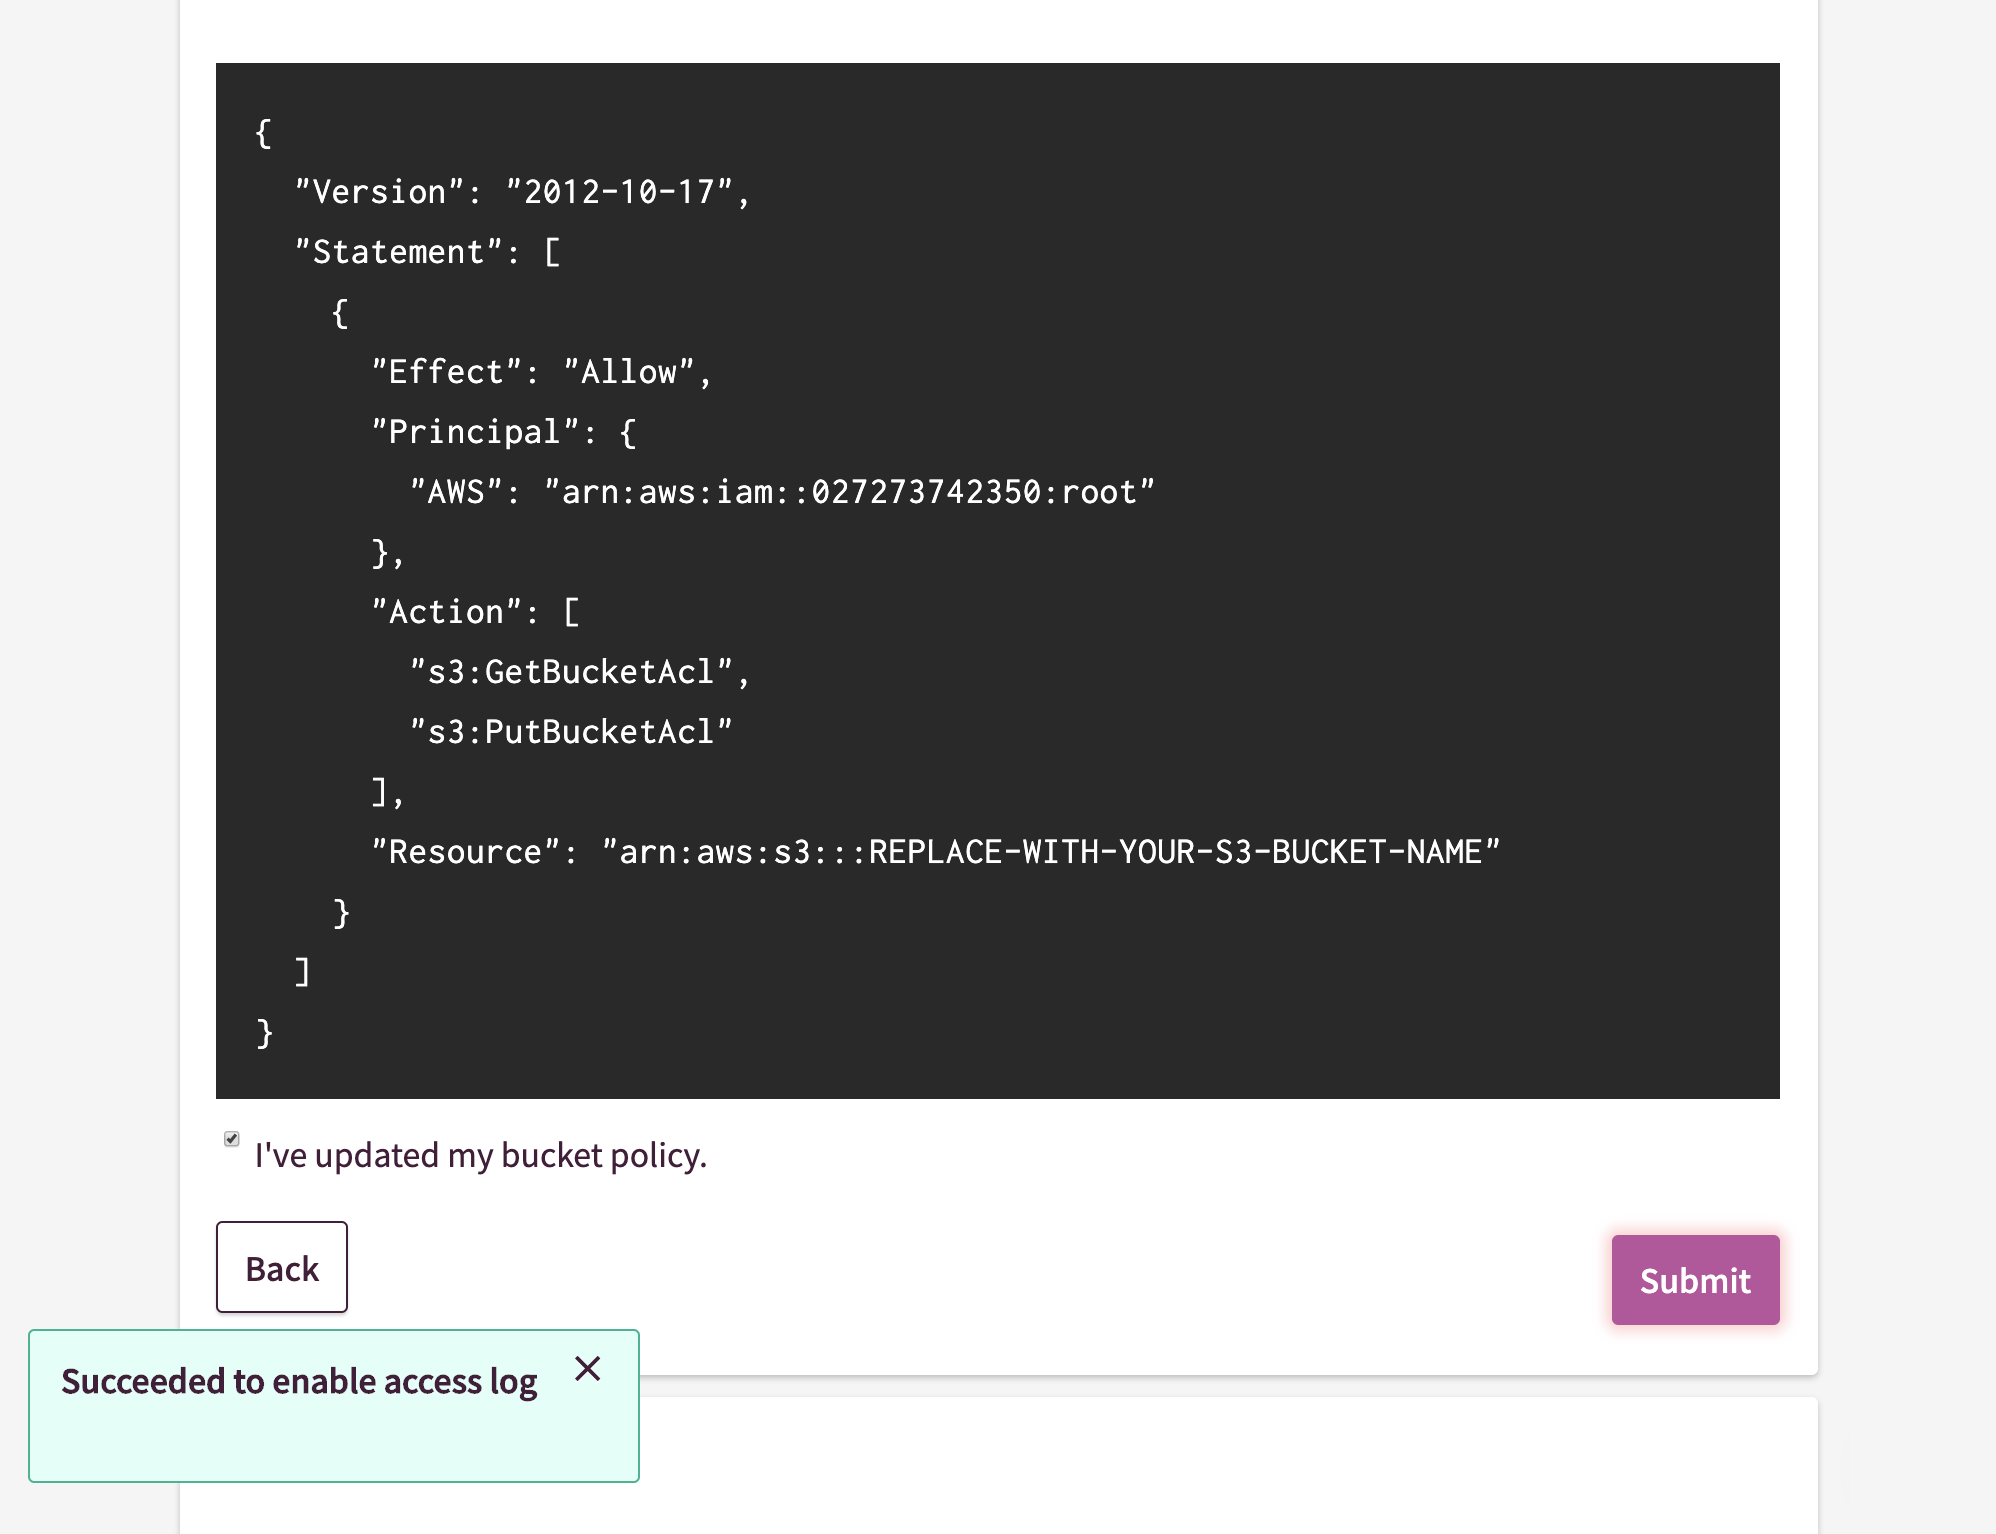
Sample policy
{
  "Version": "2012-10-17",
  "Statement": [
    {
      "Effect": "Allow",
      "Principal": {
        "AWS": "arn:aws:iam::027273742350:root"
      },
      "Action": [
        "s3:GetBucketAcl",
        "s3:PutBucketAcl"
      ],
      "Resource": "arn:aws:s3:::REPLACE-WITH-YOUR-S3-BUCKET-NAME"
    }
  ]
}
5. Update S3 Bucket Policy
Back to S3’s console, paste copied policy, then click [Save] button right above the text area.
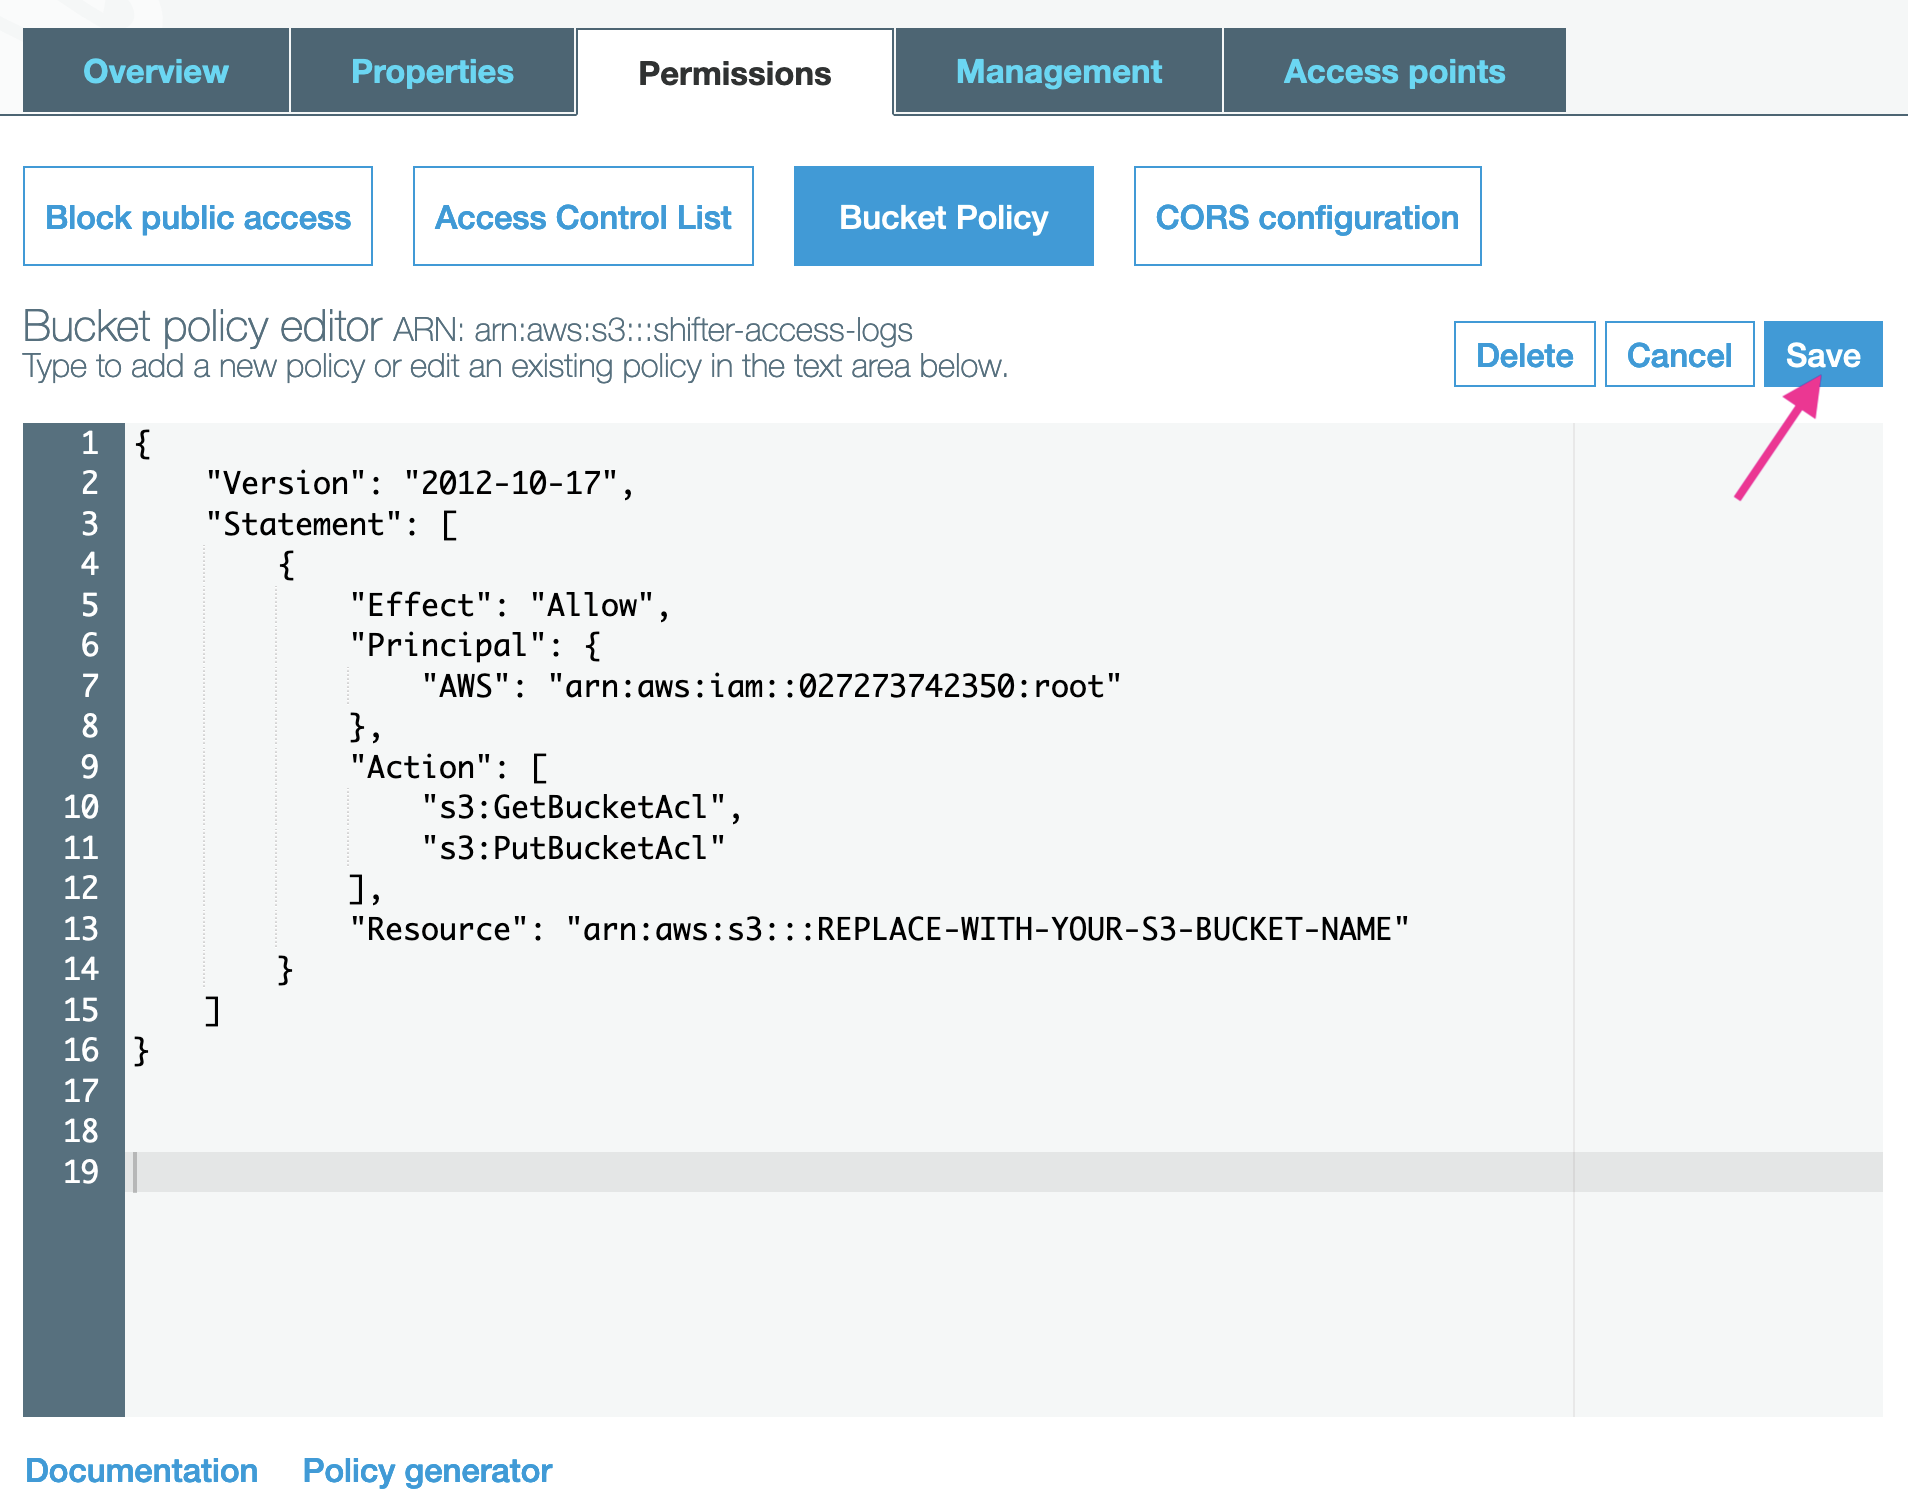
If you familiar with AWS-CLI, checkout Put bucket policy document for more details.
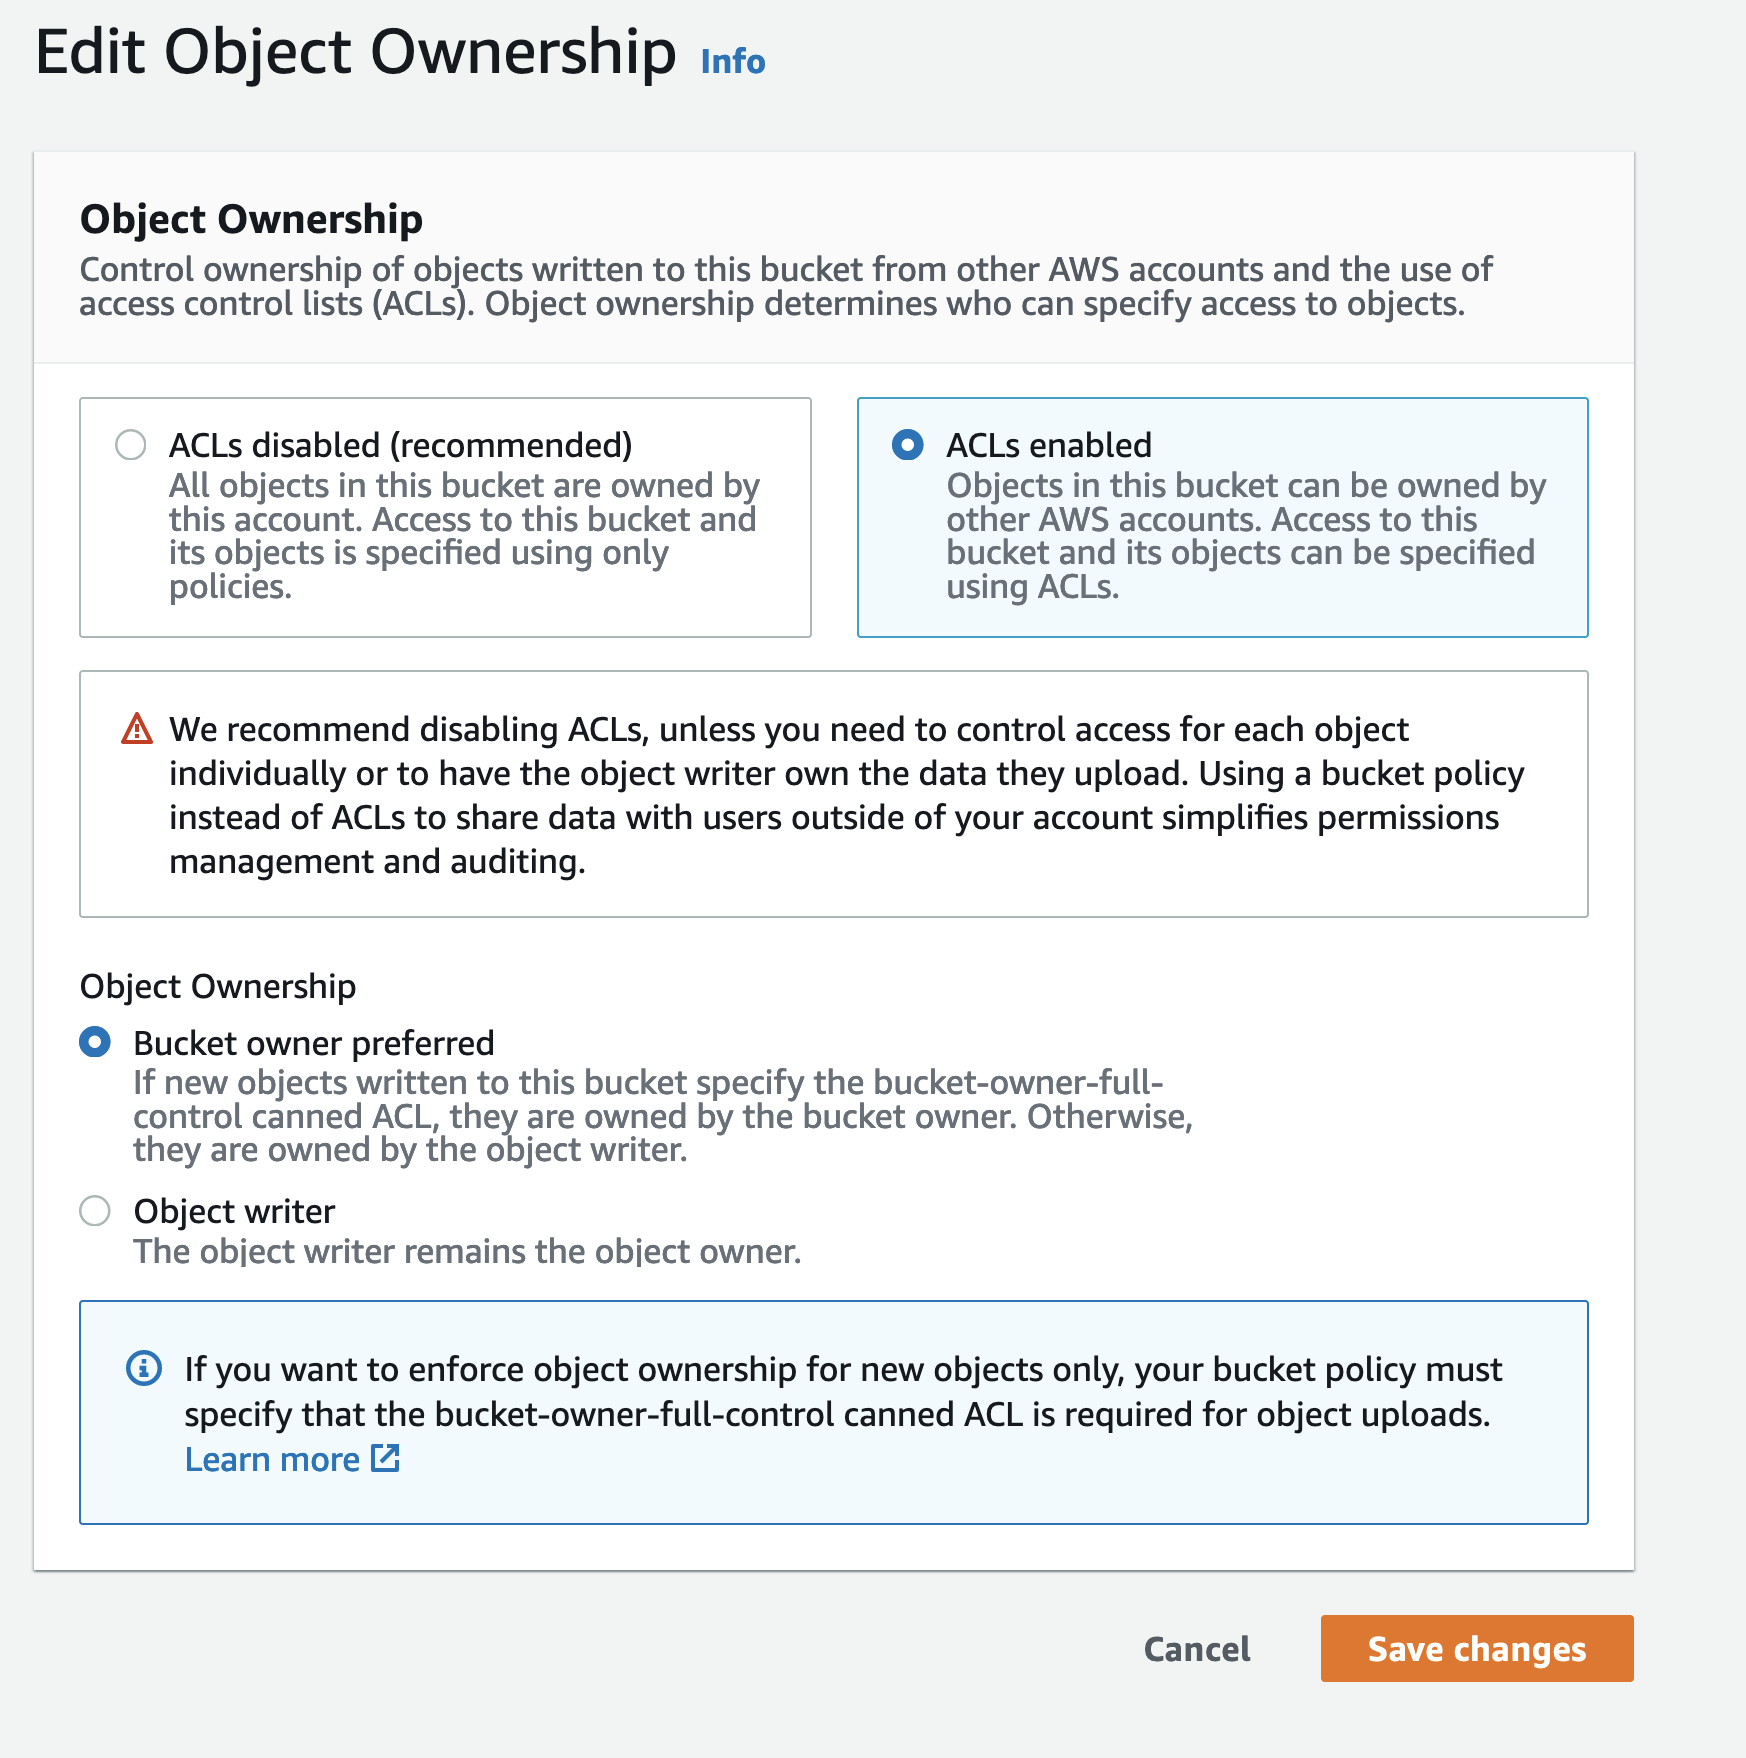
6. Set Object Ownership
like below:
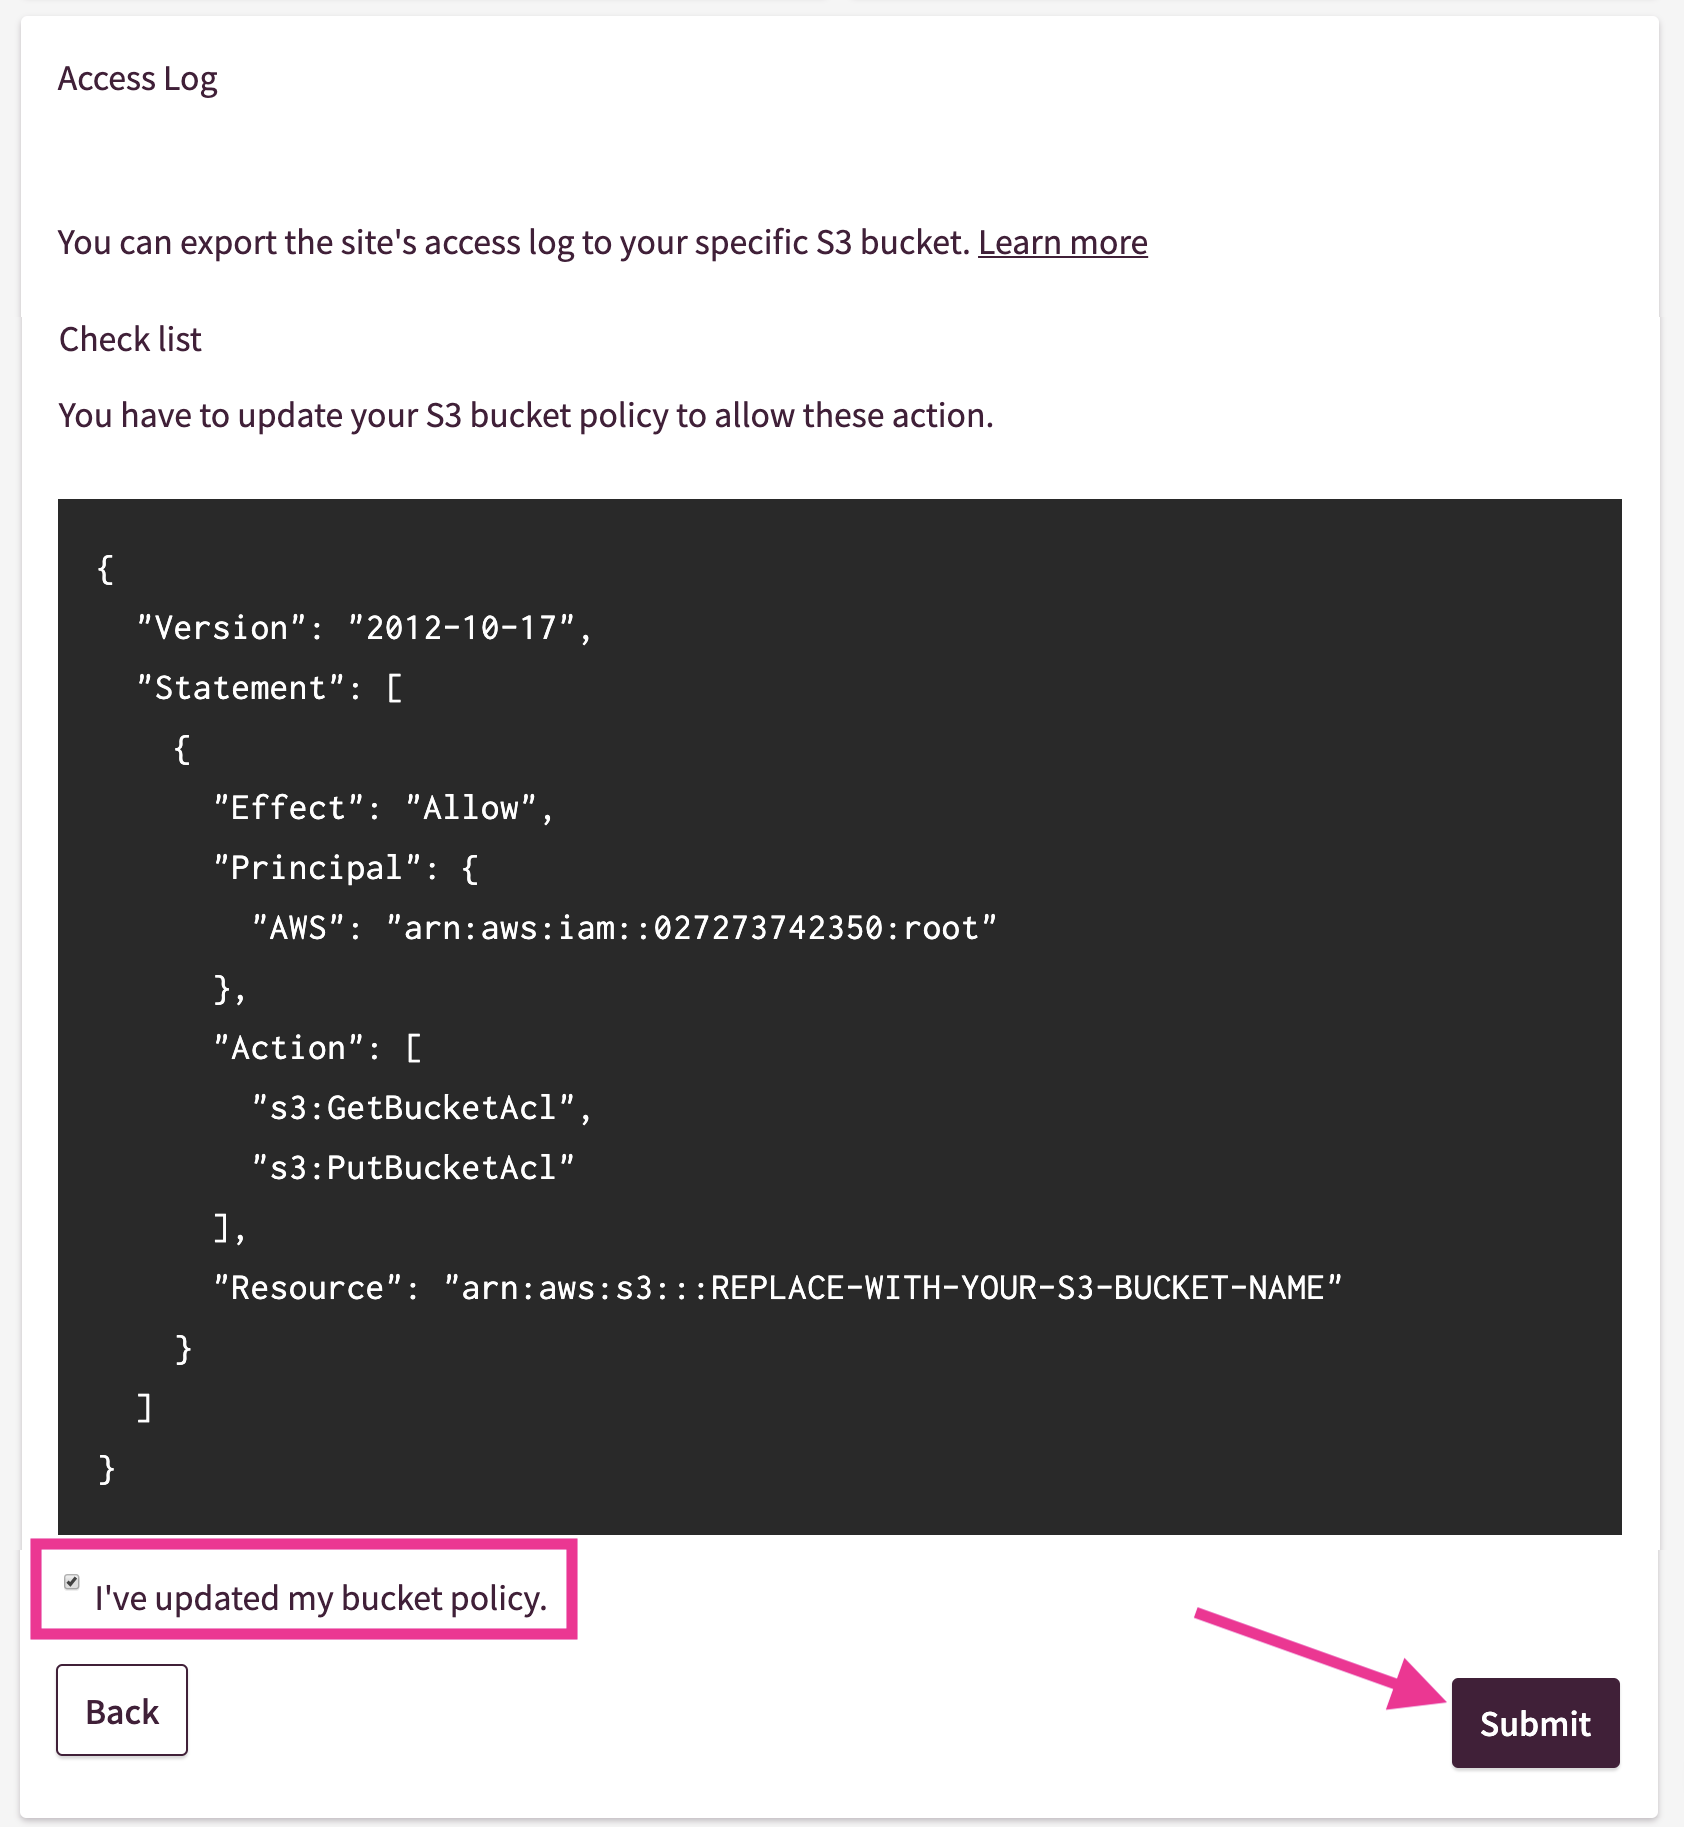
7. Connect Shifter to your S3 Bucket
Return to Shifter dashboard. Then, check the box that says [I’ve updated my bucket policy].
7. All set
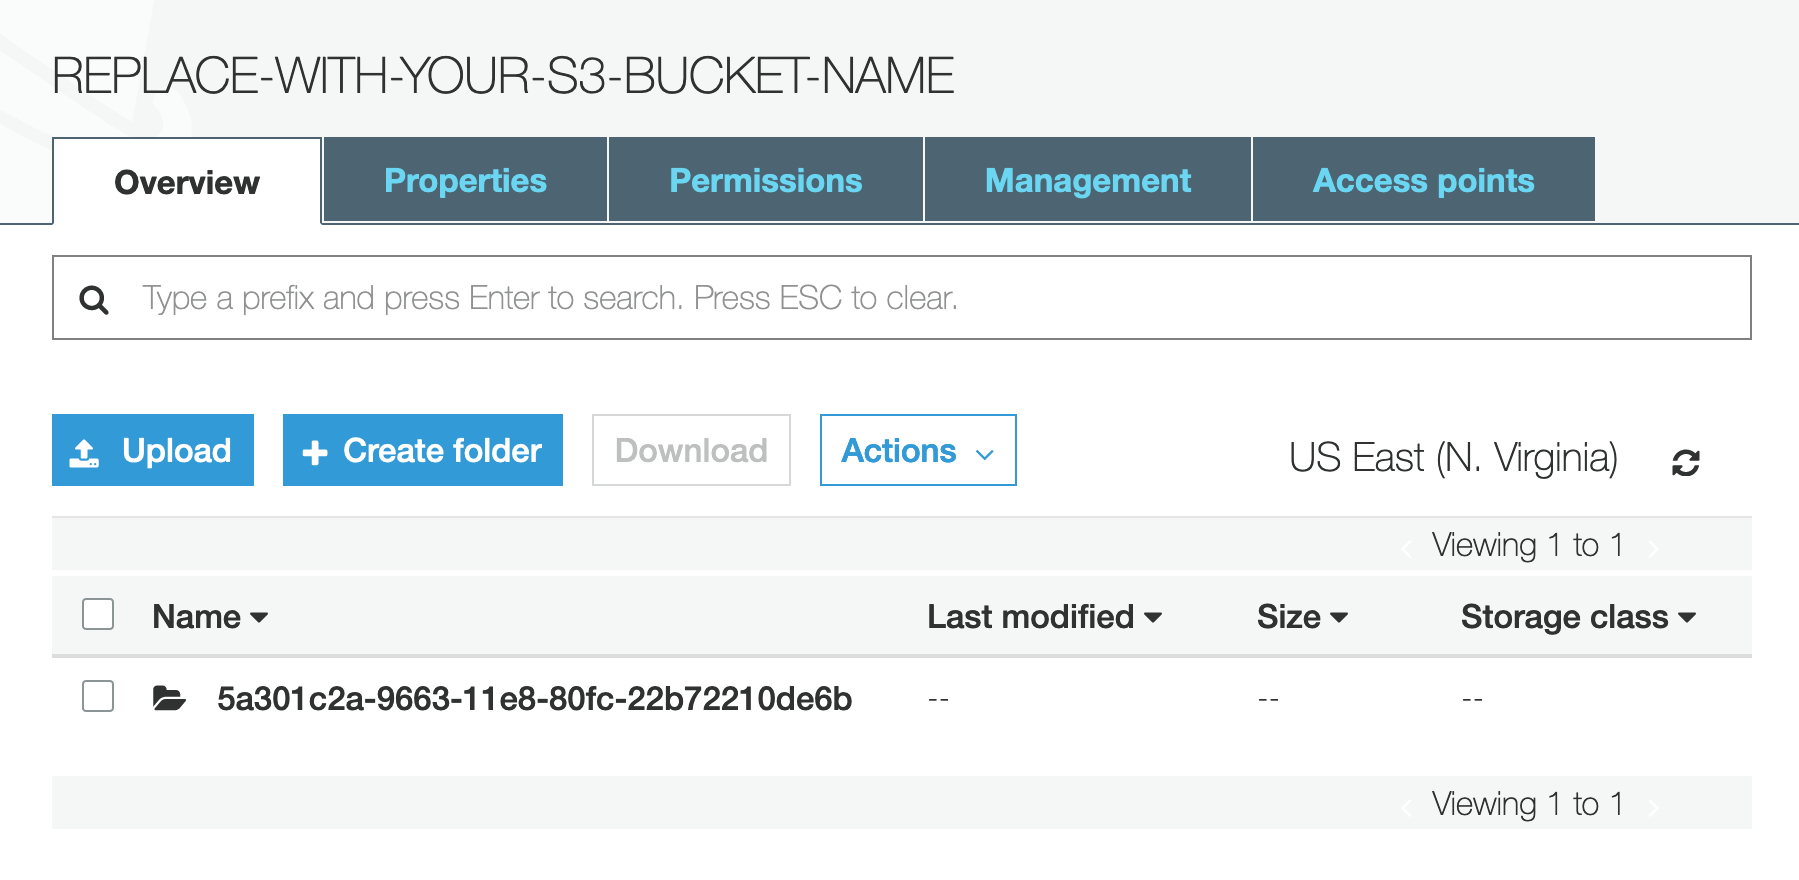
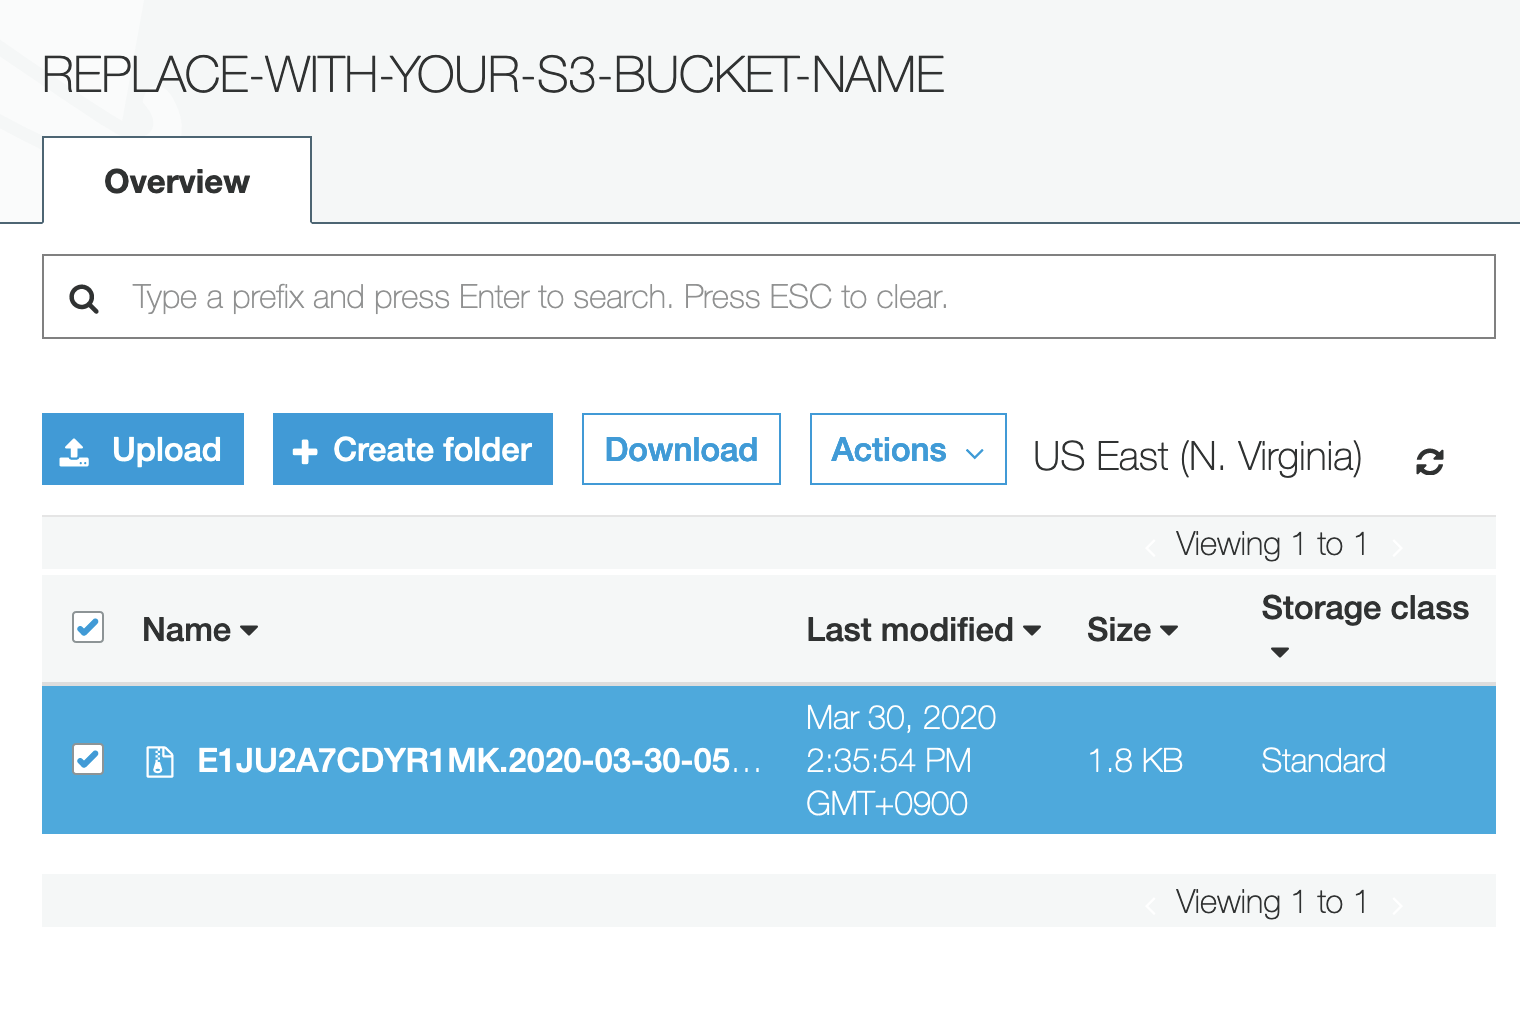
8. Access logs are exported
After a bit, Shifter will export a log file to your ordered S3 Bucket.