Requirements
-
Shifter account (Creating an account)
-
GitHub account
-
AWS account
Start Shifter Headless
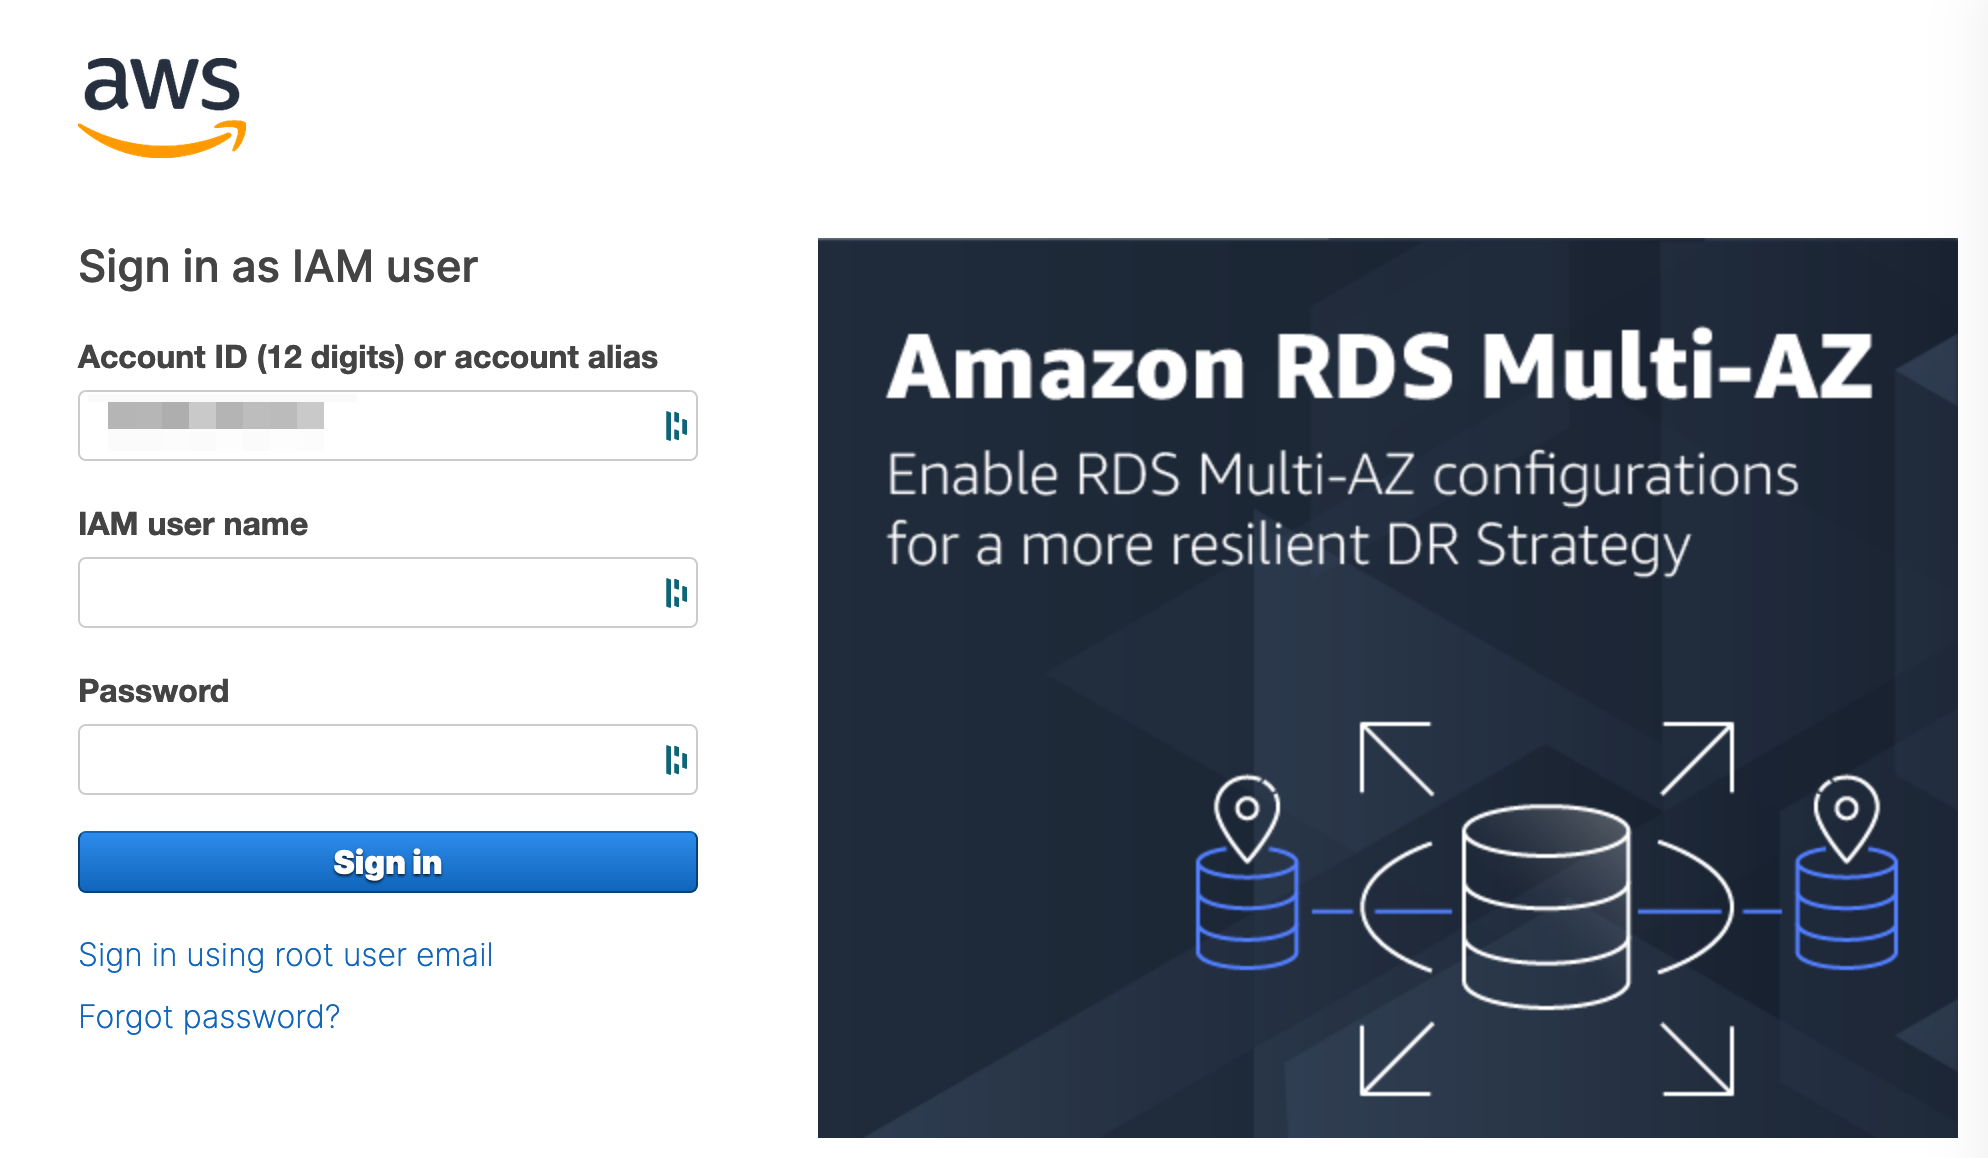
1. Login Shifter dashboard
Navigate to Headless
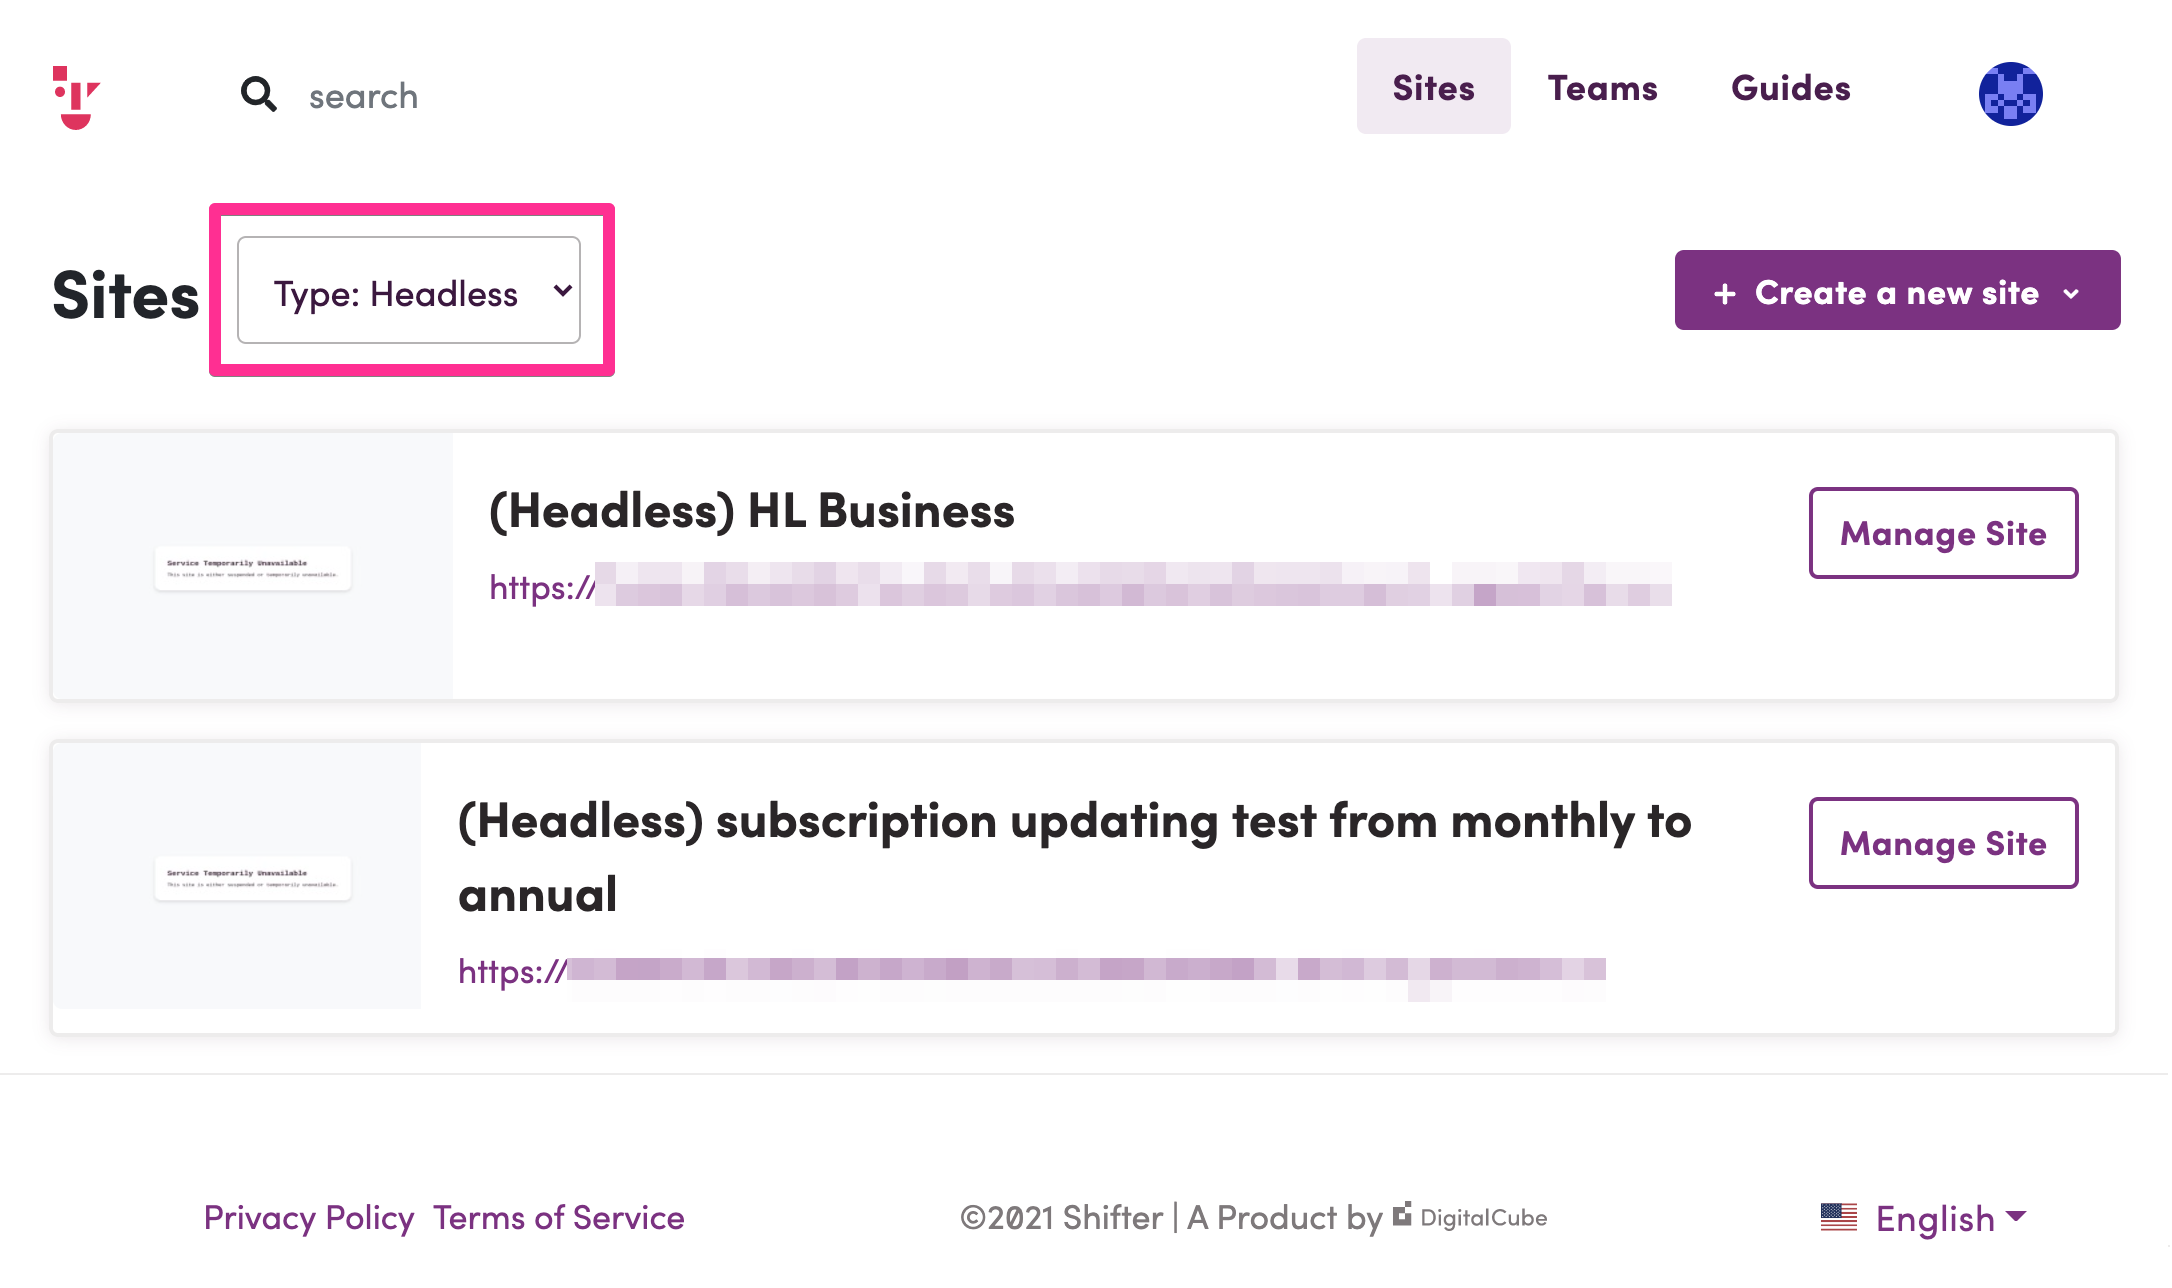
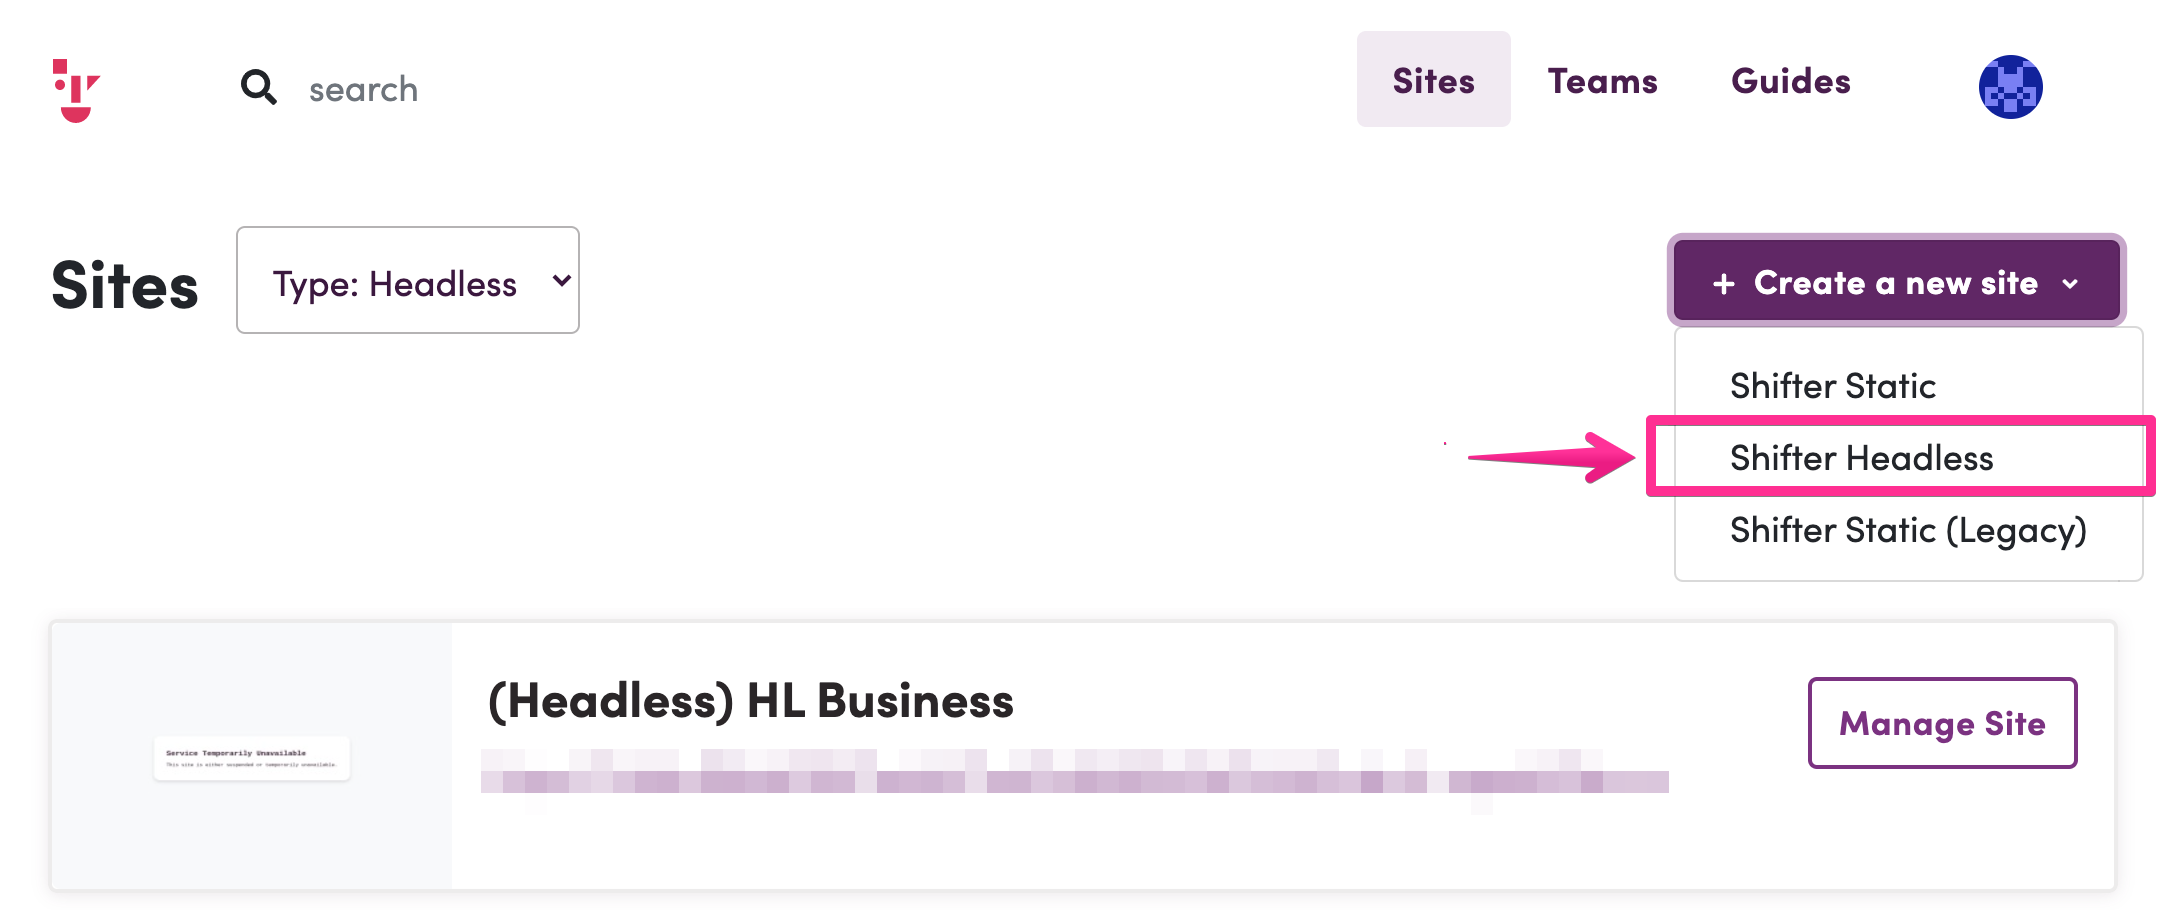
2. Create new Headless Site if you haven’t
Please refer to support document How to start up Shifter Headless WordPress for more details.
3. Create or import some posts/pages and media
We use theme unit test file for the document.
You can download it directly: https://raw.githubusercontent.com/WPTRT/theme-unit-test/master/themeunittestdata.wordpress.xml
4. Start Shifter Headless and copy its URL
Sample WordPress URL: https://shifterheadless-gridsome-aws-amplify.hl-a.getshifter.io

Create new GitHub repository
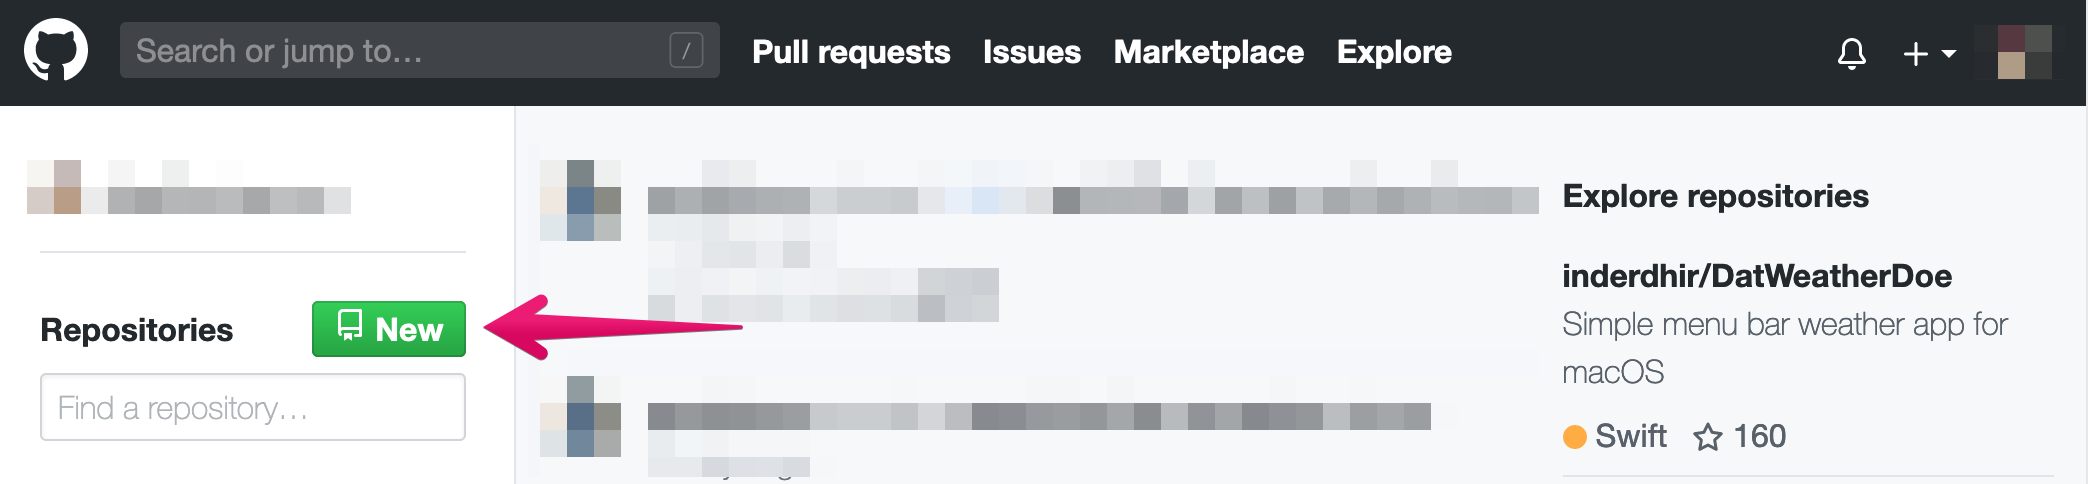
1. Access GitHub
2. Create repository
Click [New] button near the Repositories menu
Name your repository.
We name it as shifterheadless-gridsome-aws-amplify for a sample.
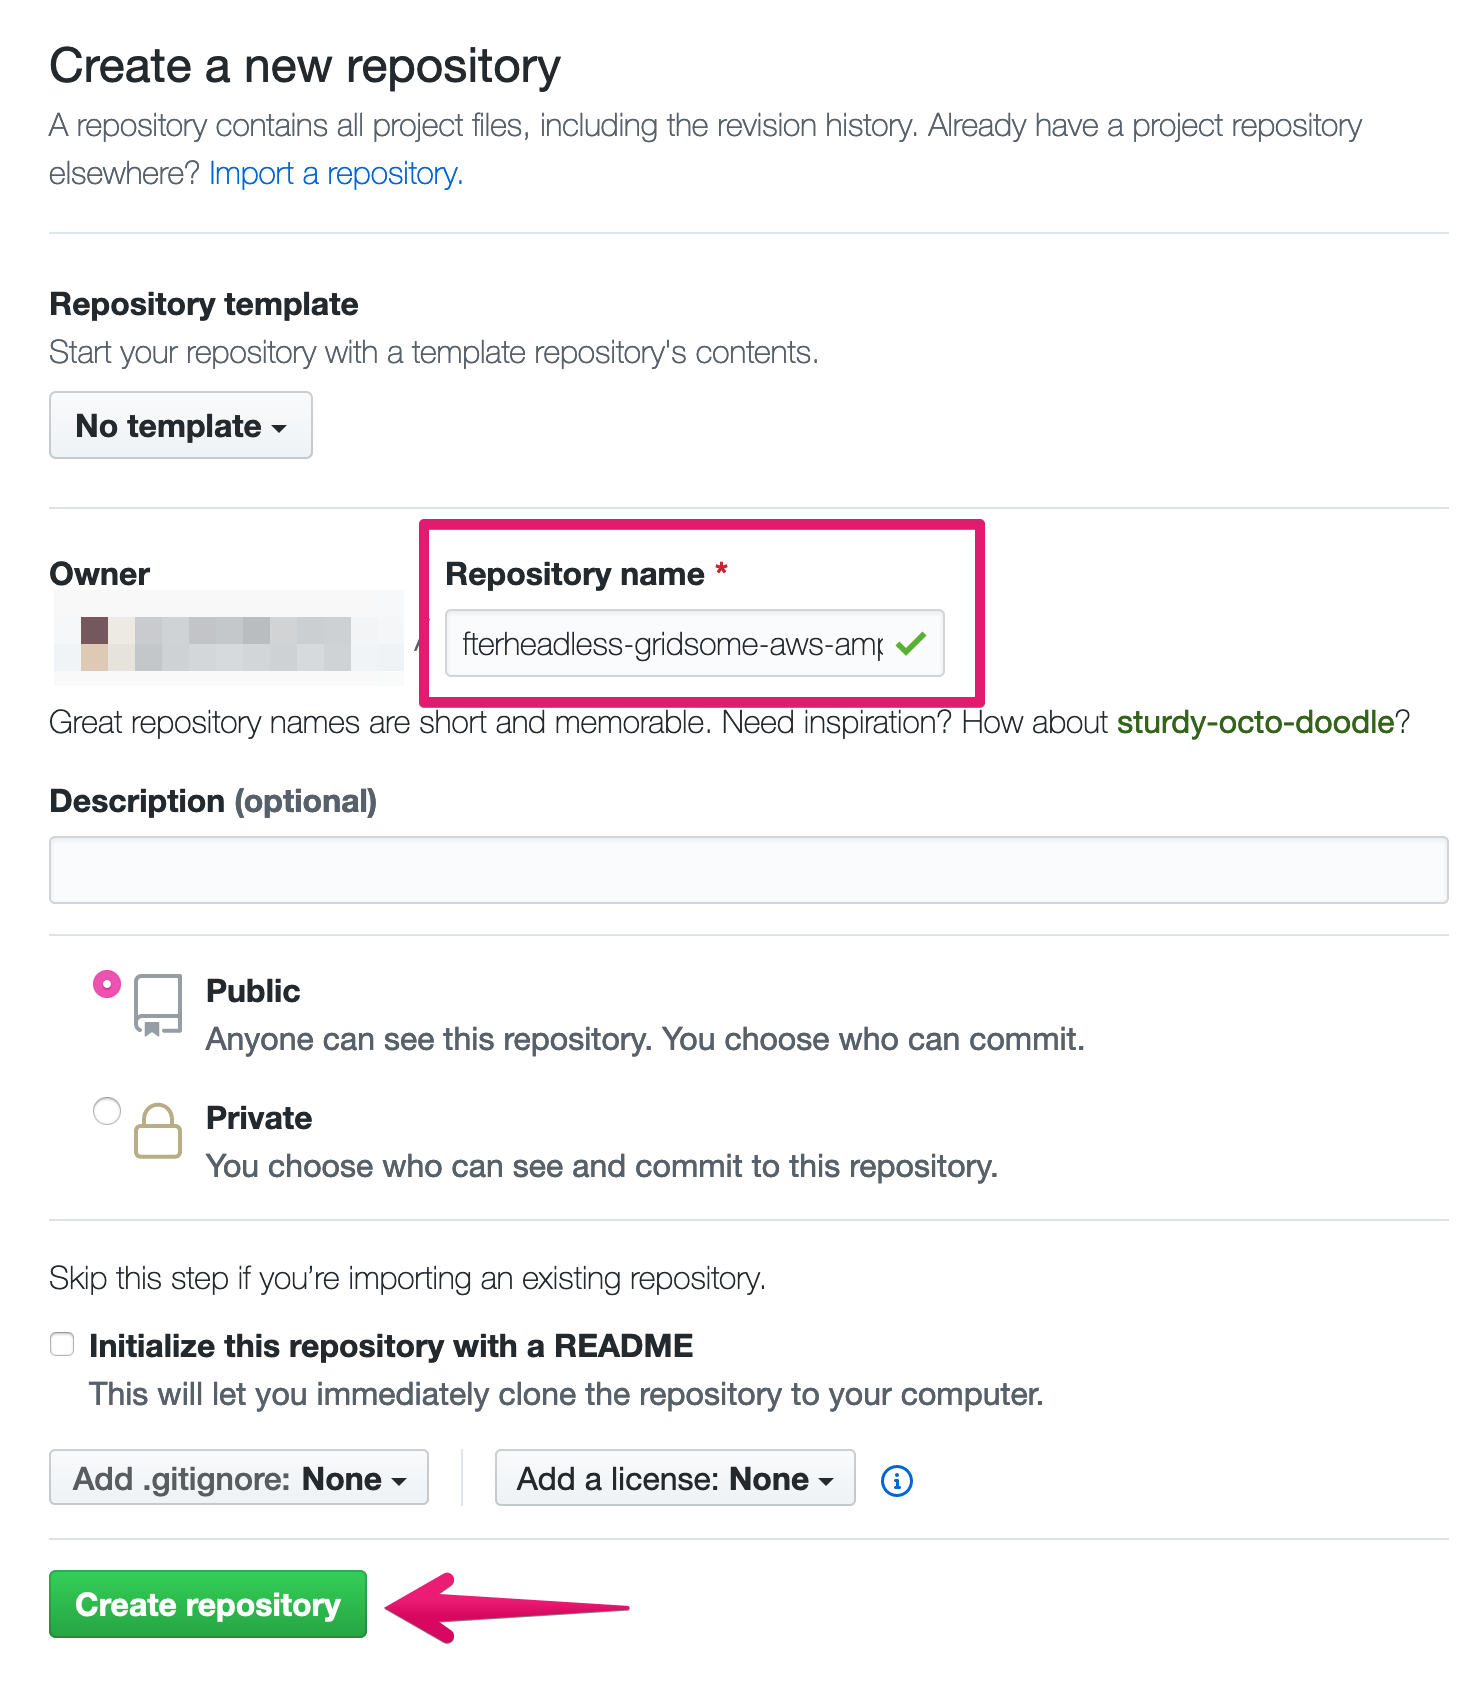
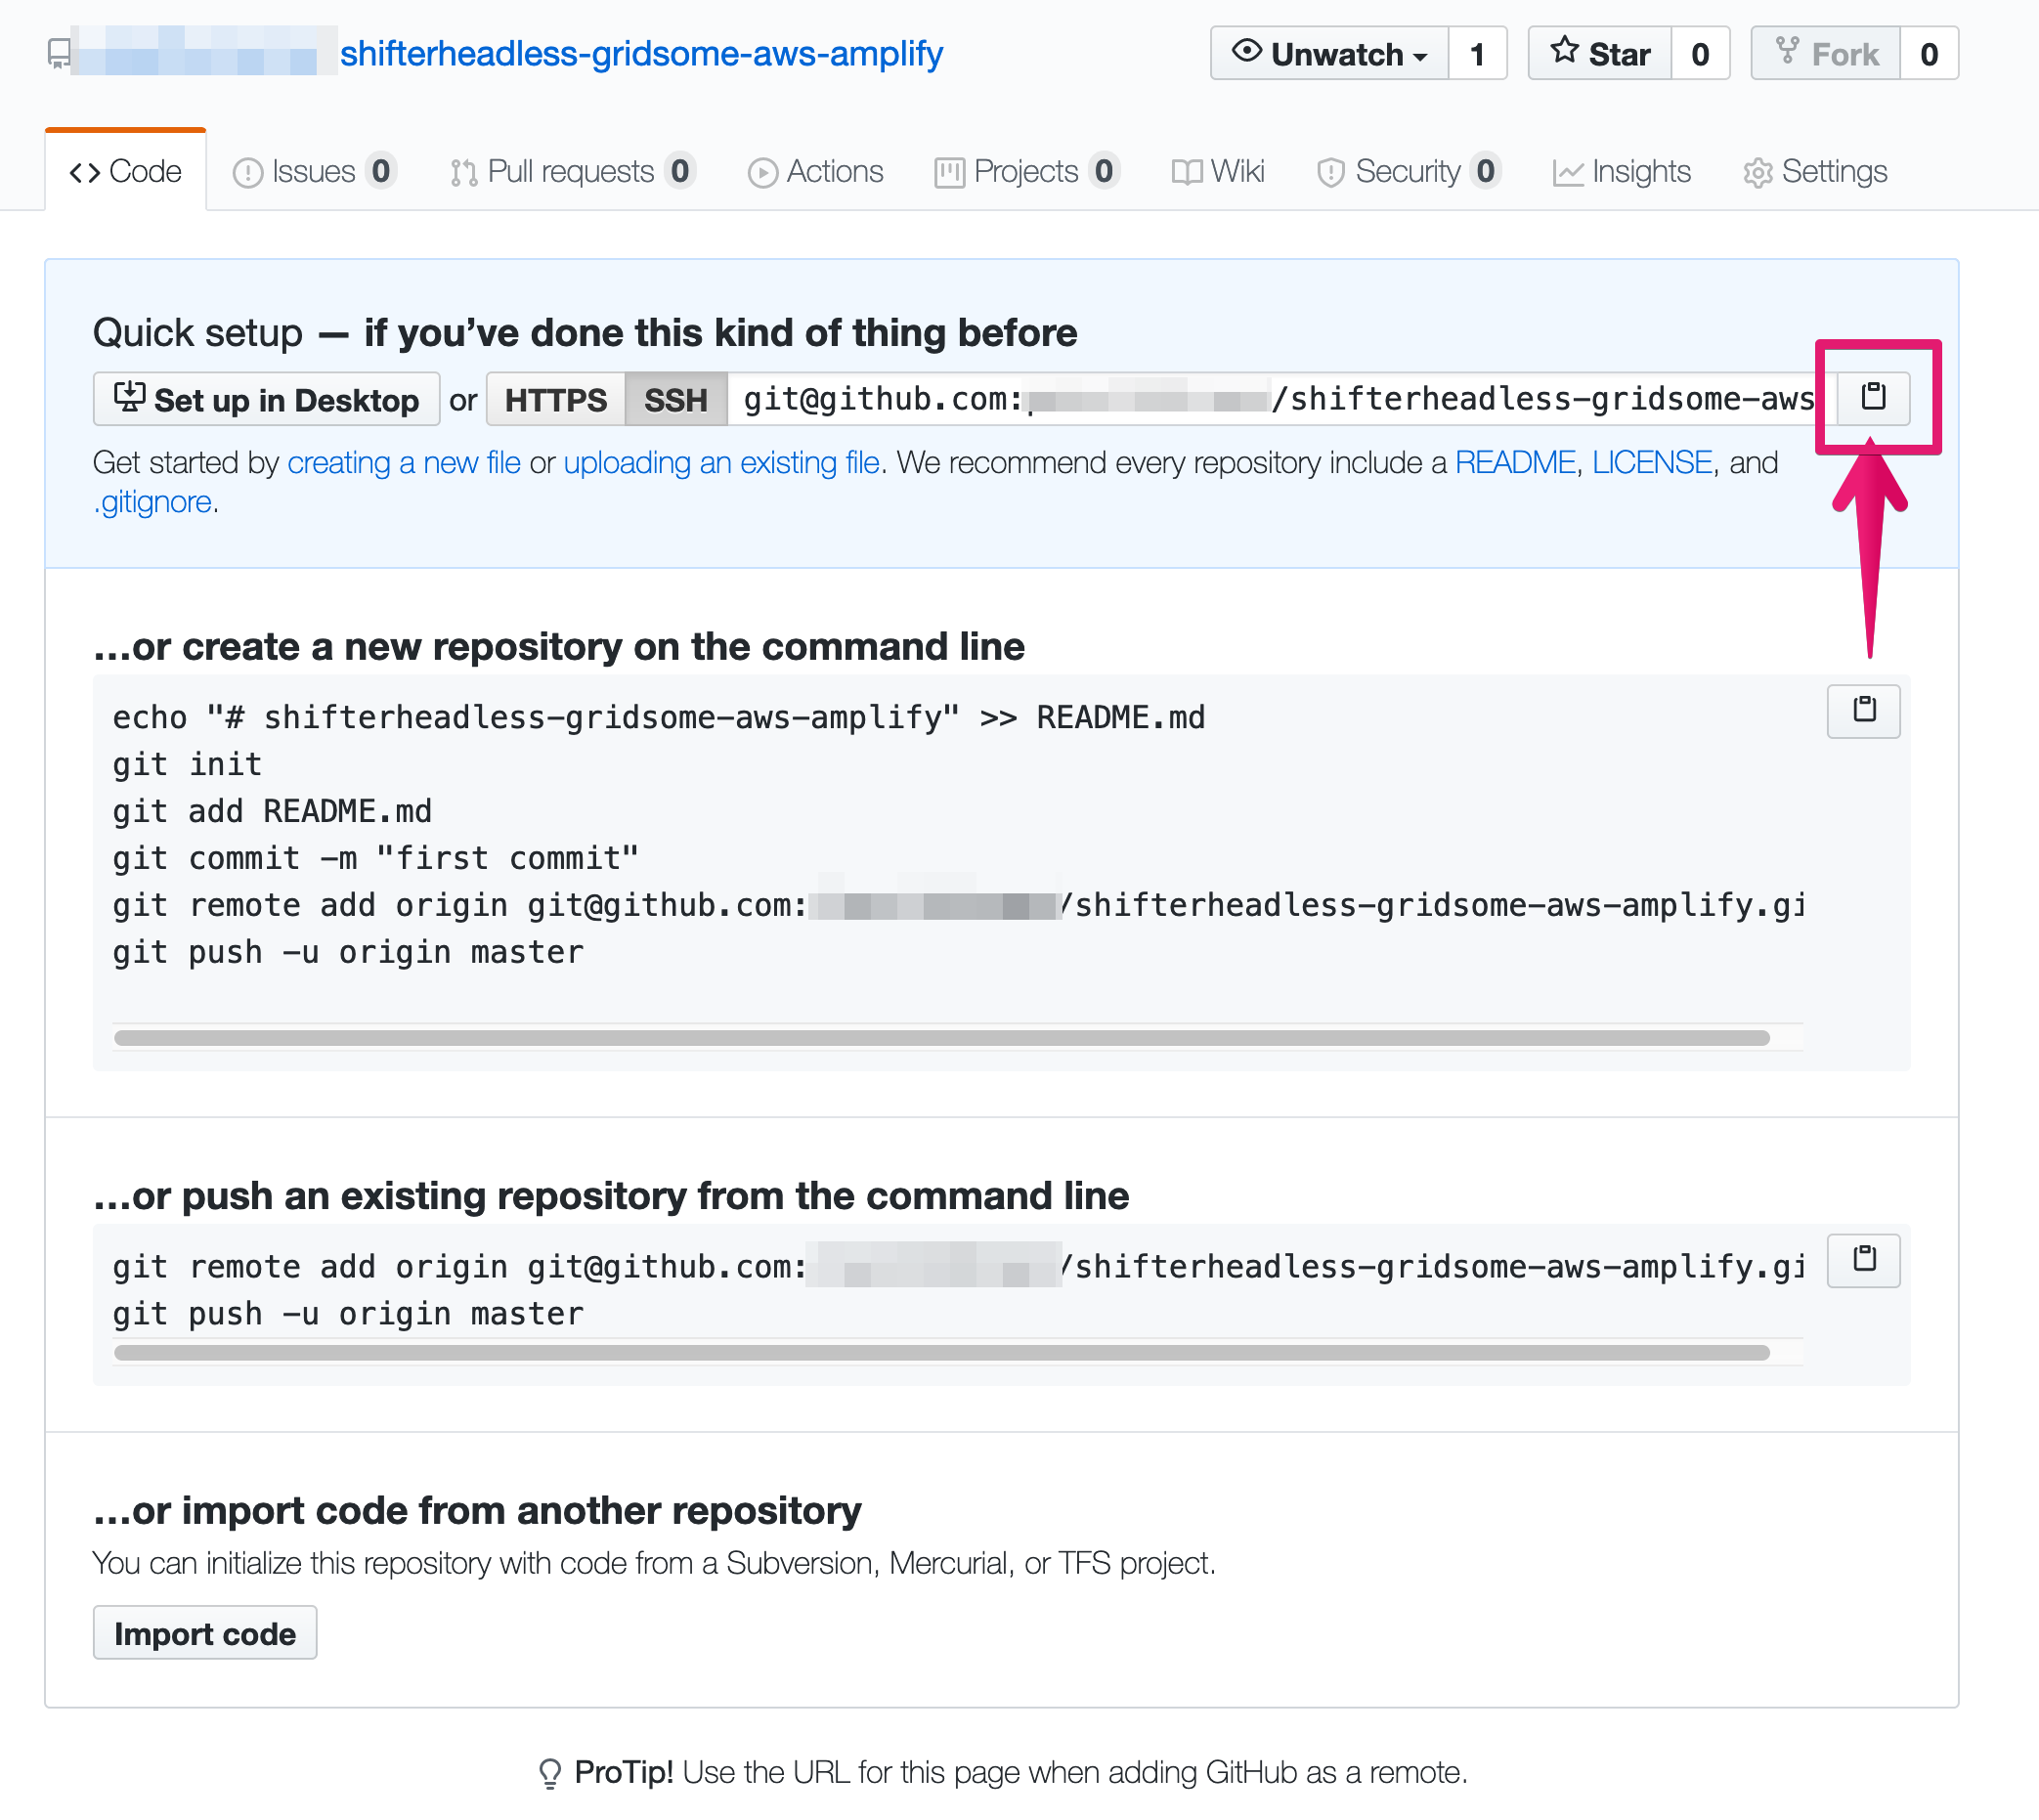
3. Copy the repository’s URL
The URL will be git@github.com:YOUR-GITHUB-ACCOUNT/shifterheadless-gridsome-aws-amplify.git or https://github.com/YOUR-GITHUB-ACCOUNT/shifterheadless-gridsome-aws-amplify.git
Create new Gridsome project on your local
1. Install Node.js if you haven’t.
A. Install via package
B. Install via homebrew with nodebrew
2. Install “Gridsome CLI” to the local machine
Runthe following to install it
$ npm install --global @gridsome/cliRefer an official document for more details
3. Create new Gridsome project
Run gridsome create YOUR-PROJECT-NAME wordpress command
Refer an official WordPress starter for Gridsome document for more details.
$  gridsome create shifterheadless-gridsome-aws-amplify wordpress

❯ Clone https://github.com/gridsome/gridsome-starter-wordpress.git 1.64s
❯ Update project package.json 0s
❯ Install dependencies 20.46s

  - Enter directory cd shifterheadless-gridsome-aws-amplify
  - Run gridsome develop to start local development
  - Run gridsome build to build for production
4. Move into created project directory
$ cd shifterheadless-gridsome-aws-amplify
or
$ cd YOUR-PROJECT-NAME
5. Initialise and setup git for the project
$ git init
Initialized empty Git repository in shifterheadless-gridsome-aws-amplify/.git/
6. Set remote URL
Add remote URL as an origin of the repository
$ git remote add origin git@github.com:YOUR-GITHUB-ACCOUNT/shifterheadless-gridsome-aws-amplify.git or
$ git remote add origin https://github.com/YOUR-GITHUB-ACCOUNT/shifterheadless-gridsome-aws-amplify.git7. Edit “gridsome.config.js” and save changes
Rewrite YOUR_WEBSITE_URL with copied WordPress URL on Shifter dashboard.
  plugins: [
    {
      use: '@gridsome/source-wordpress',
      options: {
            baseUrl: 'YOUR_WEBSITE_URL', // required
            typeName: 'WordPress', // GraphQL schema name (Optional)
      }
will be like below:
  plugins: [
    {
      use: '@gridsome/source-wordpress',
      options: {
            baseUrl: 'https://shifterheadless-gridsome-aws-amplify.hl-a.getshifter.io', // required
            typeName: 'WordPress', // GraphQL schema name (Optional)
      }
8. Run develop command for checking how Gridsome website works
$ gridsome developAccess http://localhost:8080/ for checking website
Access http://localhost:8080/___explore for exploring GraphQL data.
Click [Ctrl] key with [C] key to stop server if all look good.
Let’s build your website.
9. Run build command for building data
$ gridsome buildAll data will be build under dist directory.
10. Commit files and push them to GitHub
$ git add .
$ git commit -m "first deployment"
$ git push origin master
Working with AWS Amplify Console and deploy
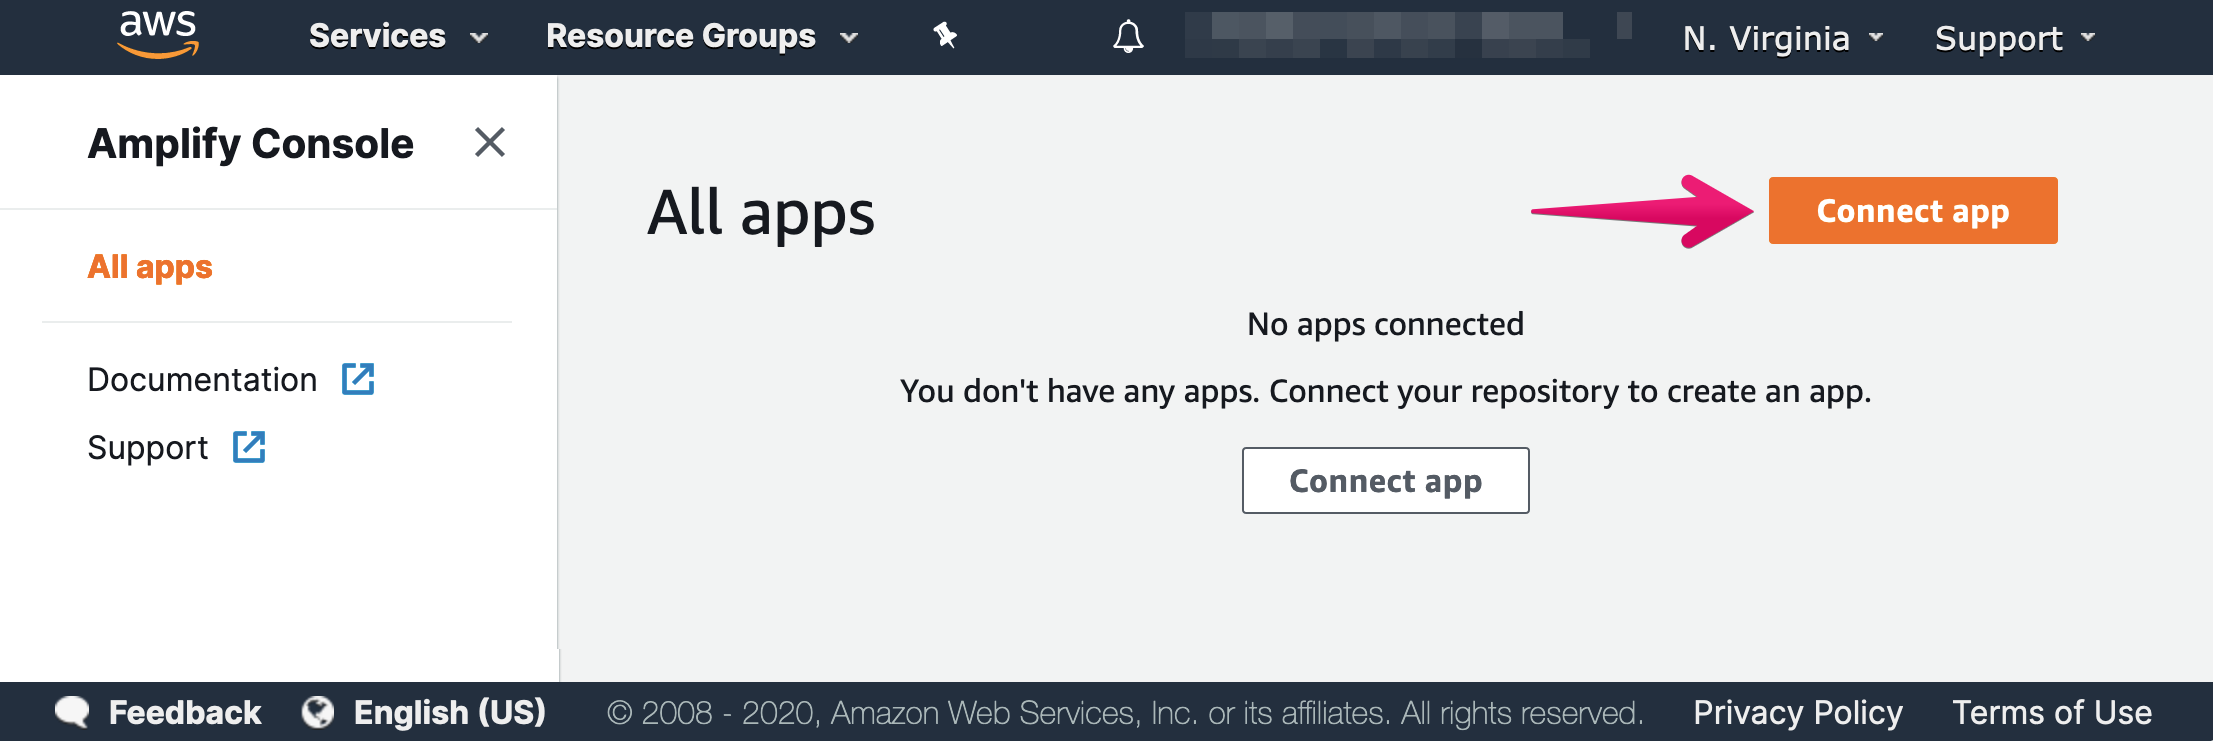
1. Navigate to AWS Amplify Console
https://console.aws.amazon.com/amplify/home
2. Click [Connect app] button
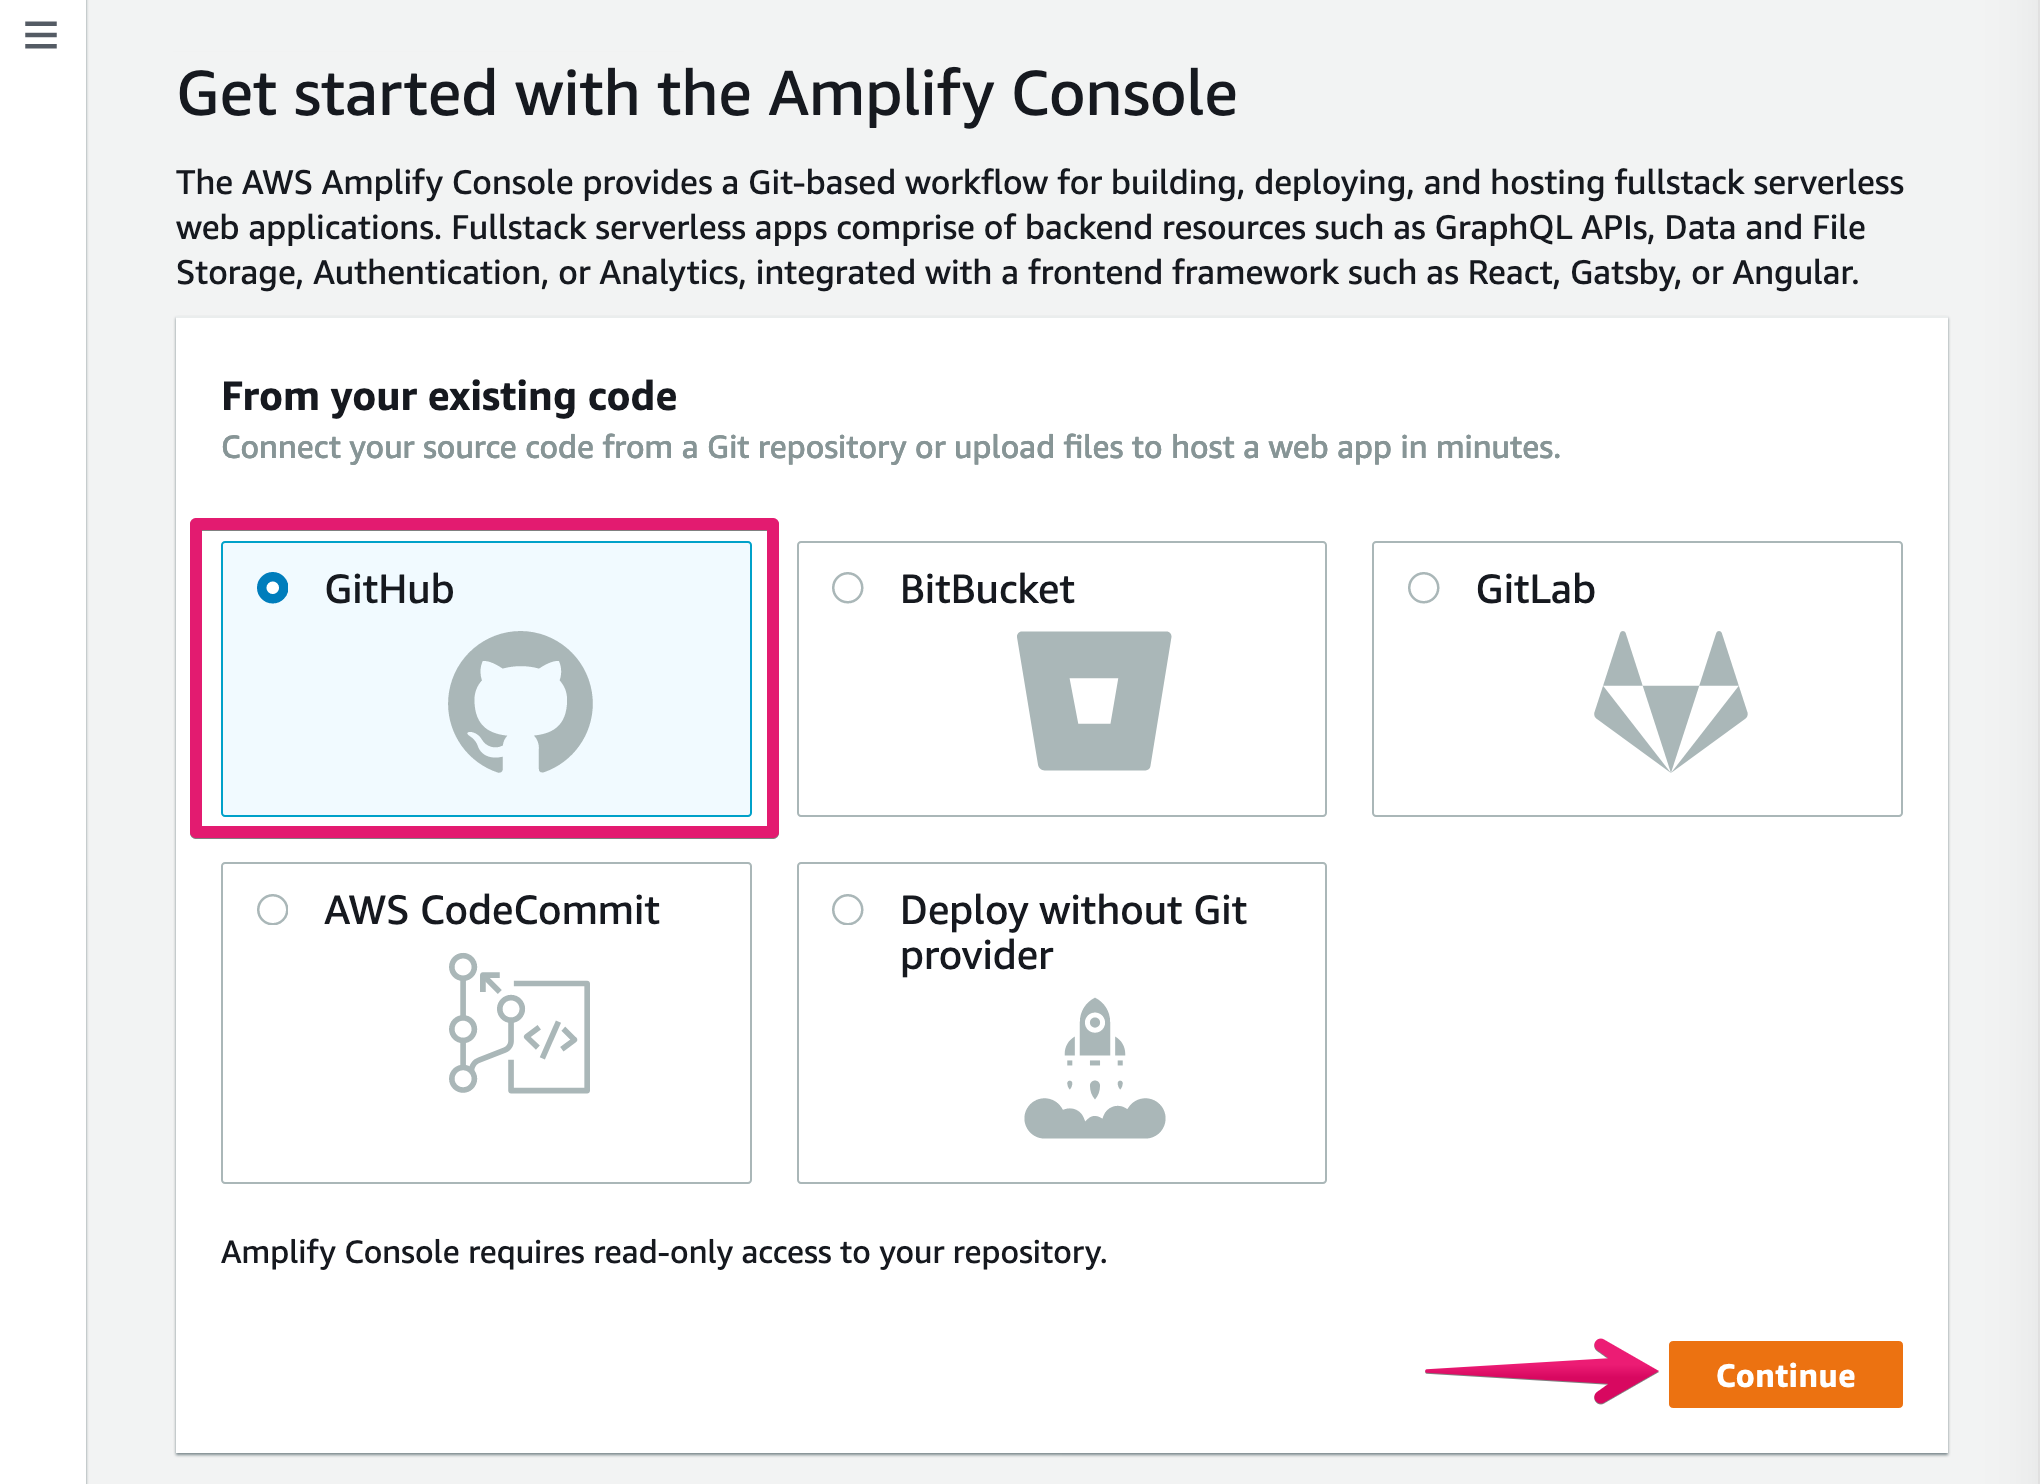
3. Choose Git service and click [Continue] button
We use GiHub as a sample.
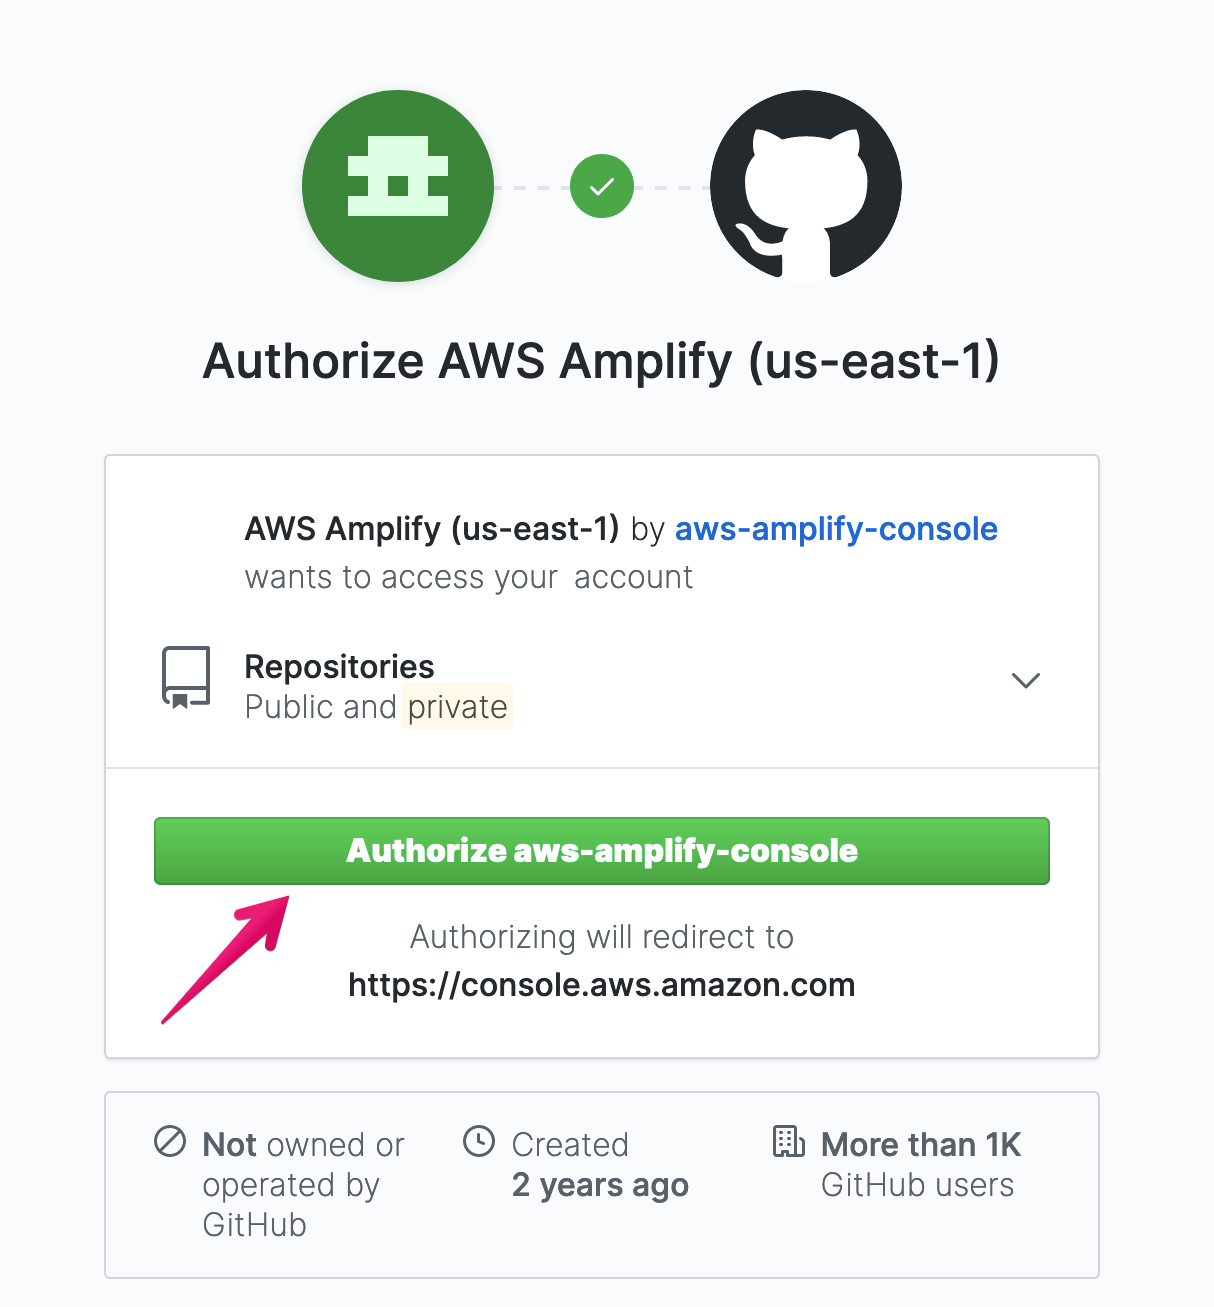
4. Click [Authorize aws-amplify-console] button to continue
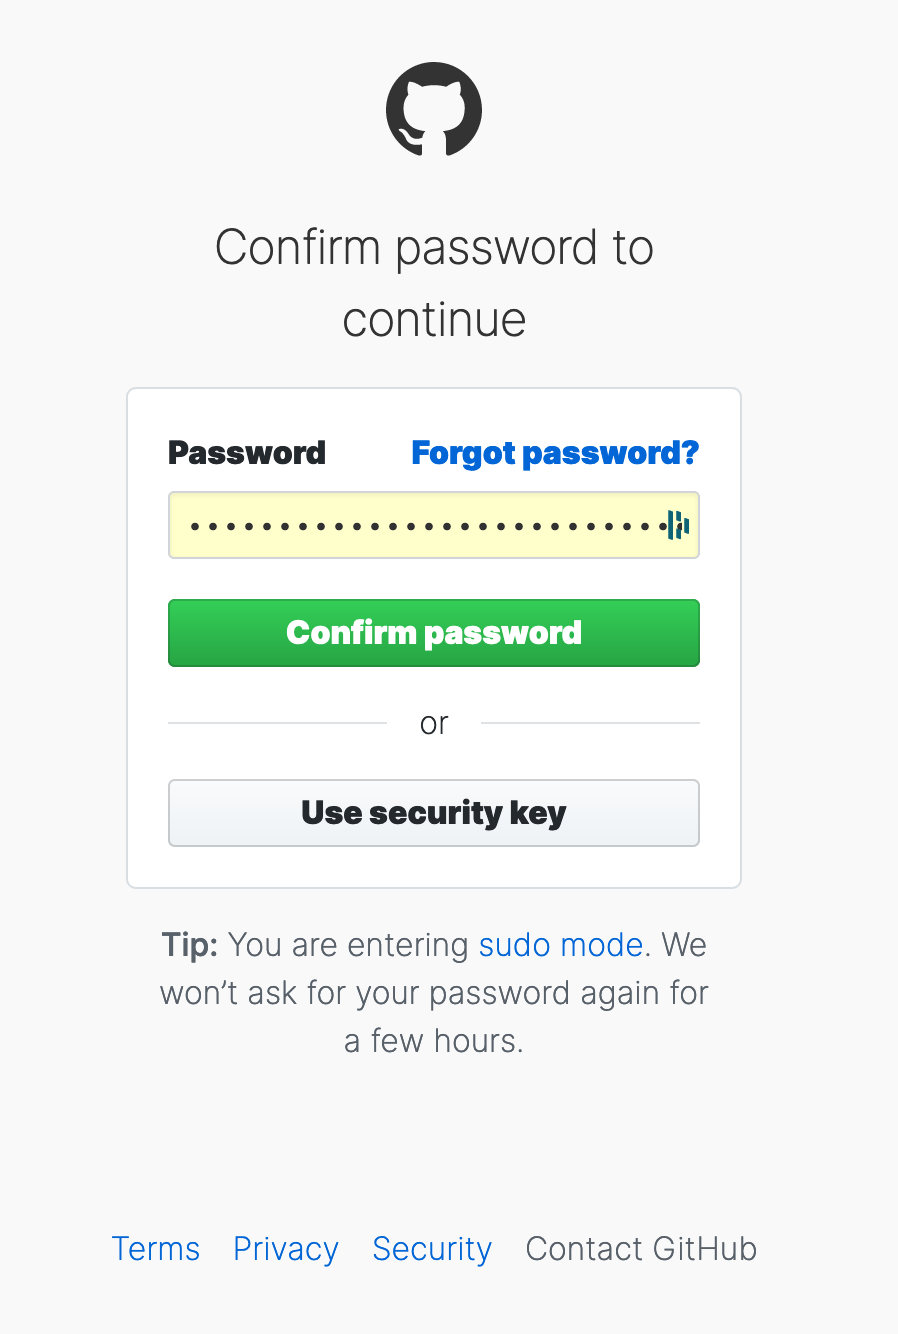
5. Fill in password for chosen Git service (GitHub) and click [Confirm password]
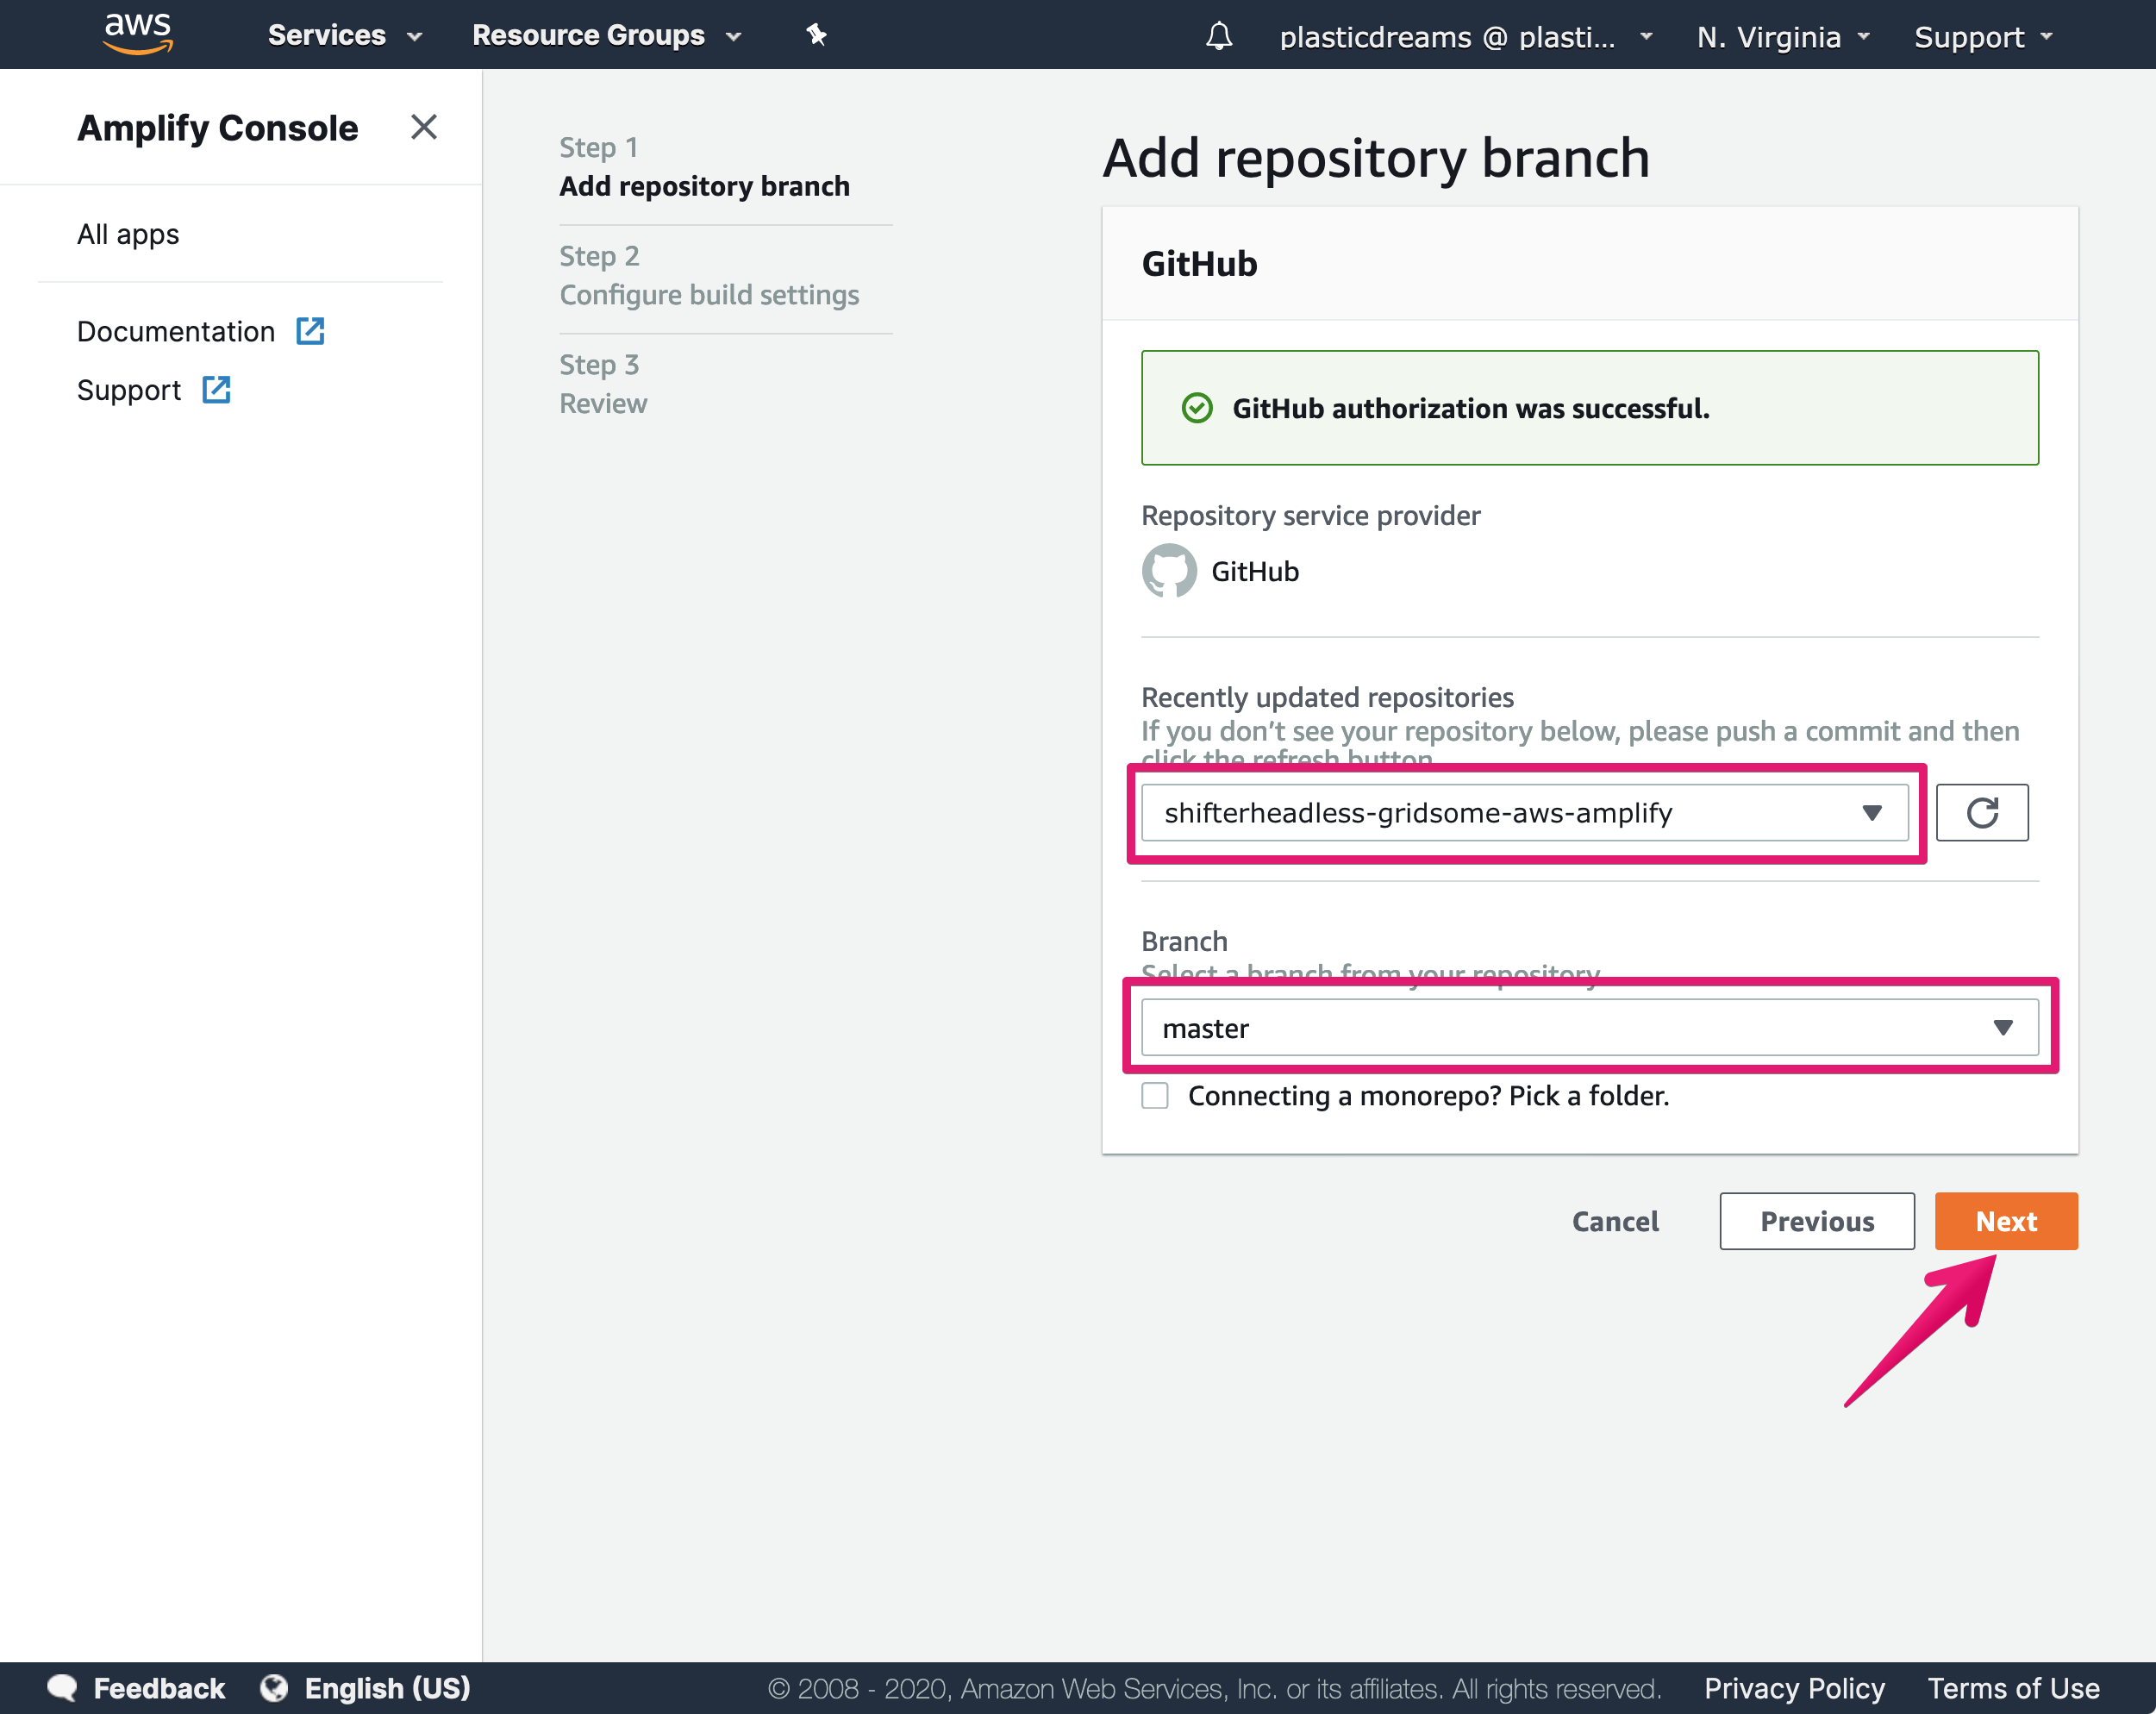
6. Add repository branch and click [Next] button.
Repository: shifterheadless-gridsome-aws-amplify
Branch: master
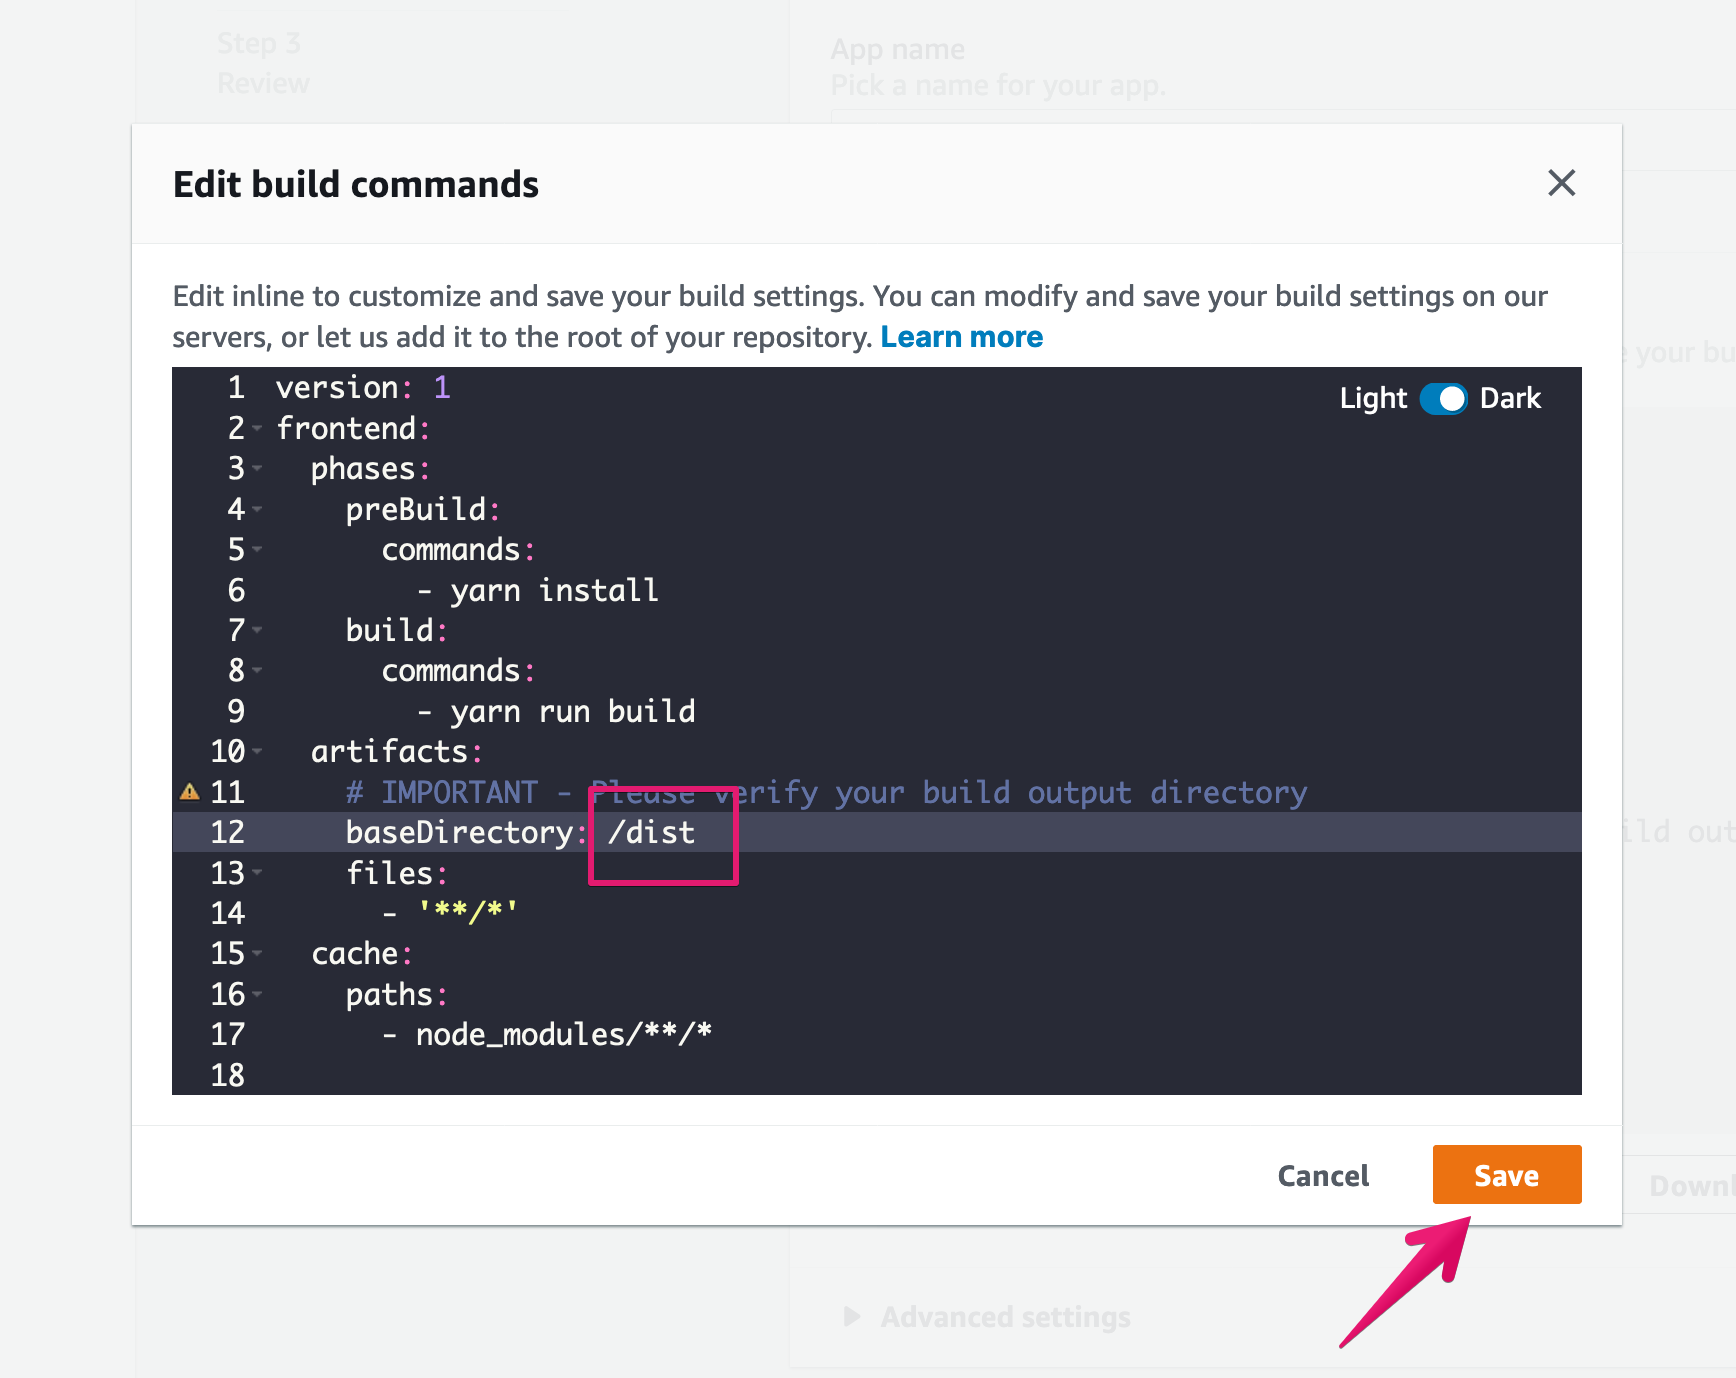
7. Click [Edit] button to configure
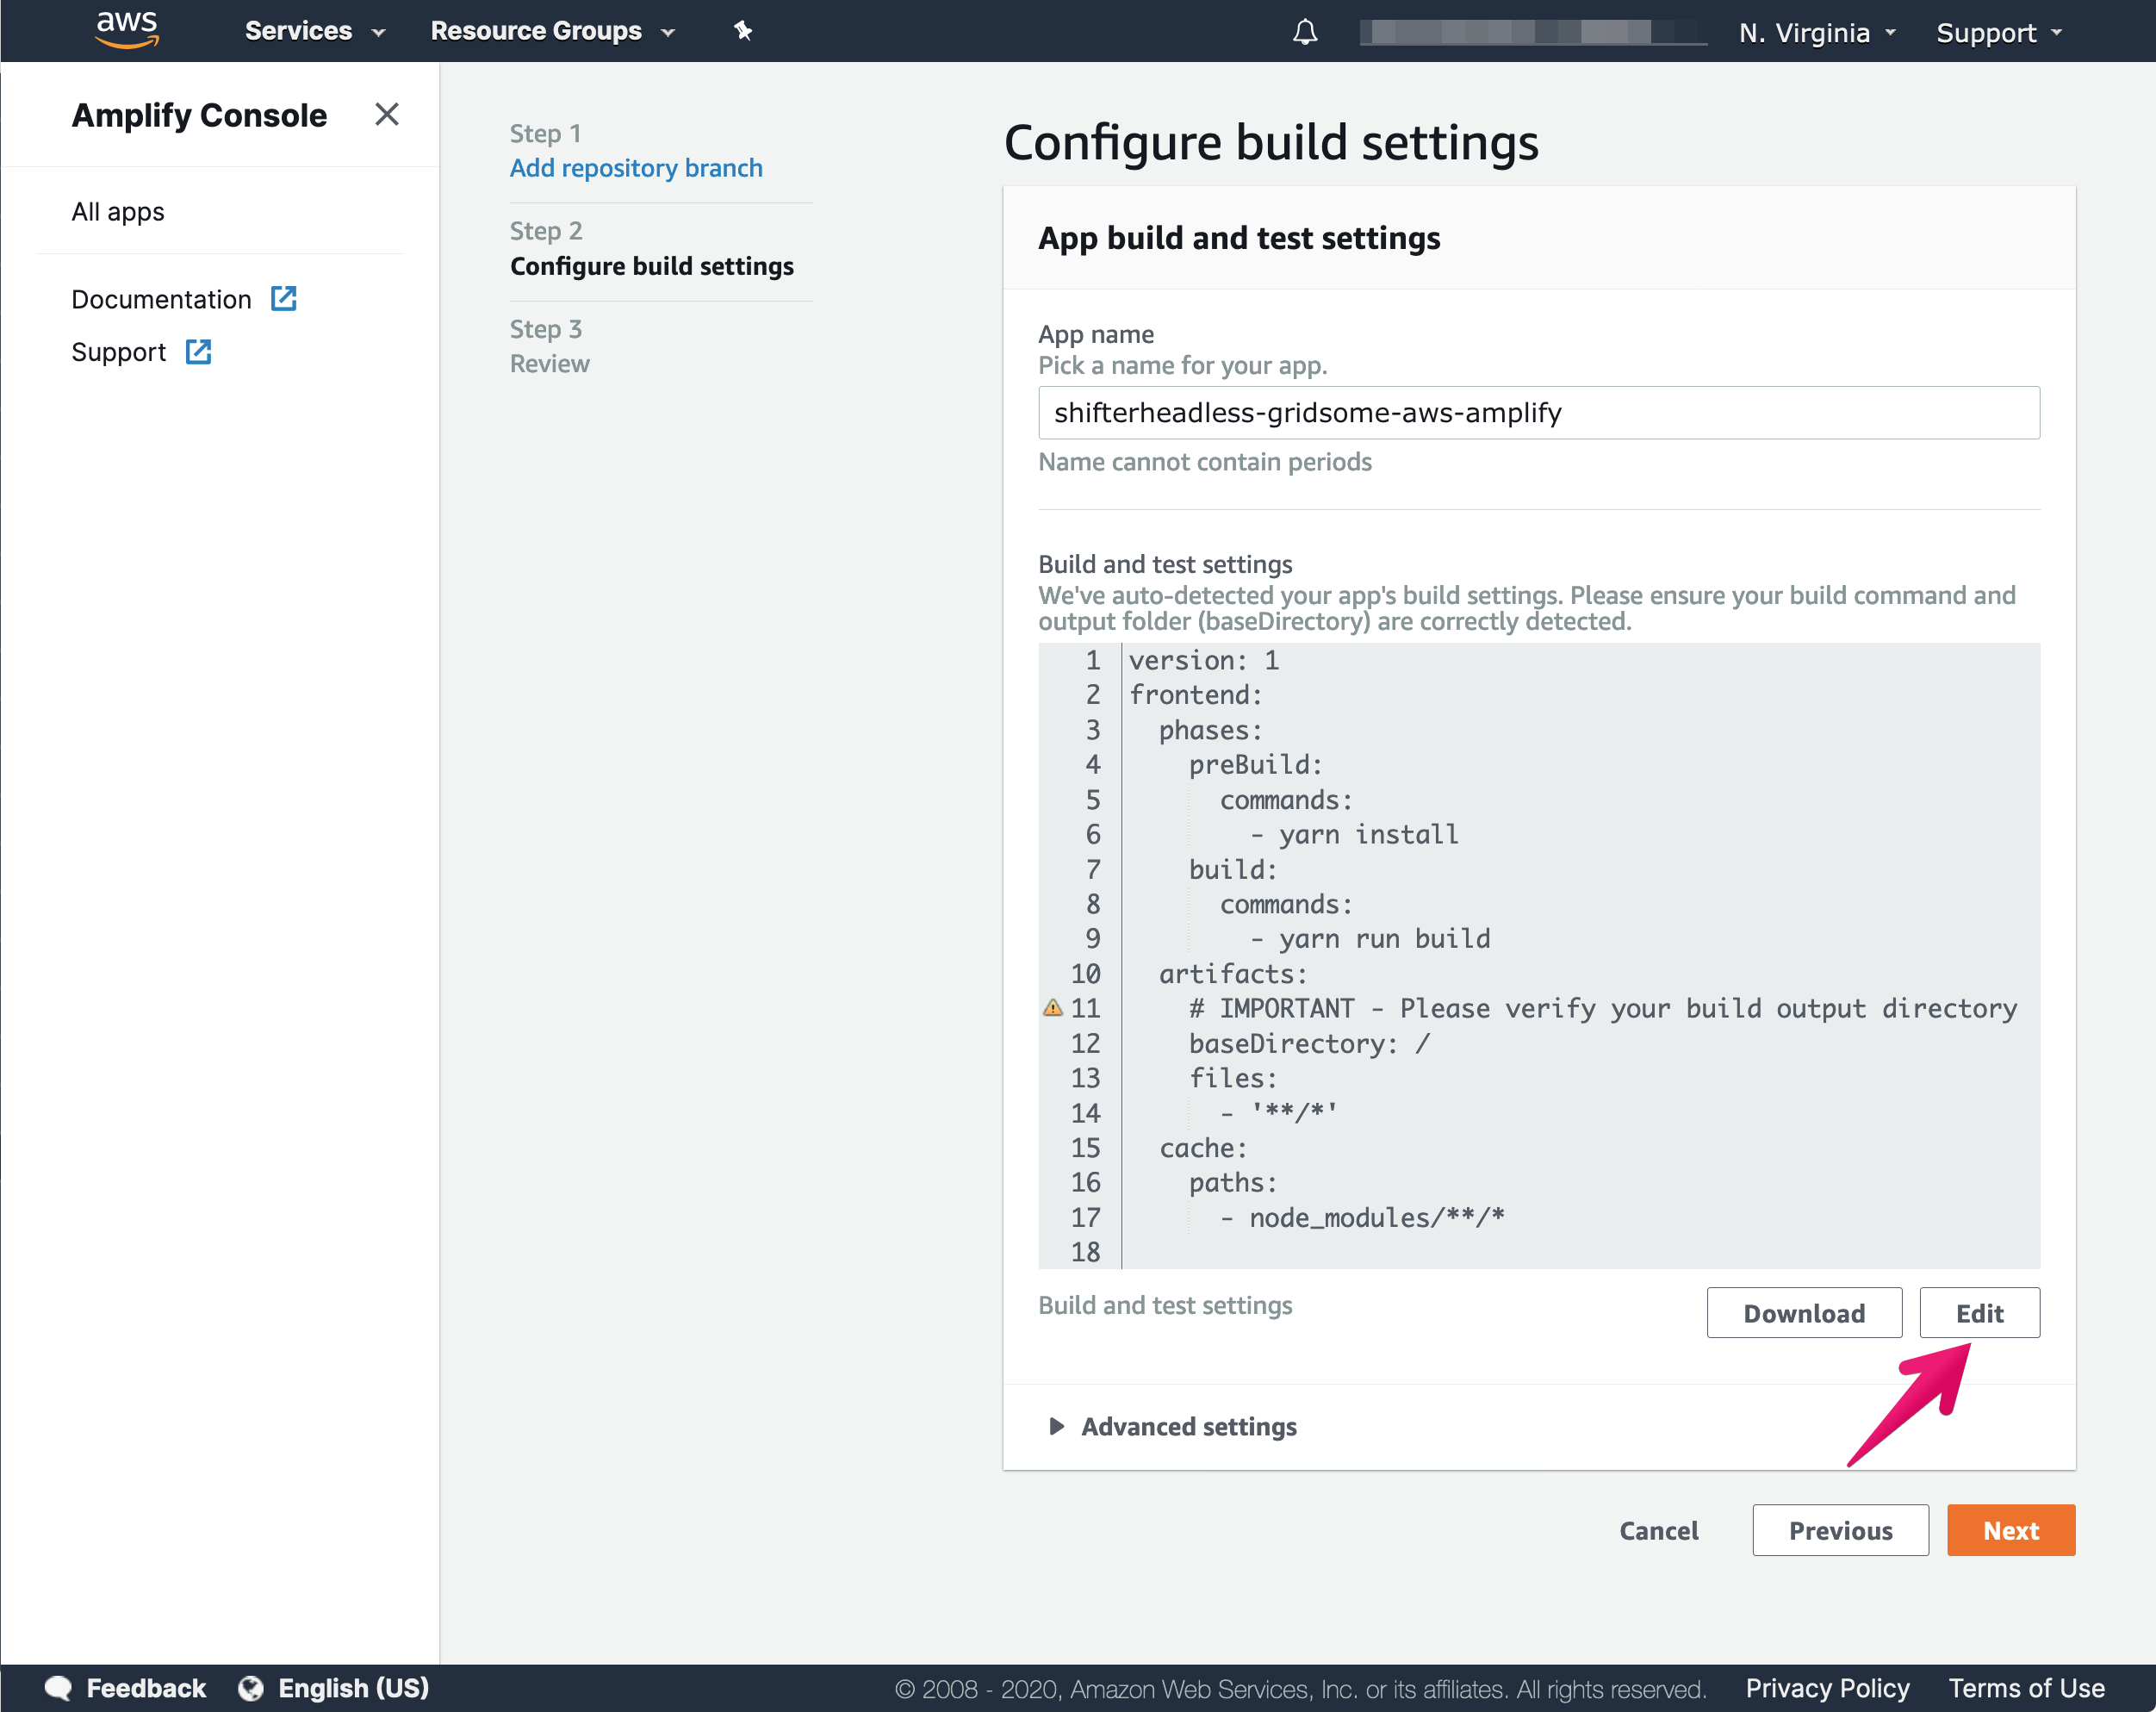
8. Edit baseDirectory to /dist then click [Save]
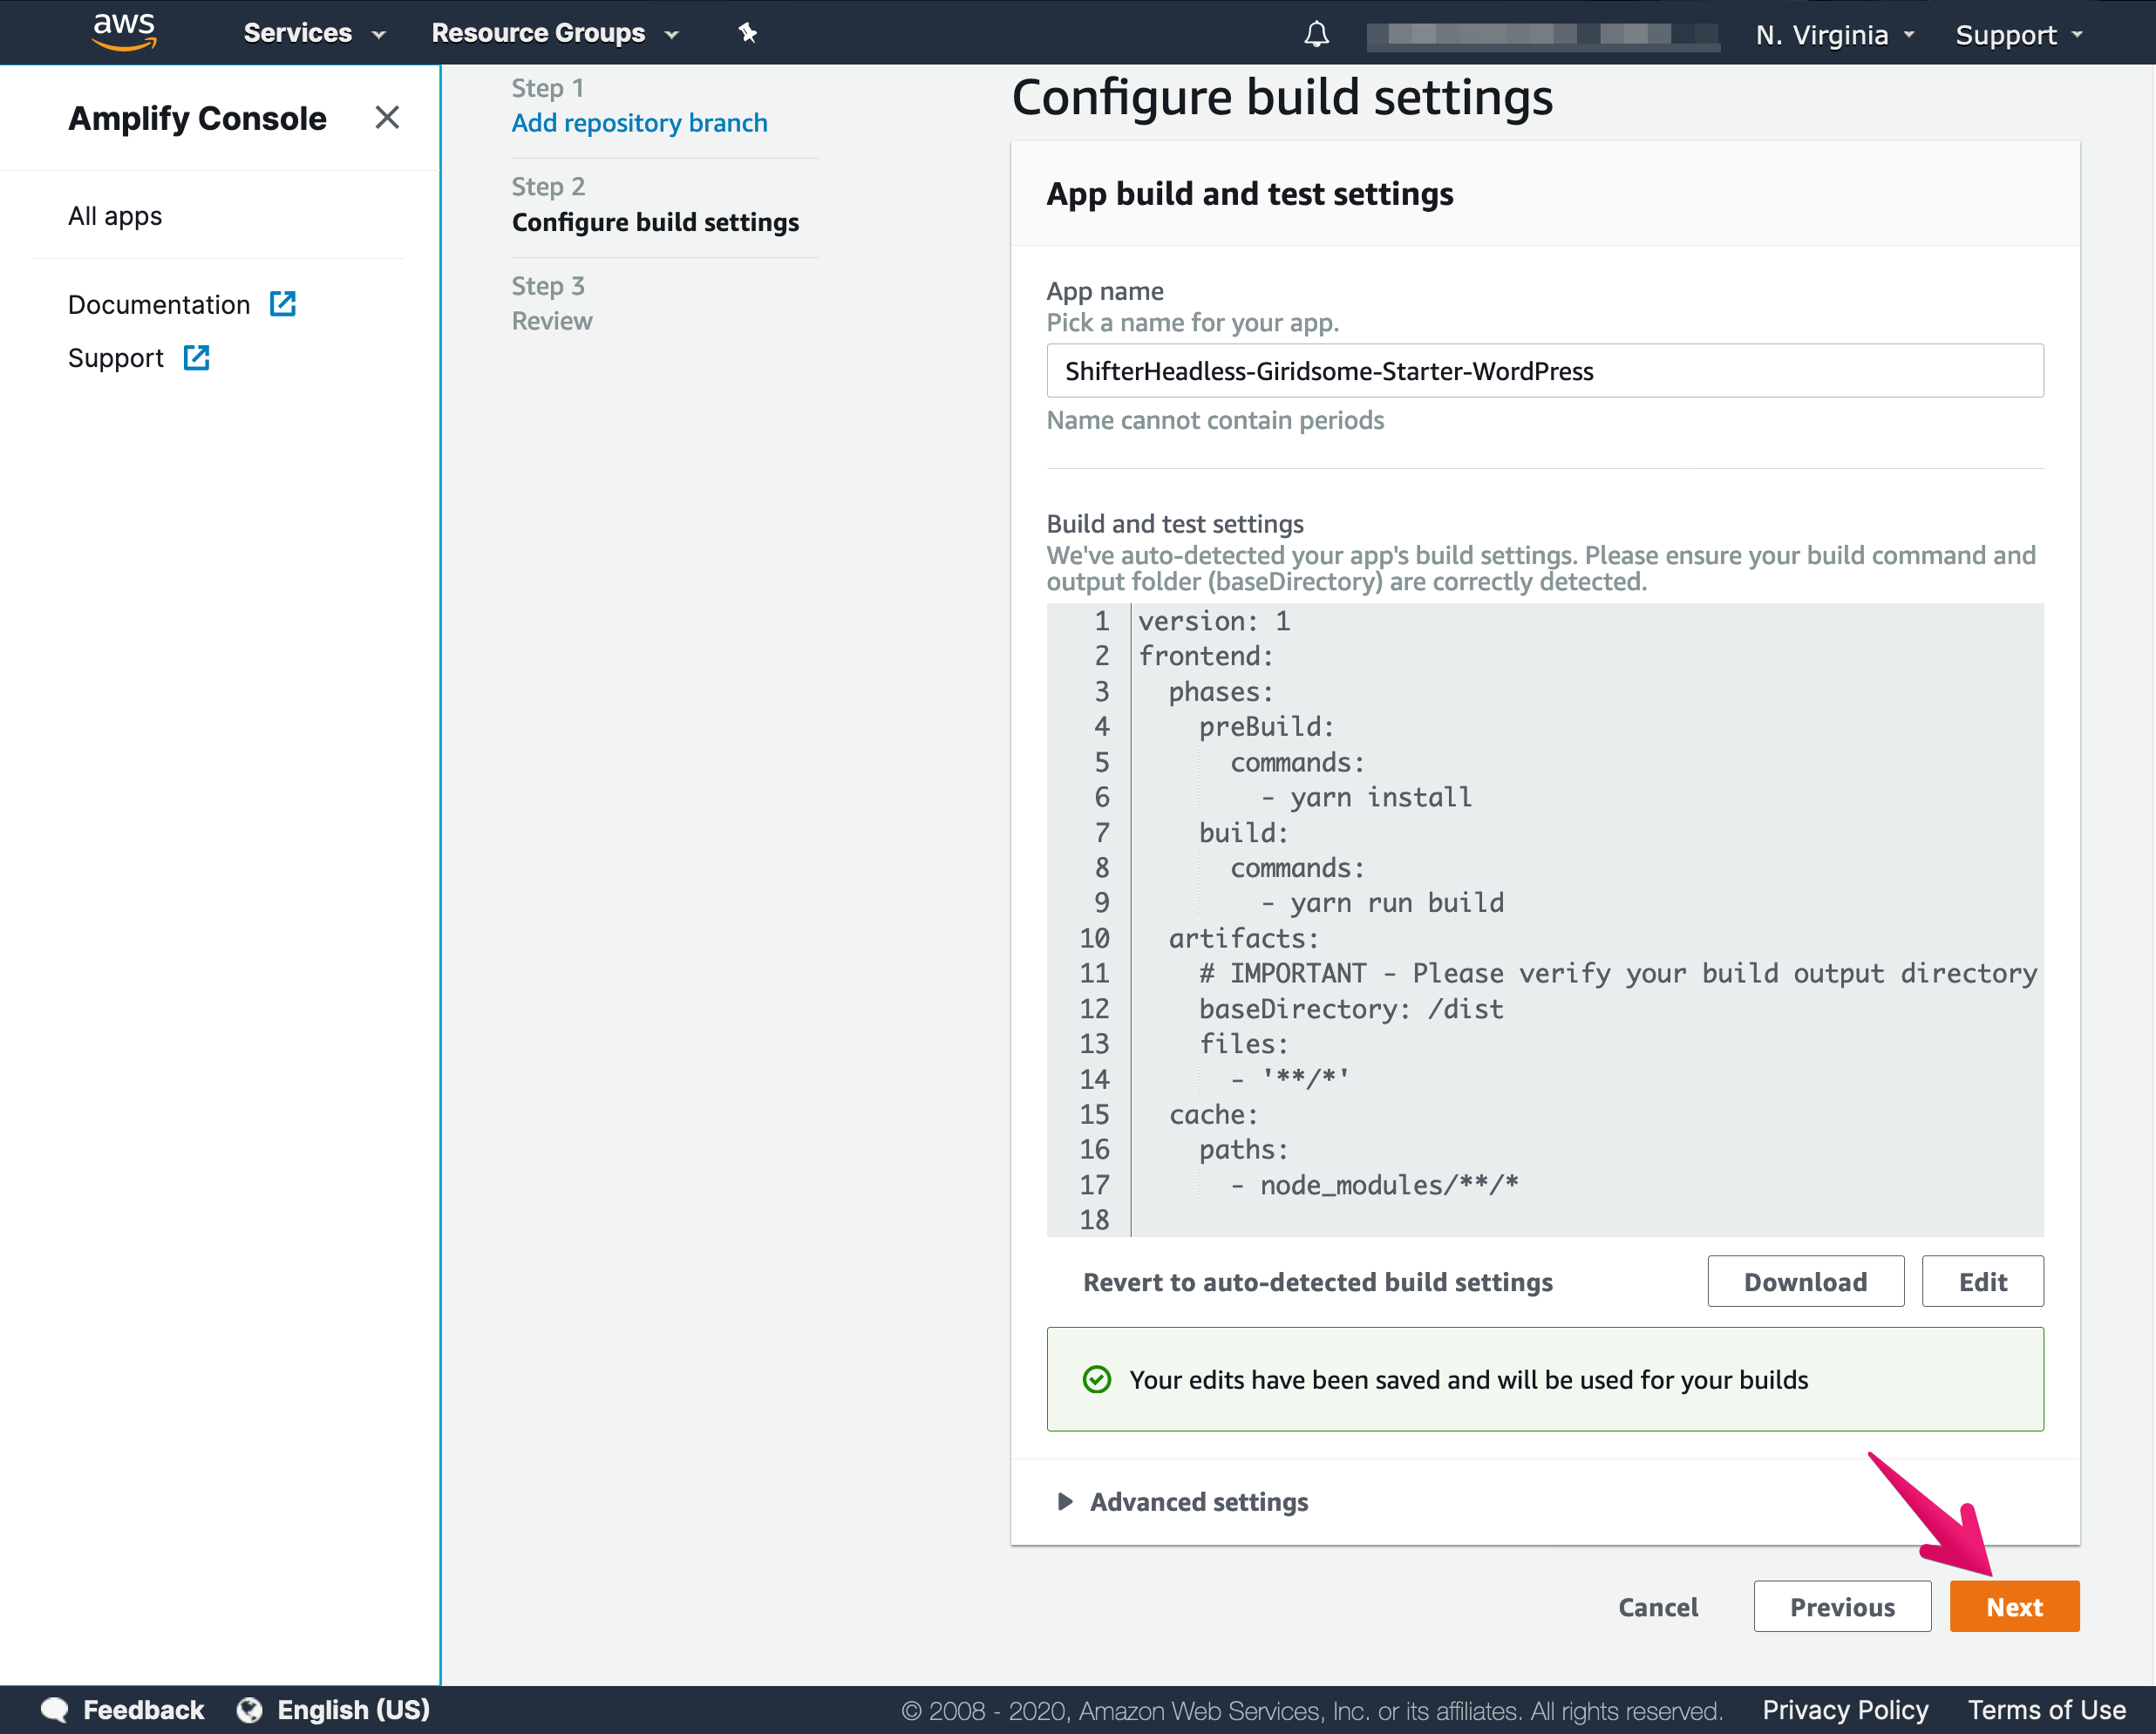
9. Click [Next] button
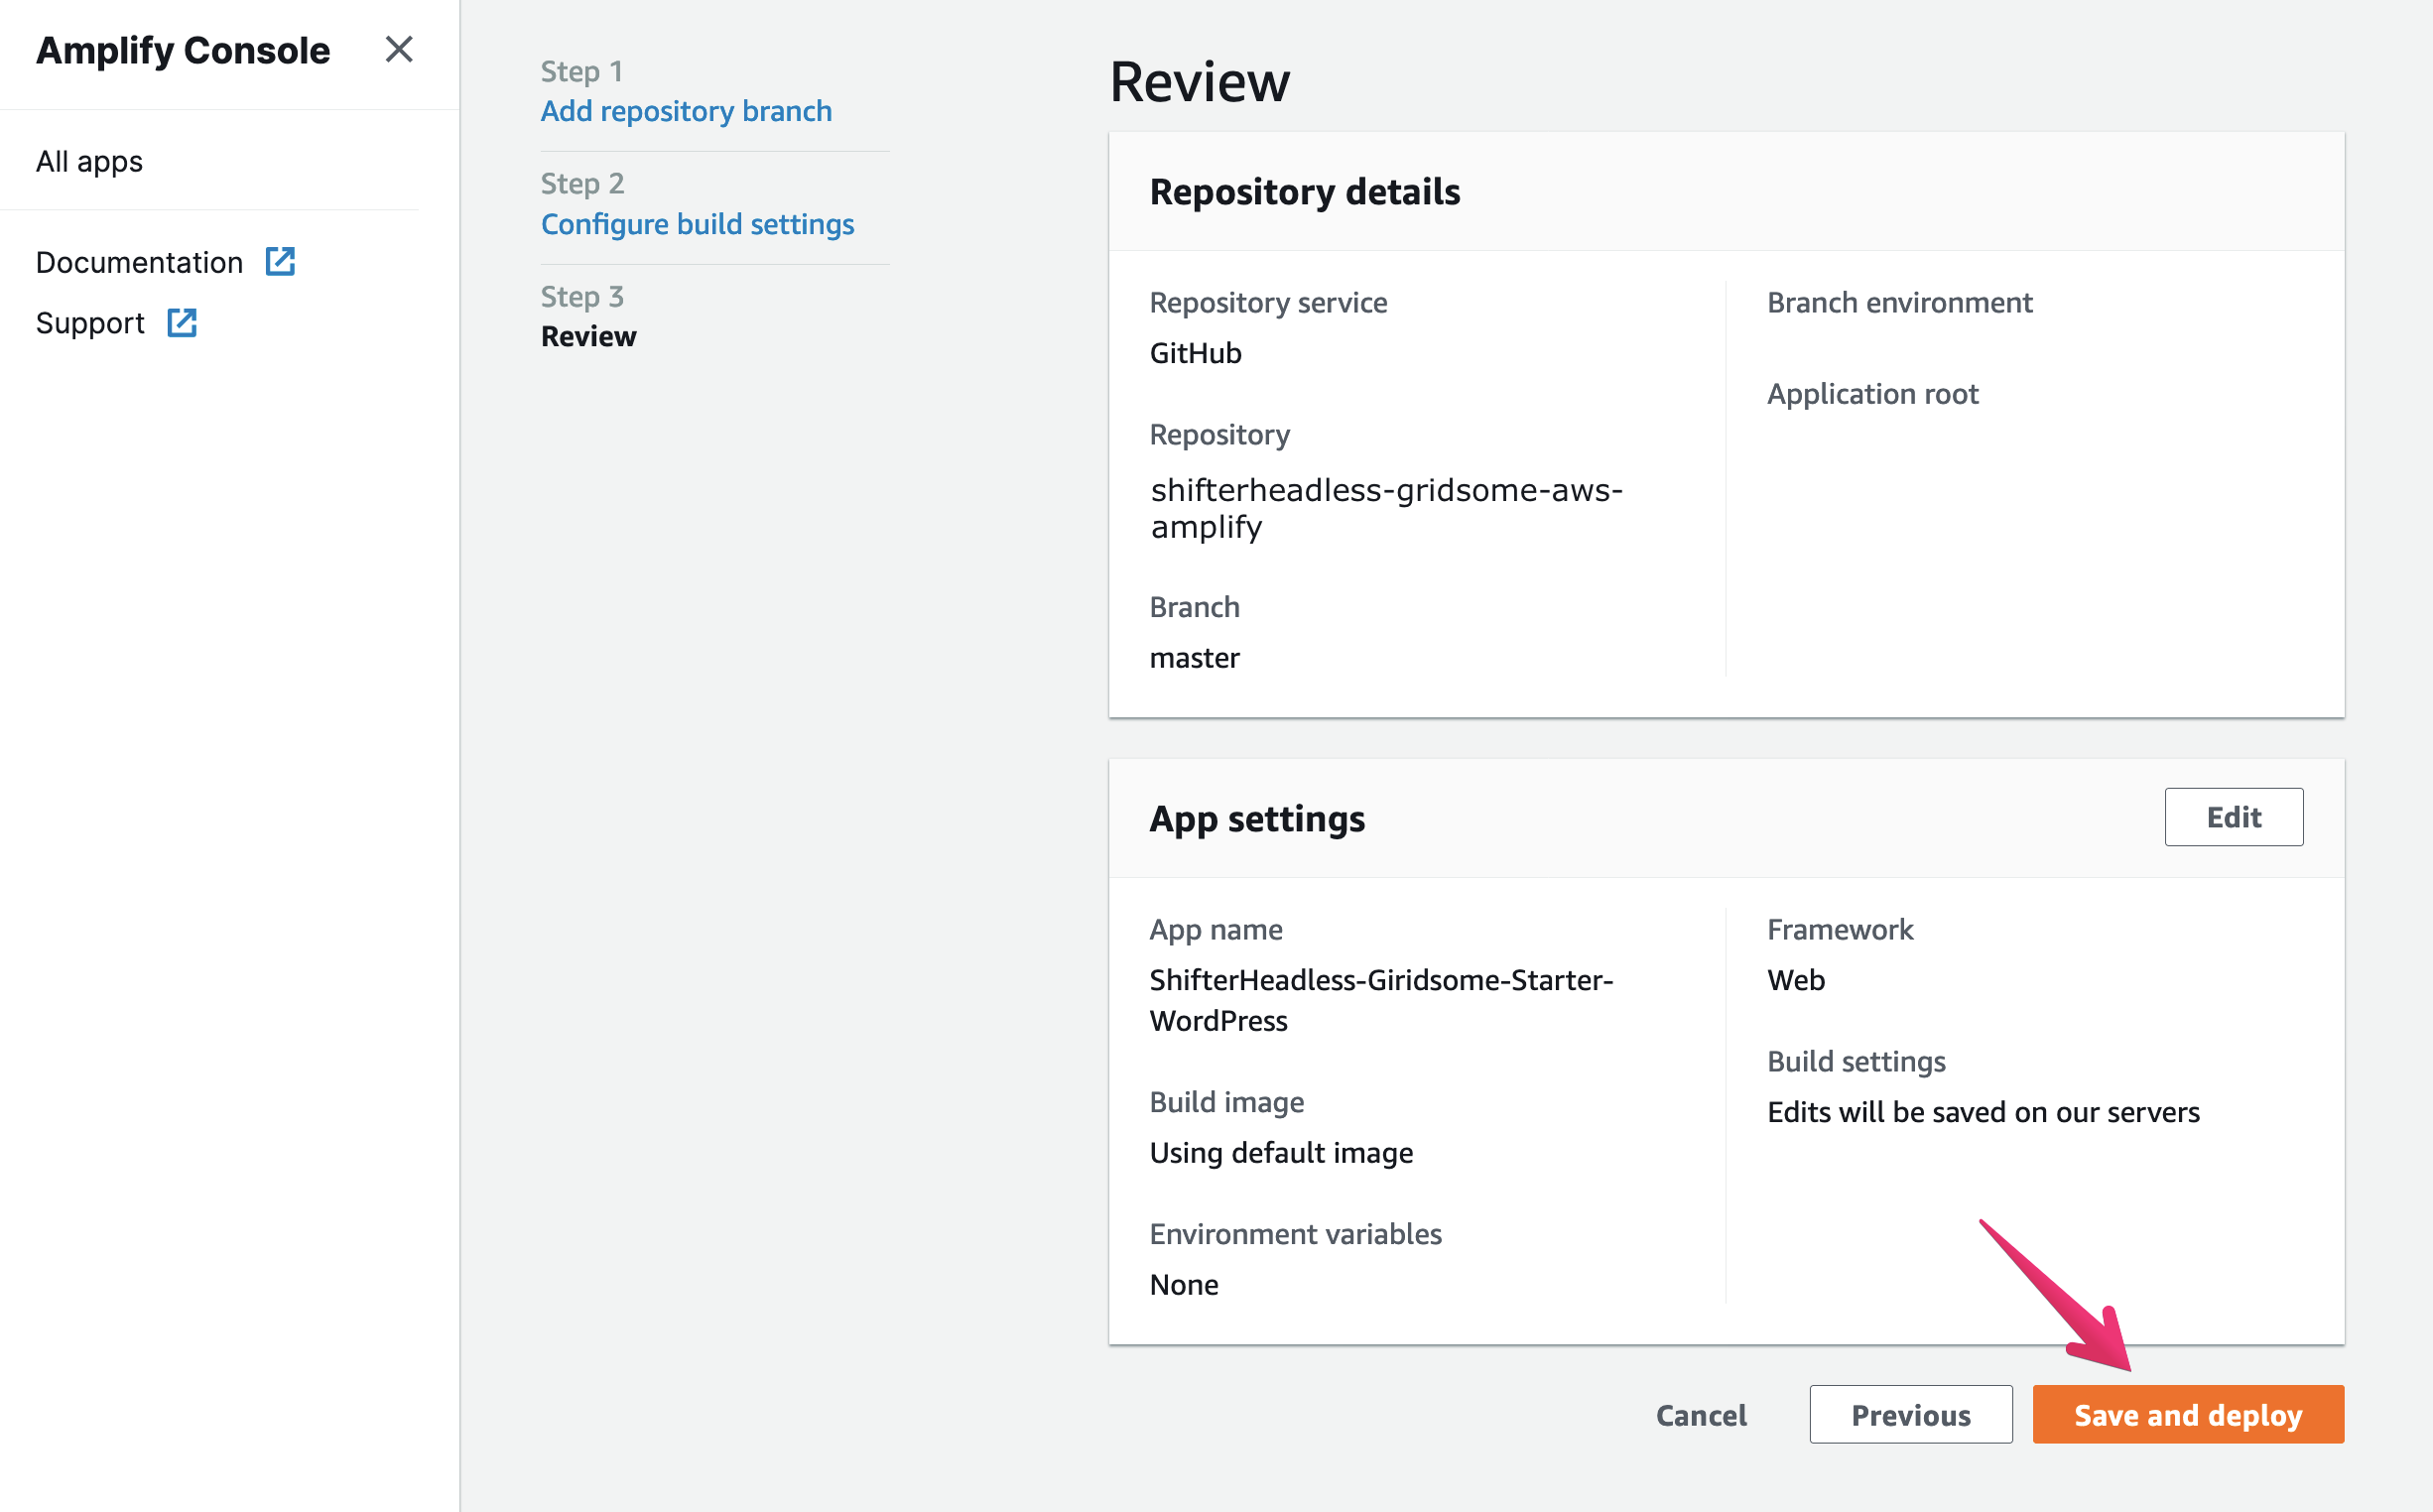
10. Click [Save and deploy] button
11. Amplify will start working

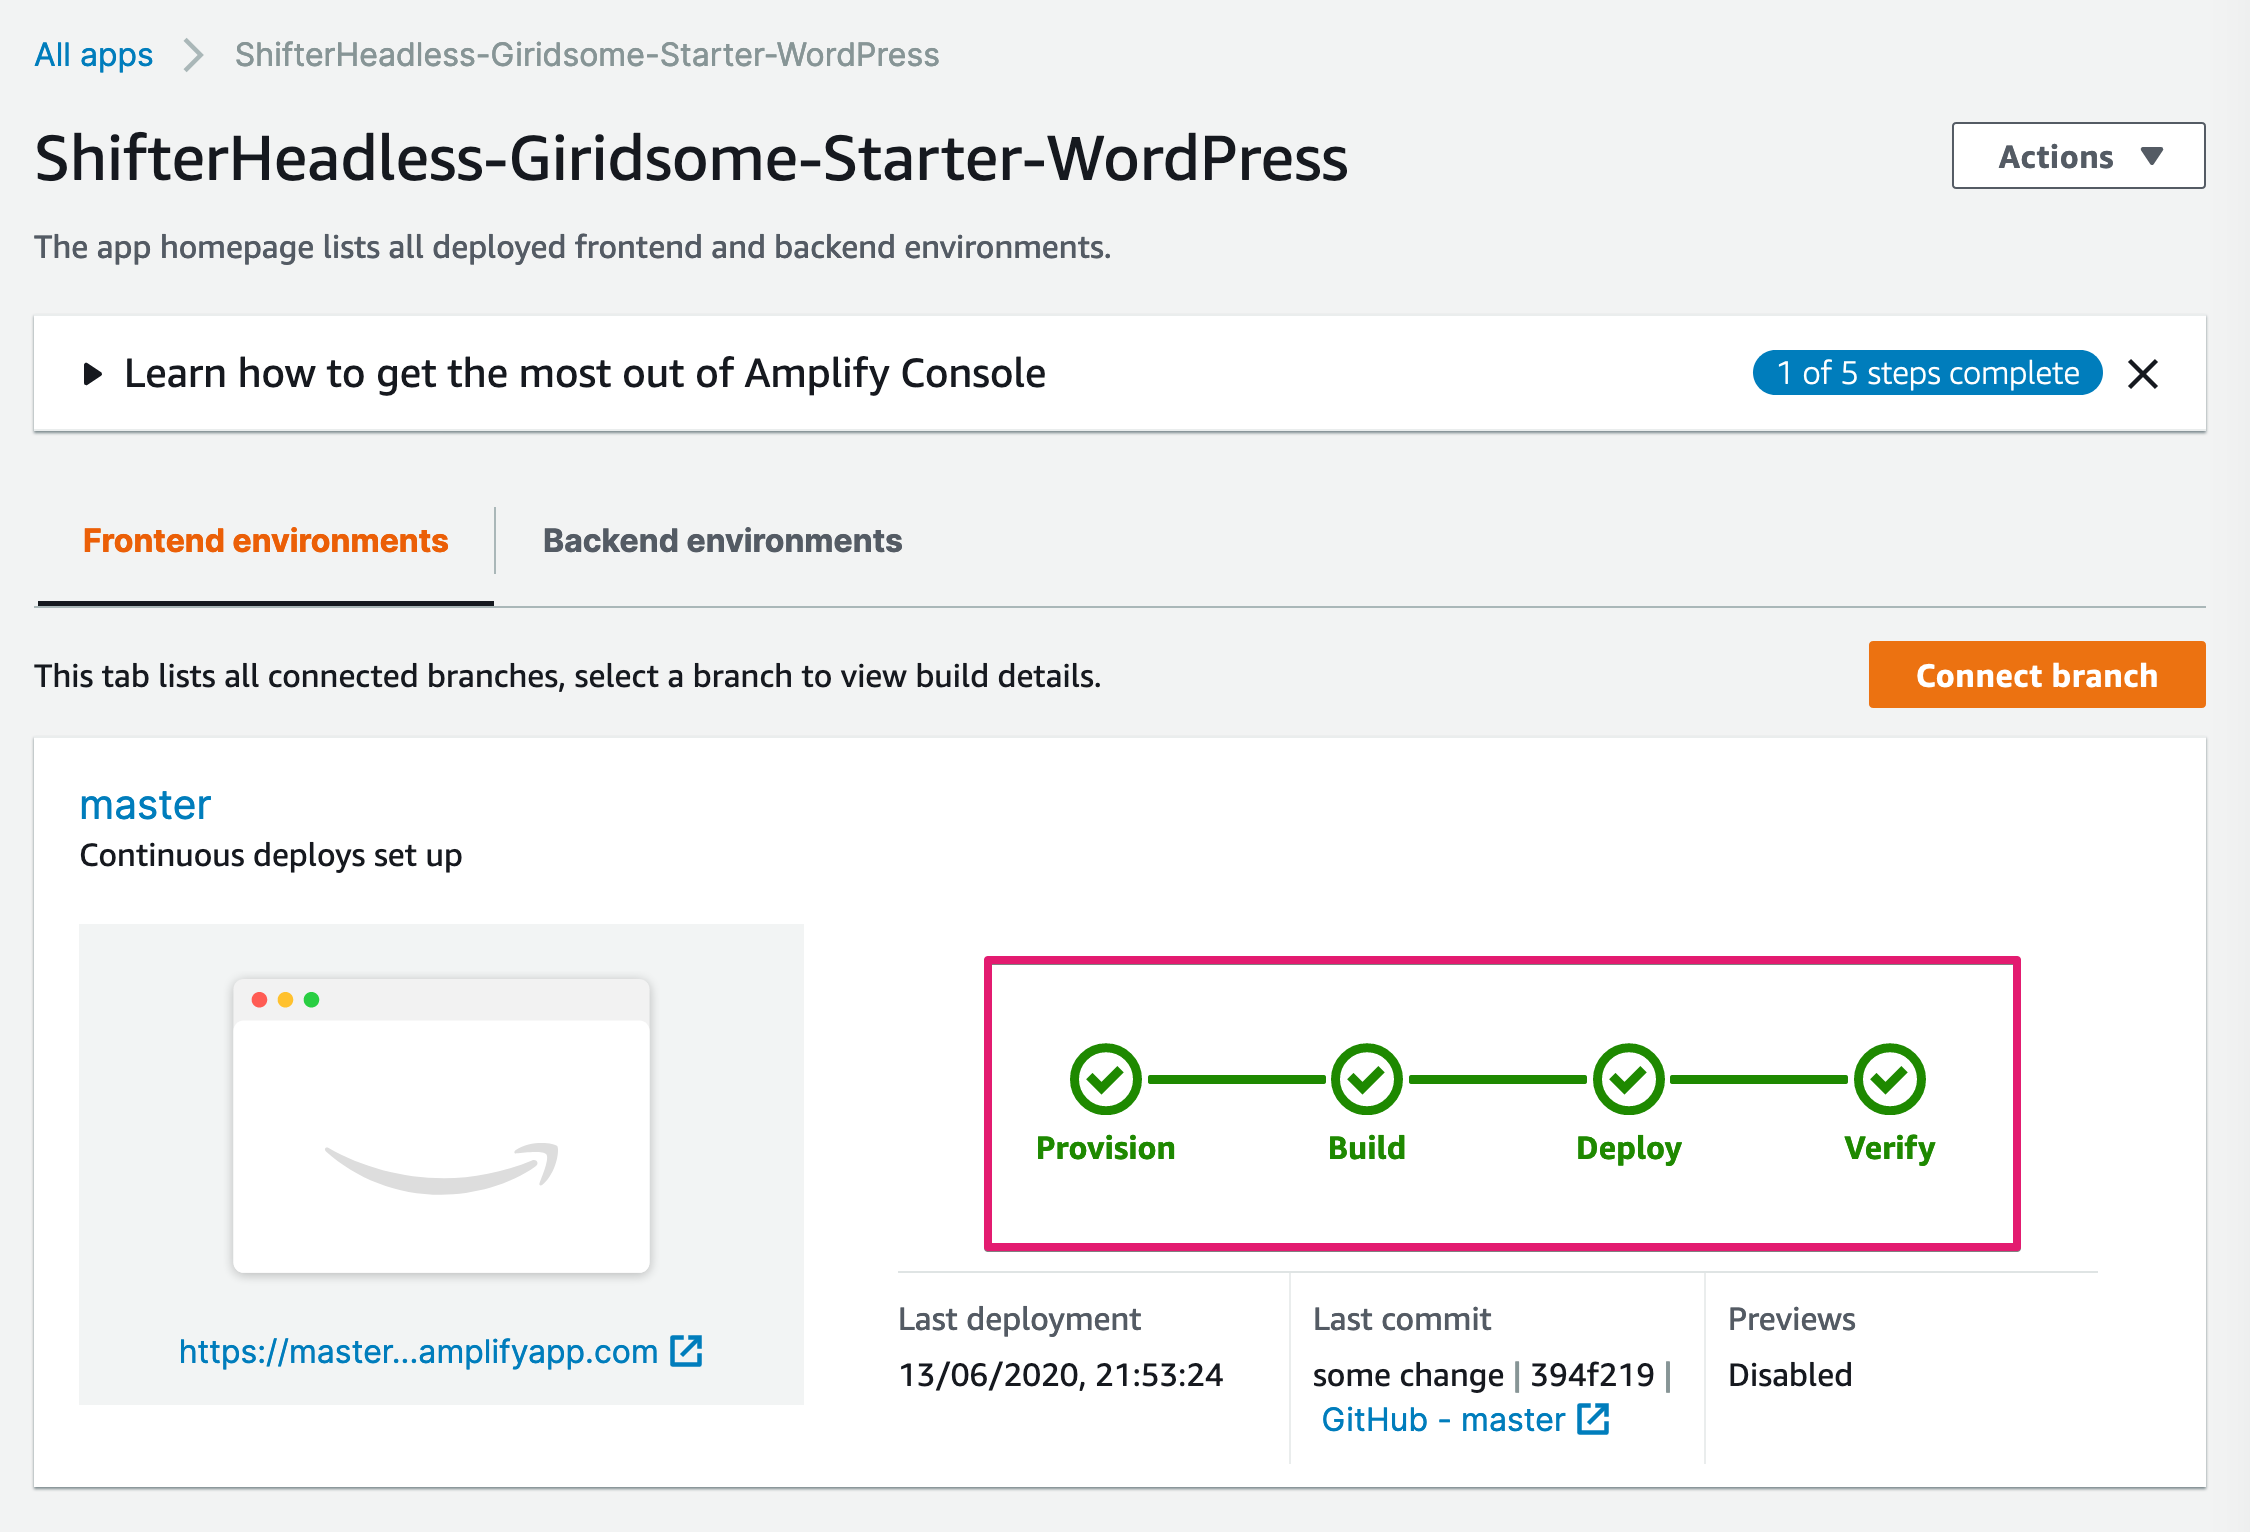
12. Now AWS Amplify is building the webapp
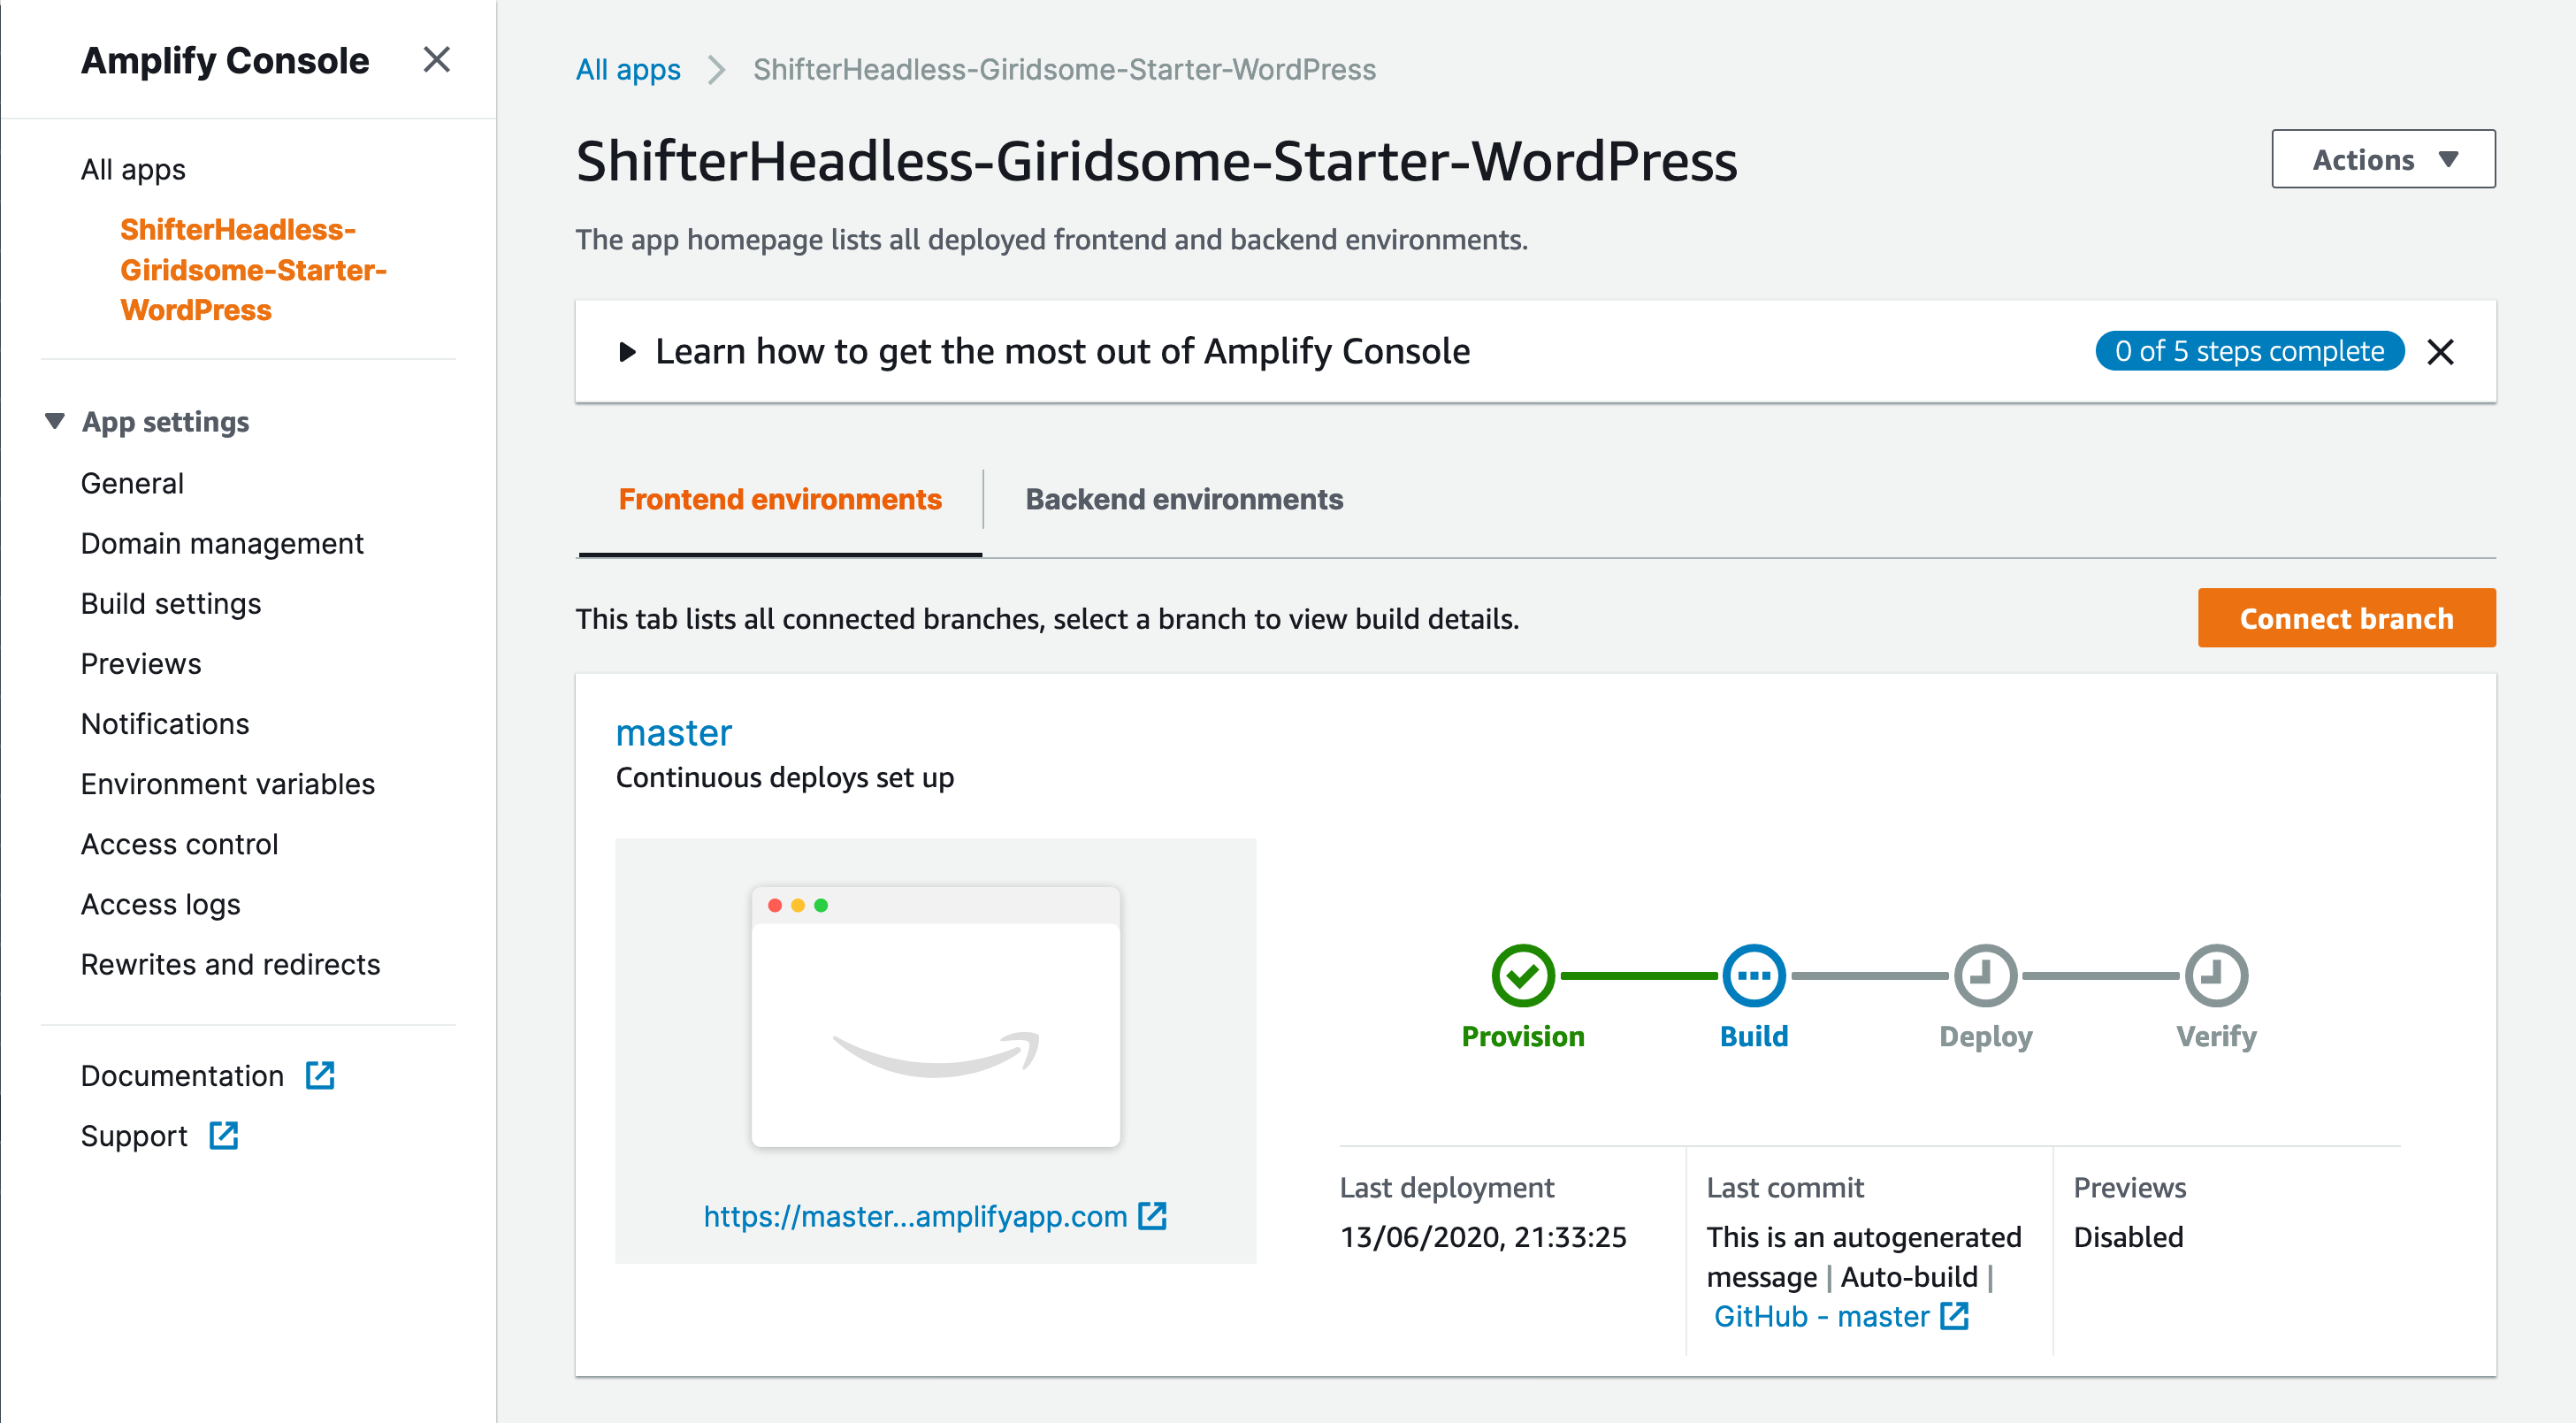
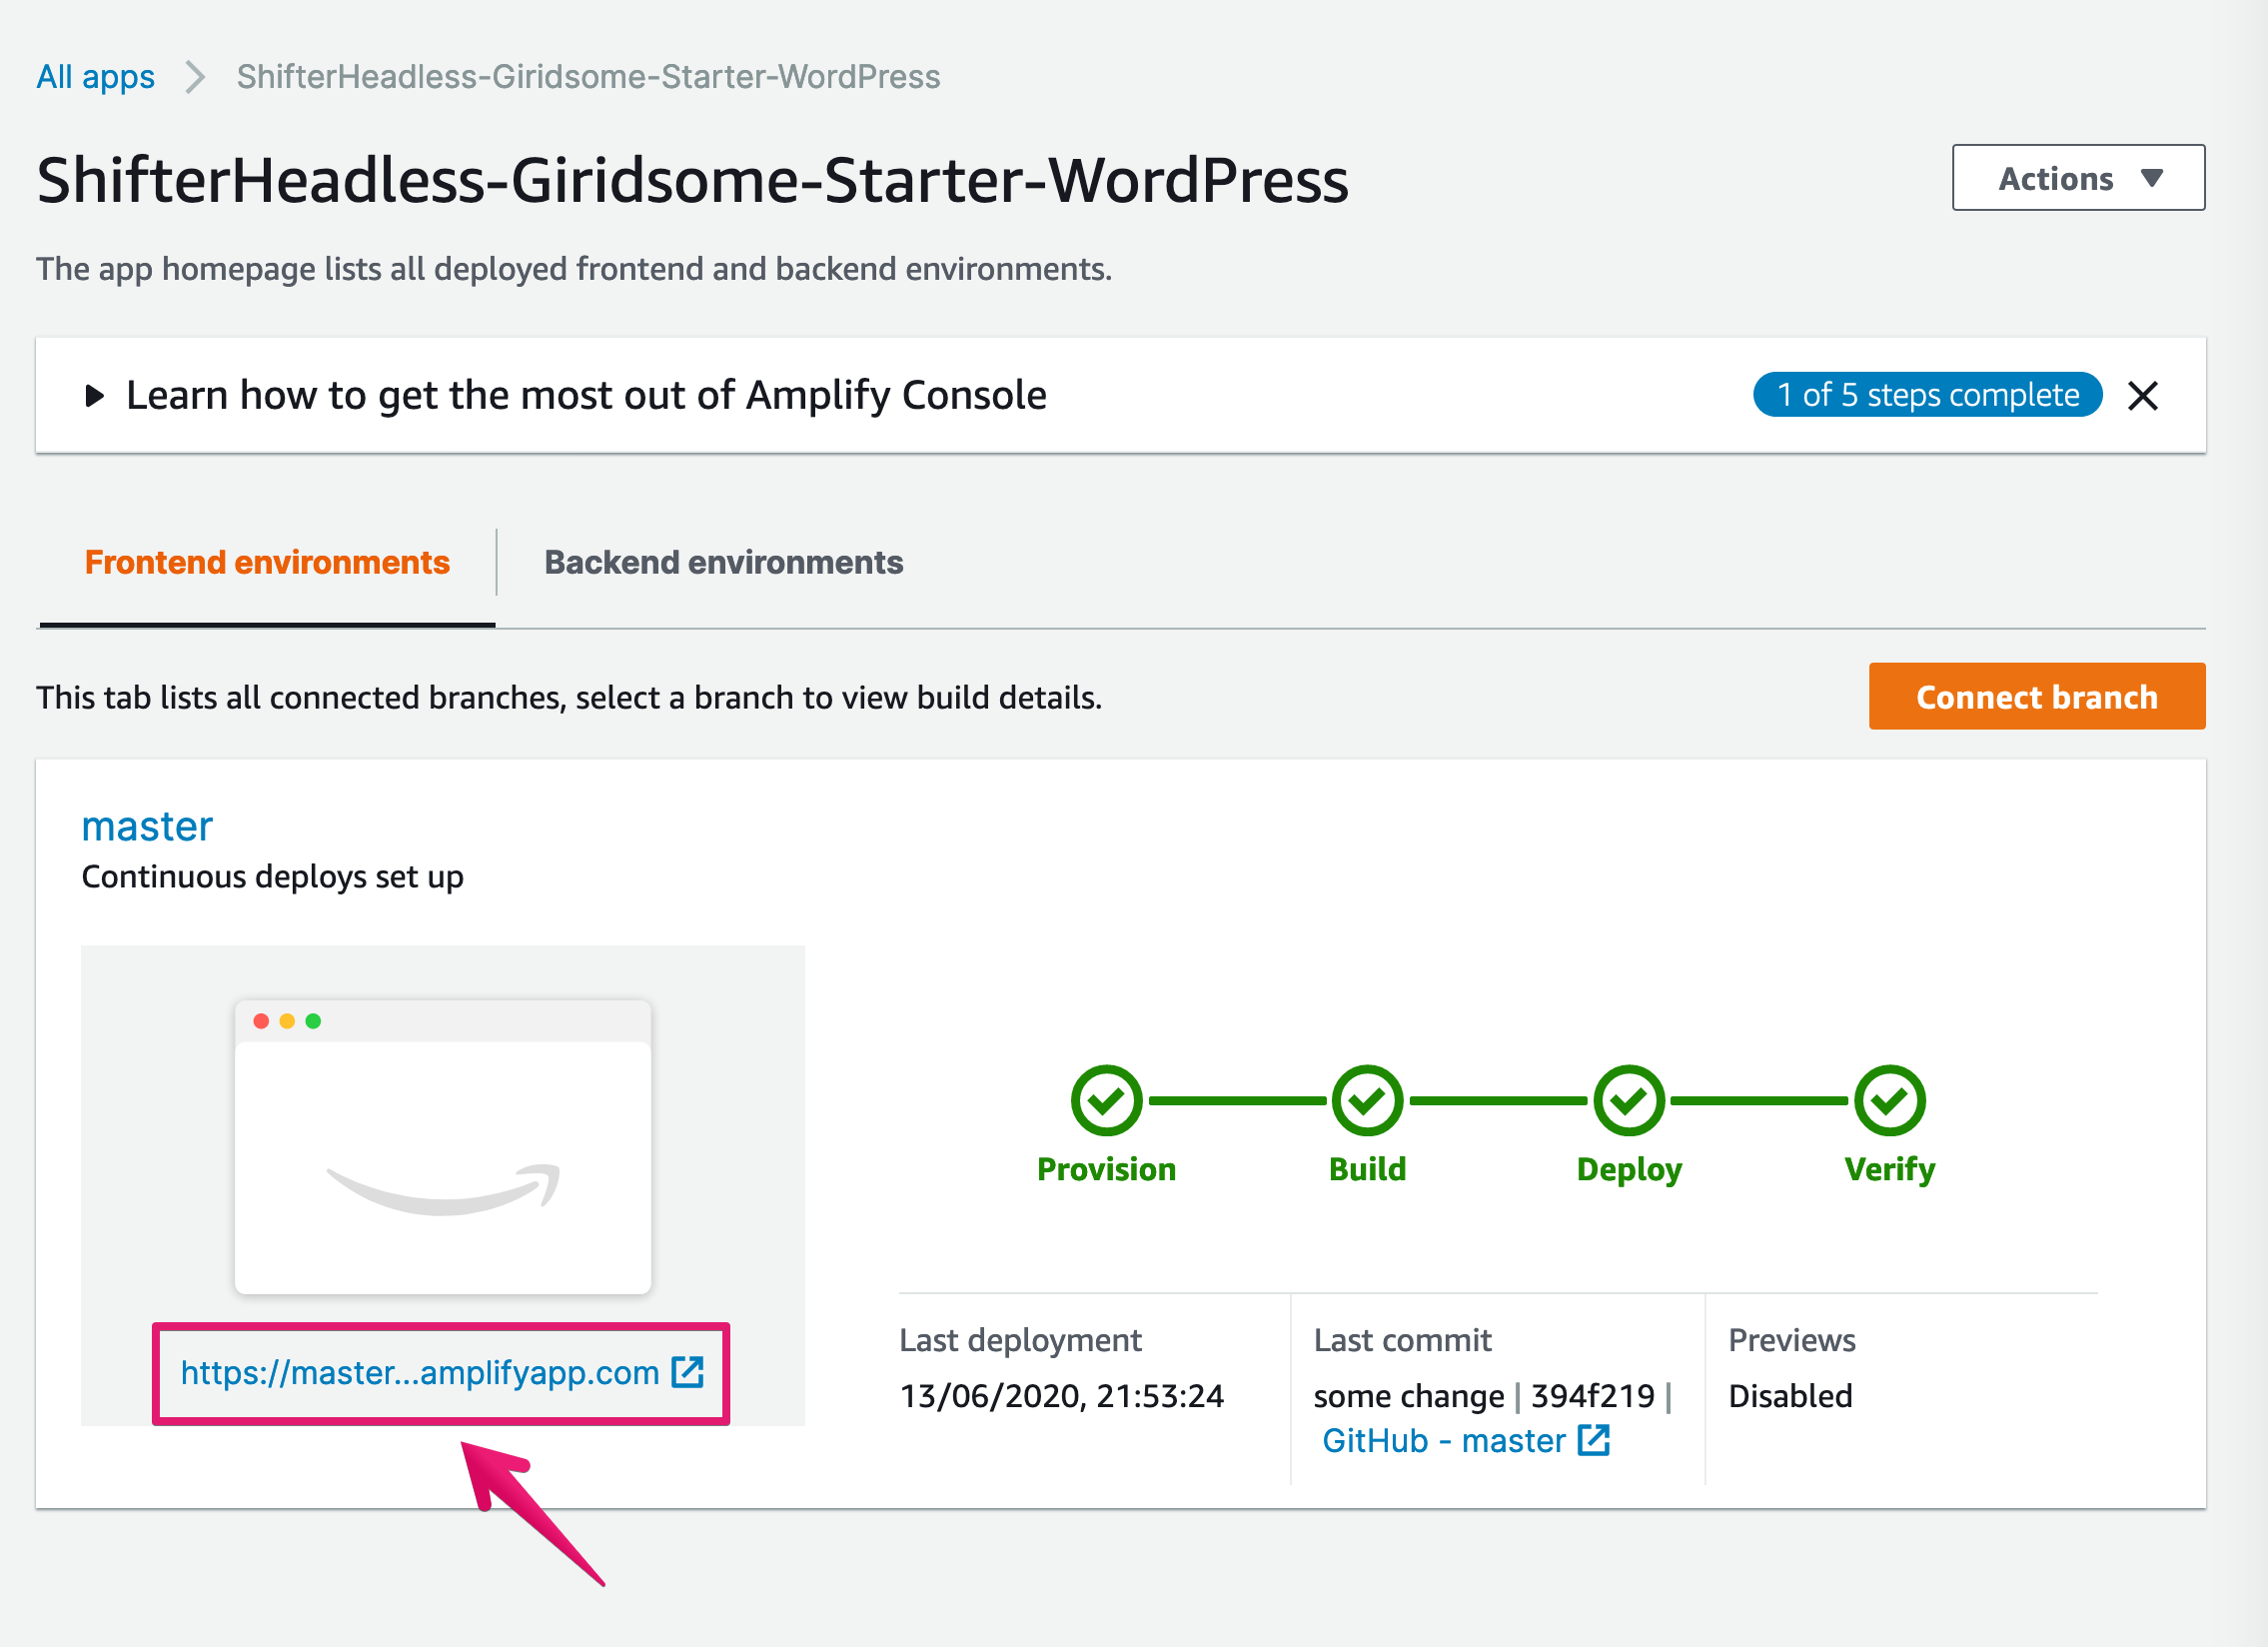
13. Build has been succeeded and deployed
14. Click generated URL which ends with “amplifyapp.com” to check your web app
15. You’ve got your webapp now!
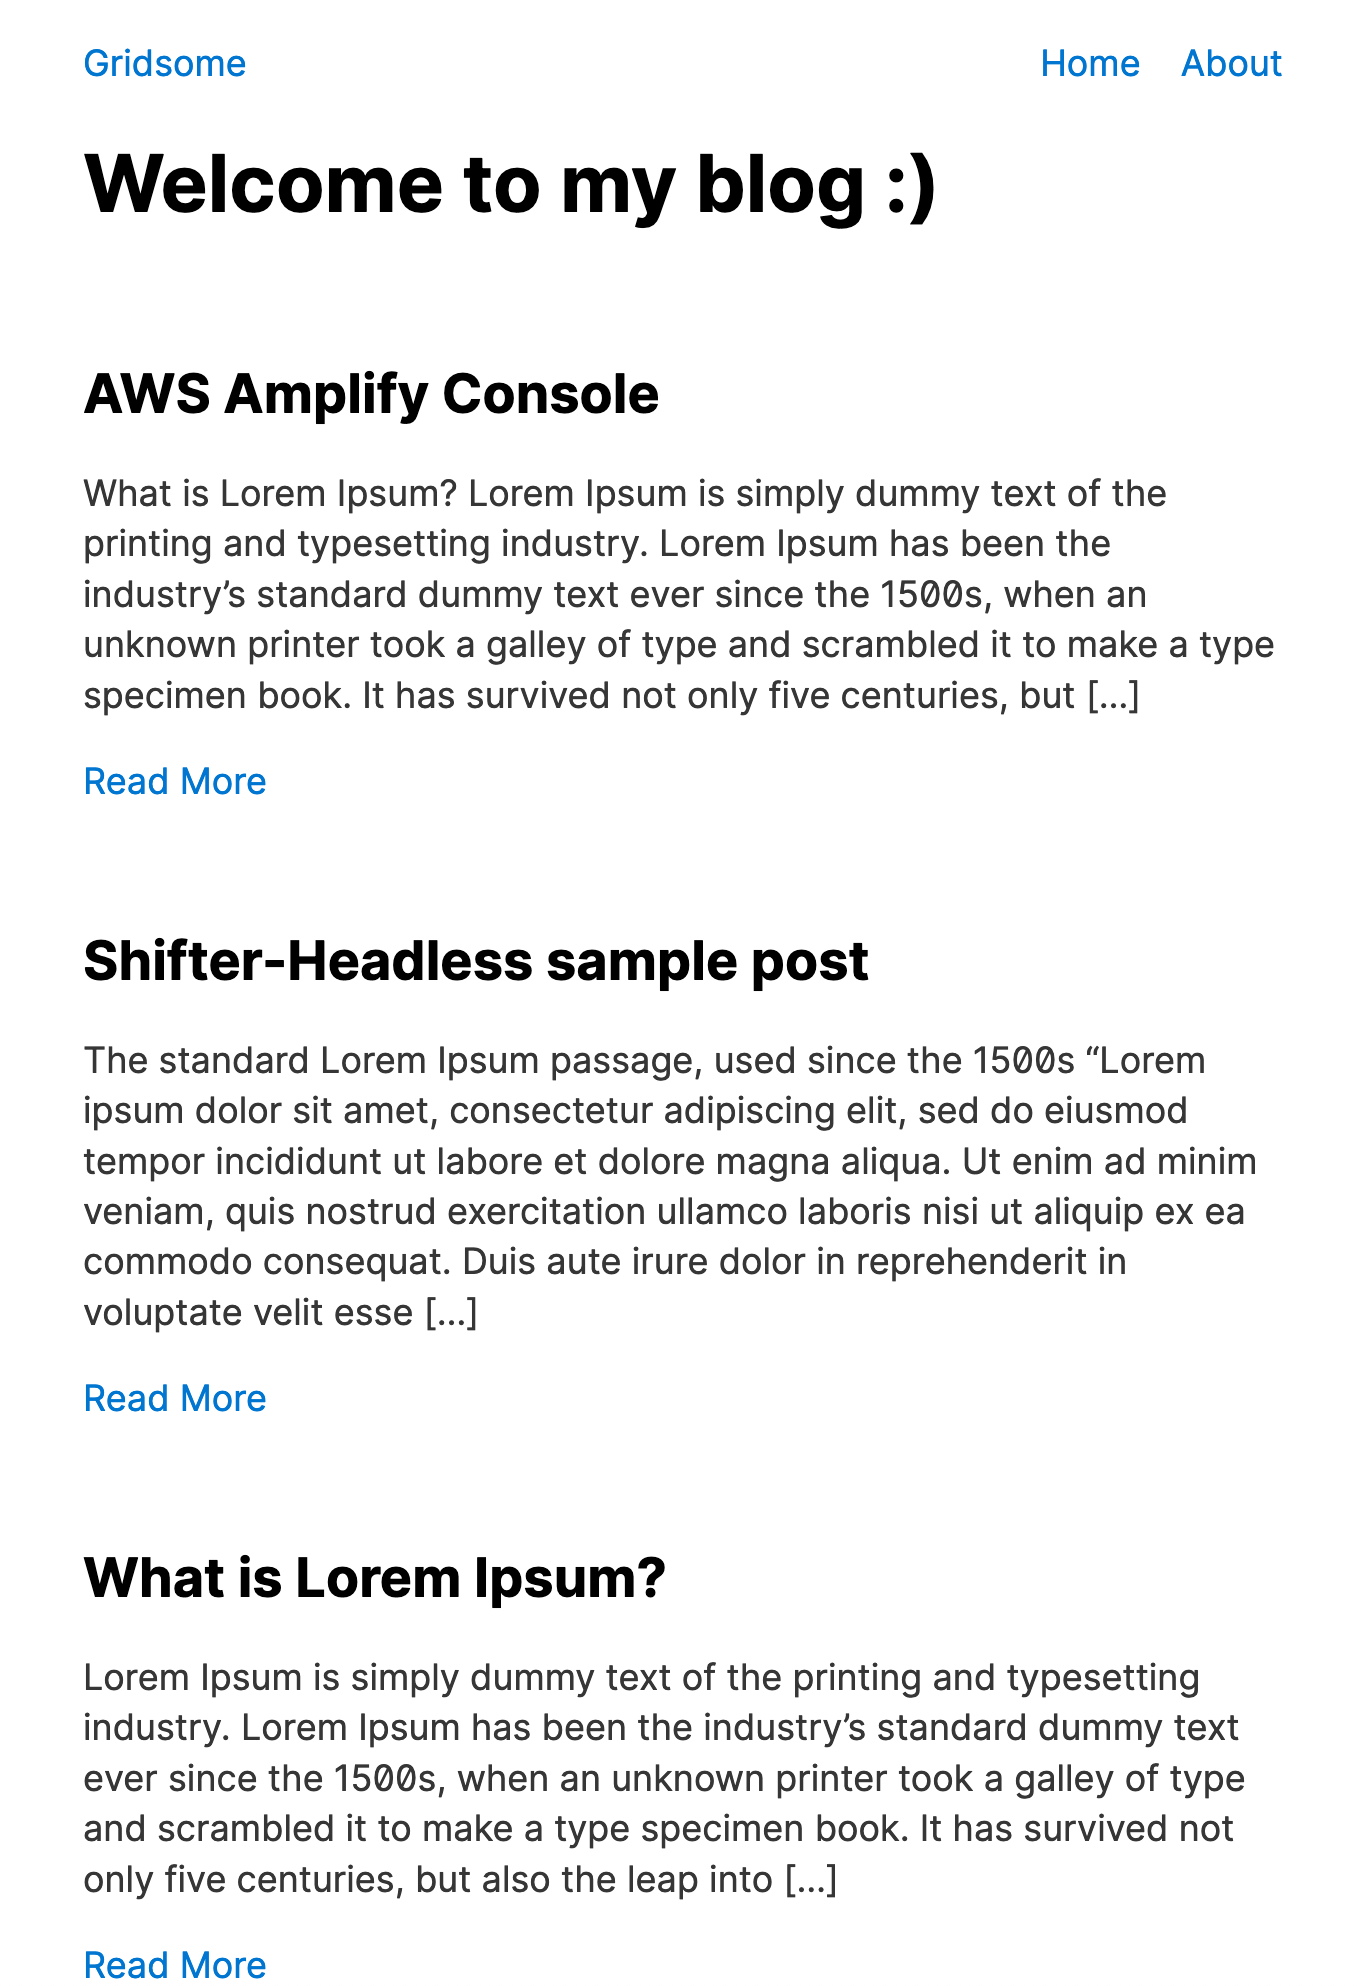
That’s all!