Requirements
-
Shifter Headless site
-
GitHub or GitLab repository
-
Cloudflare account
-
Astro
Create Shifter Headless Site
Please have a look at the support document: Getting Started with Shifter Headless.
Set up Git repository
Create a Git repository on GitHub or GitLab
-
https://github.com
-
https://gitlab.com/users/sign_in
Set up Astro
Please refer to Astro’s official documents or other resources:
Set up Cloudflare pages
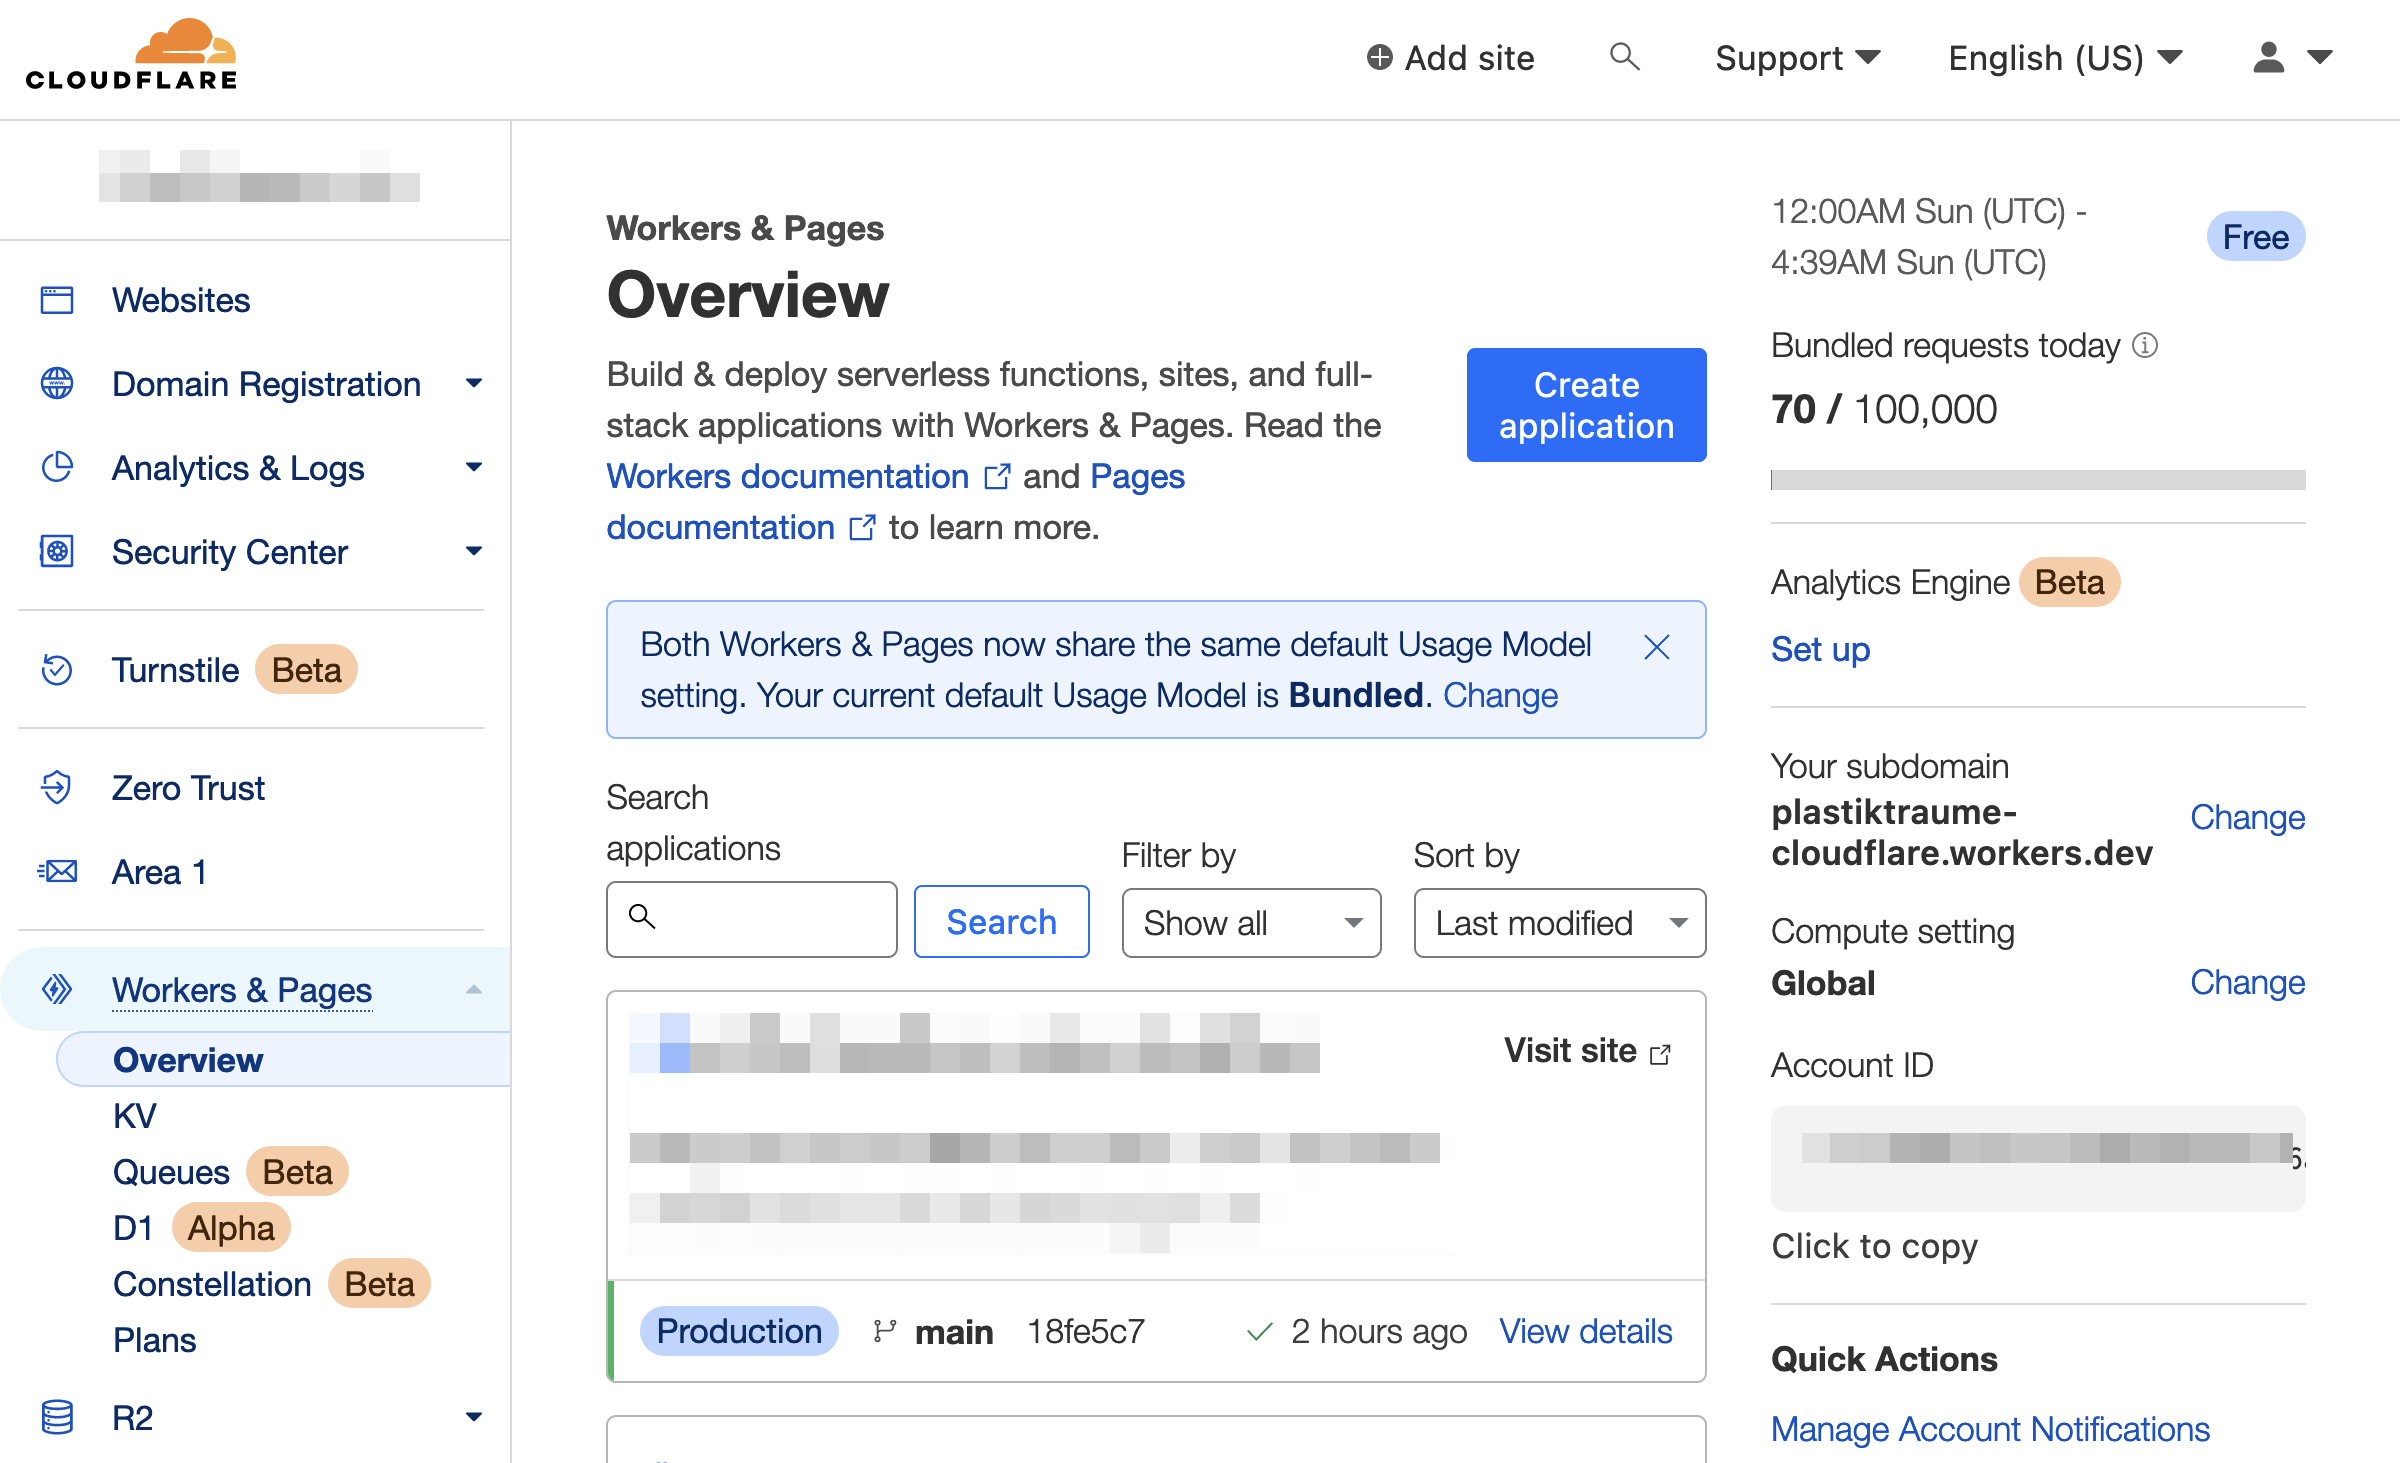
1. Login to the Cloudflare dashboard
https://www.cloudflare.com/
Navigate to [Workers & Pages] then click [Create application]
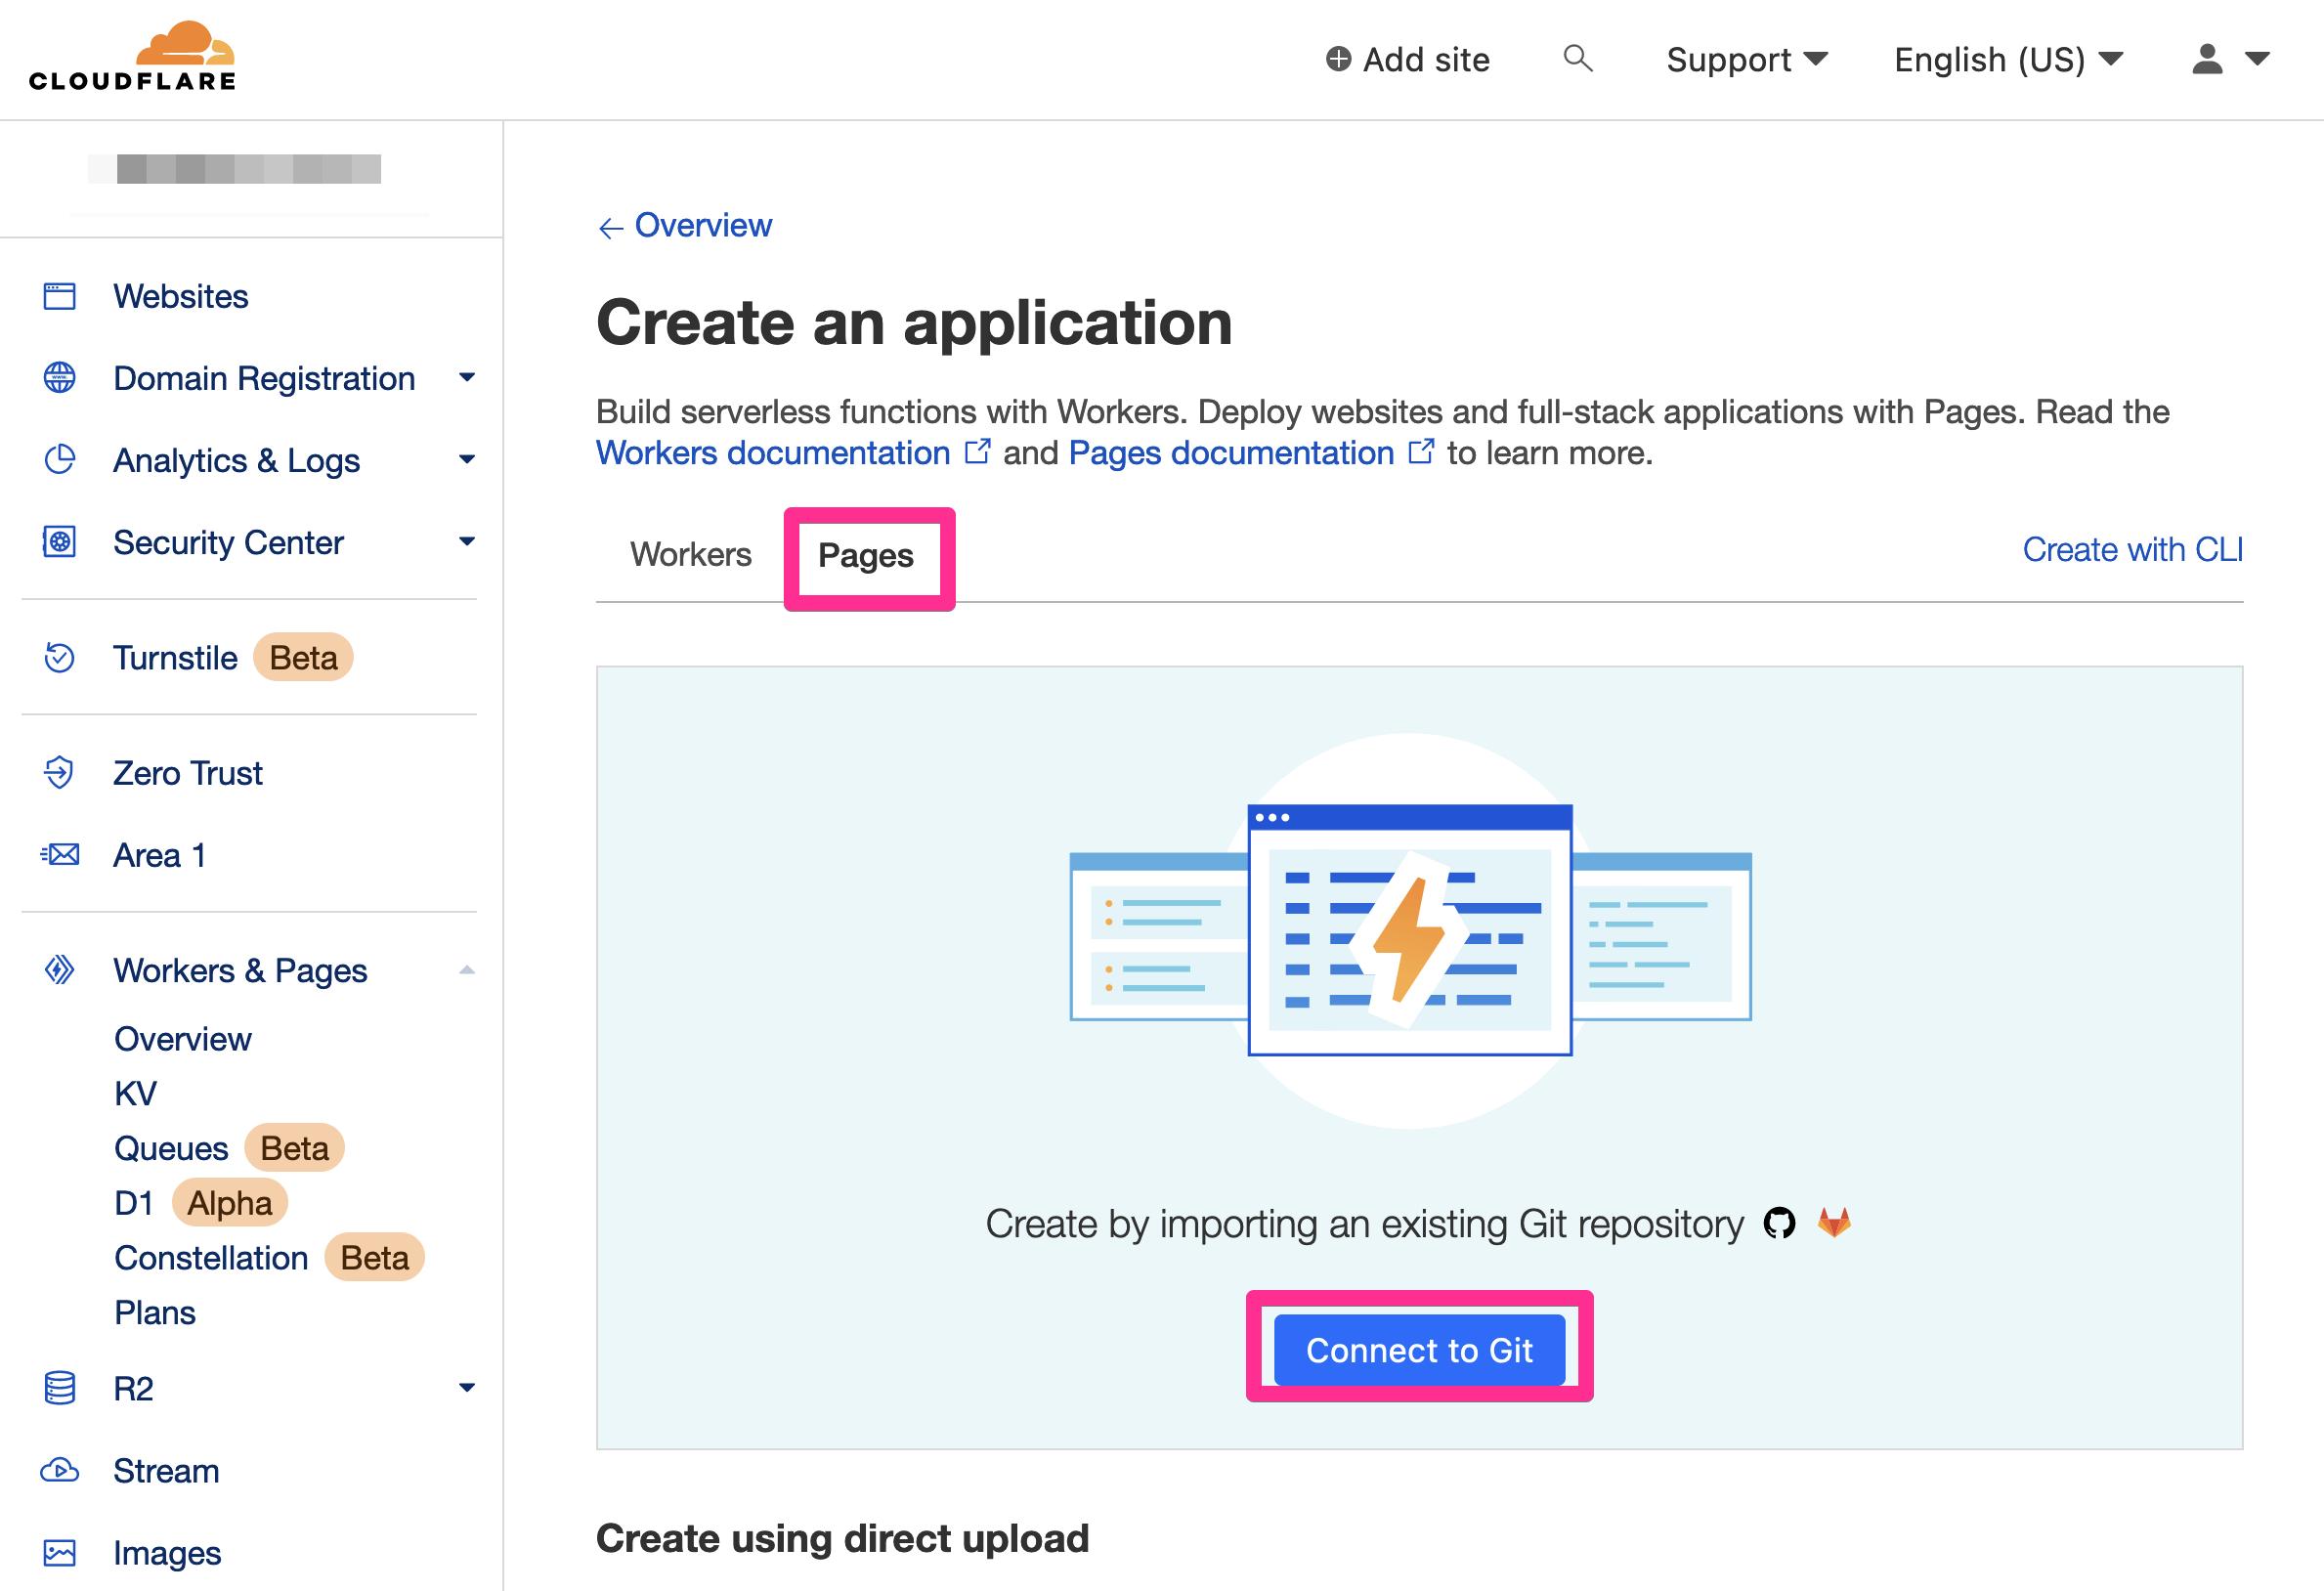
2. Choose [Pages] and click [Connect to Git]
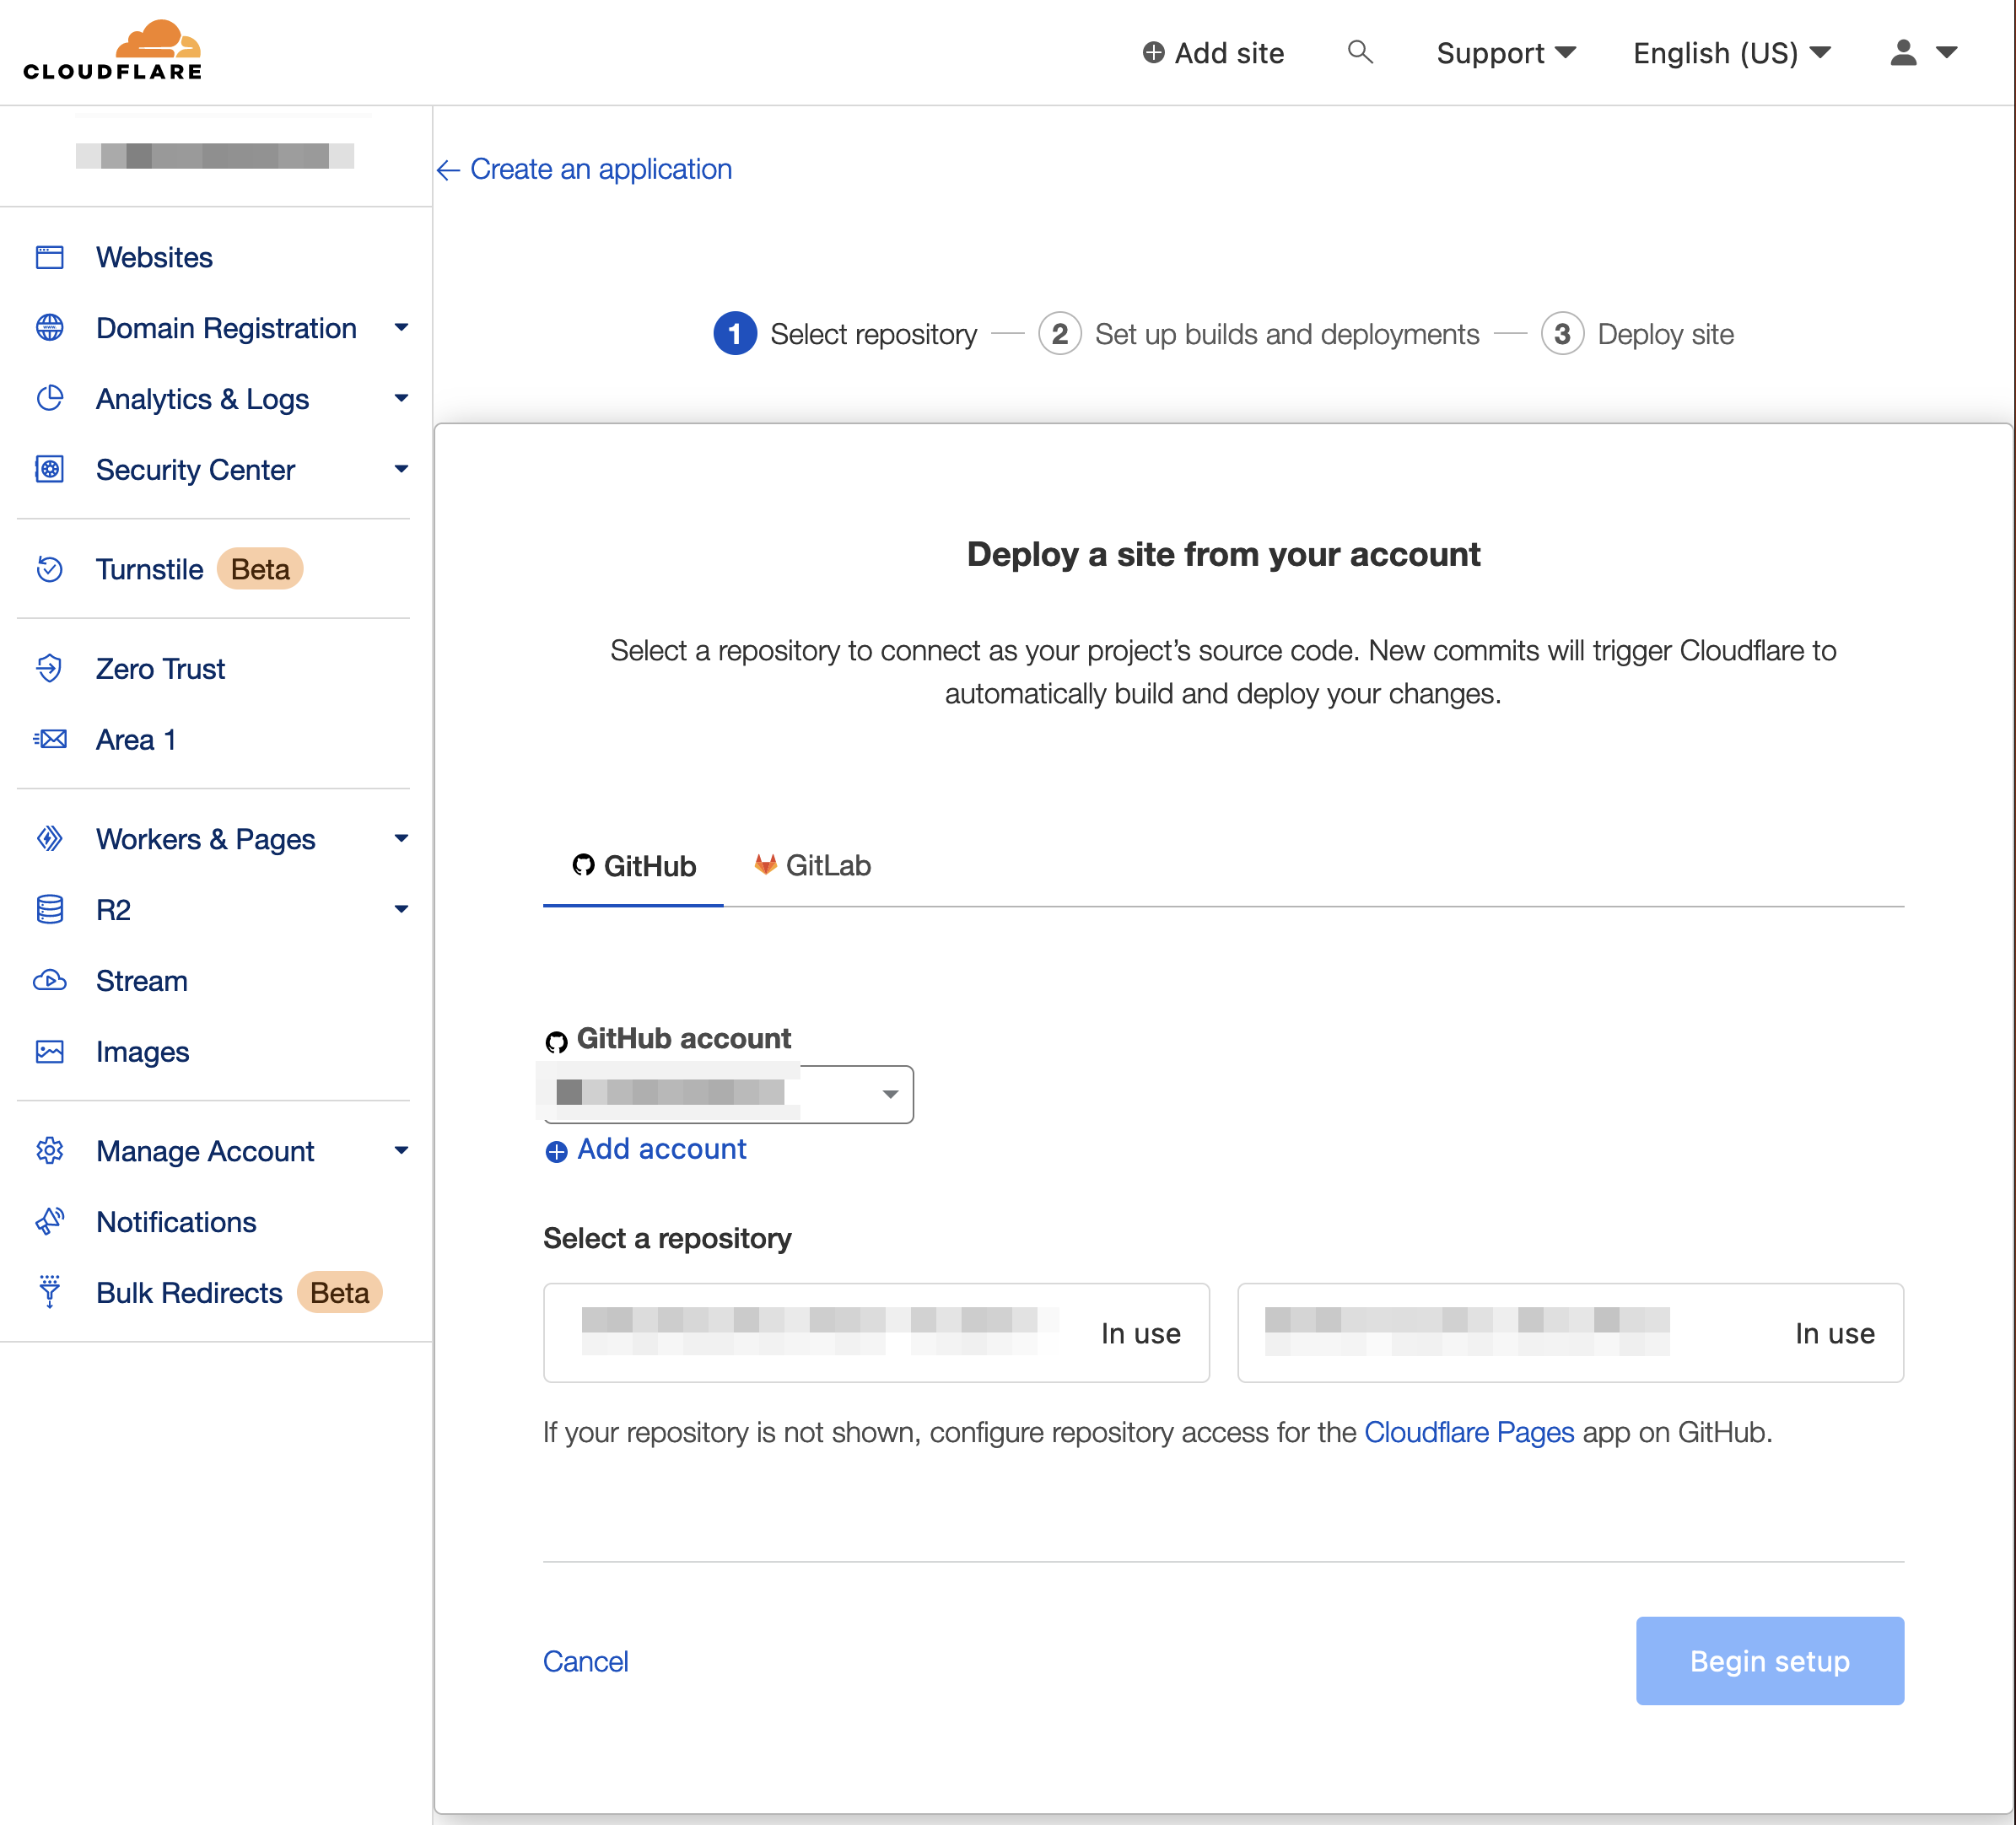
3. Select the Git repository
Connect GitHub or GitLab then choose the repository.
4. Set up builds and deployments.
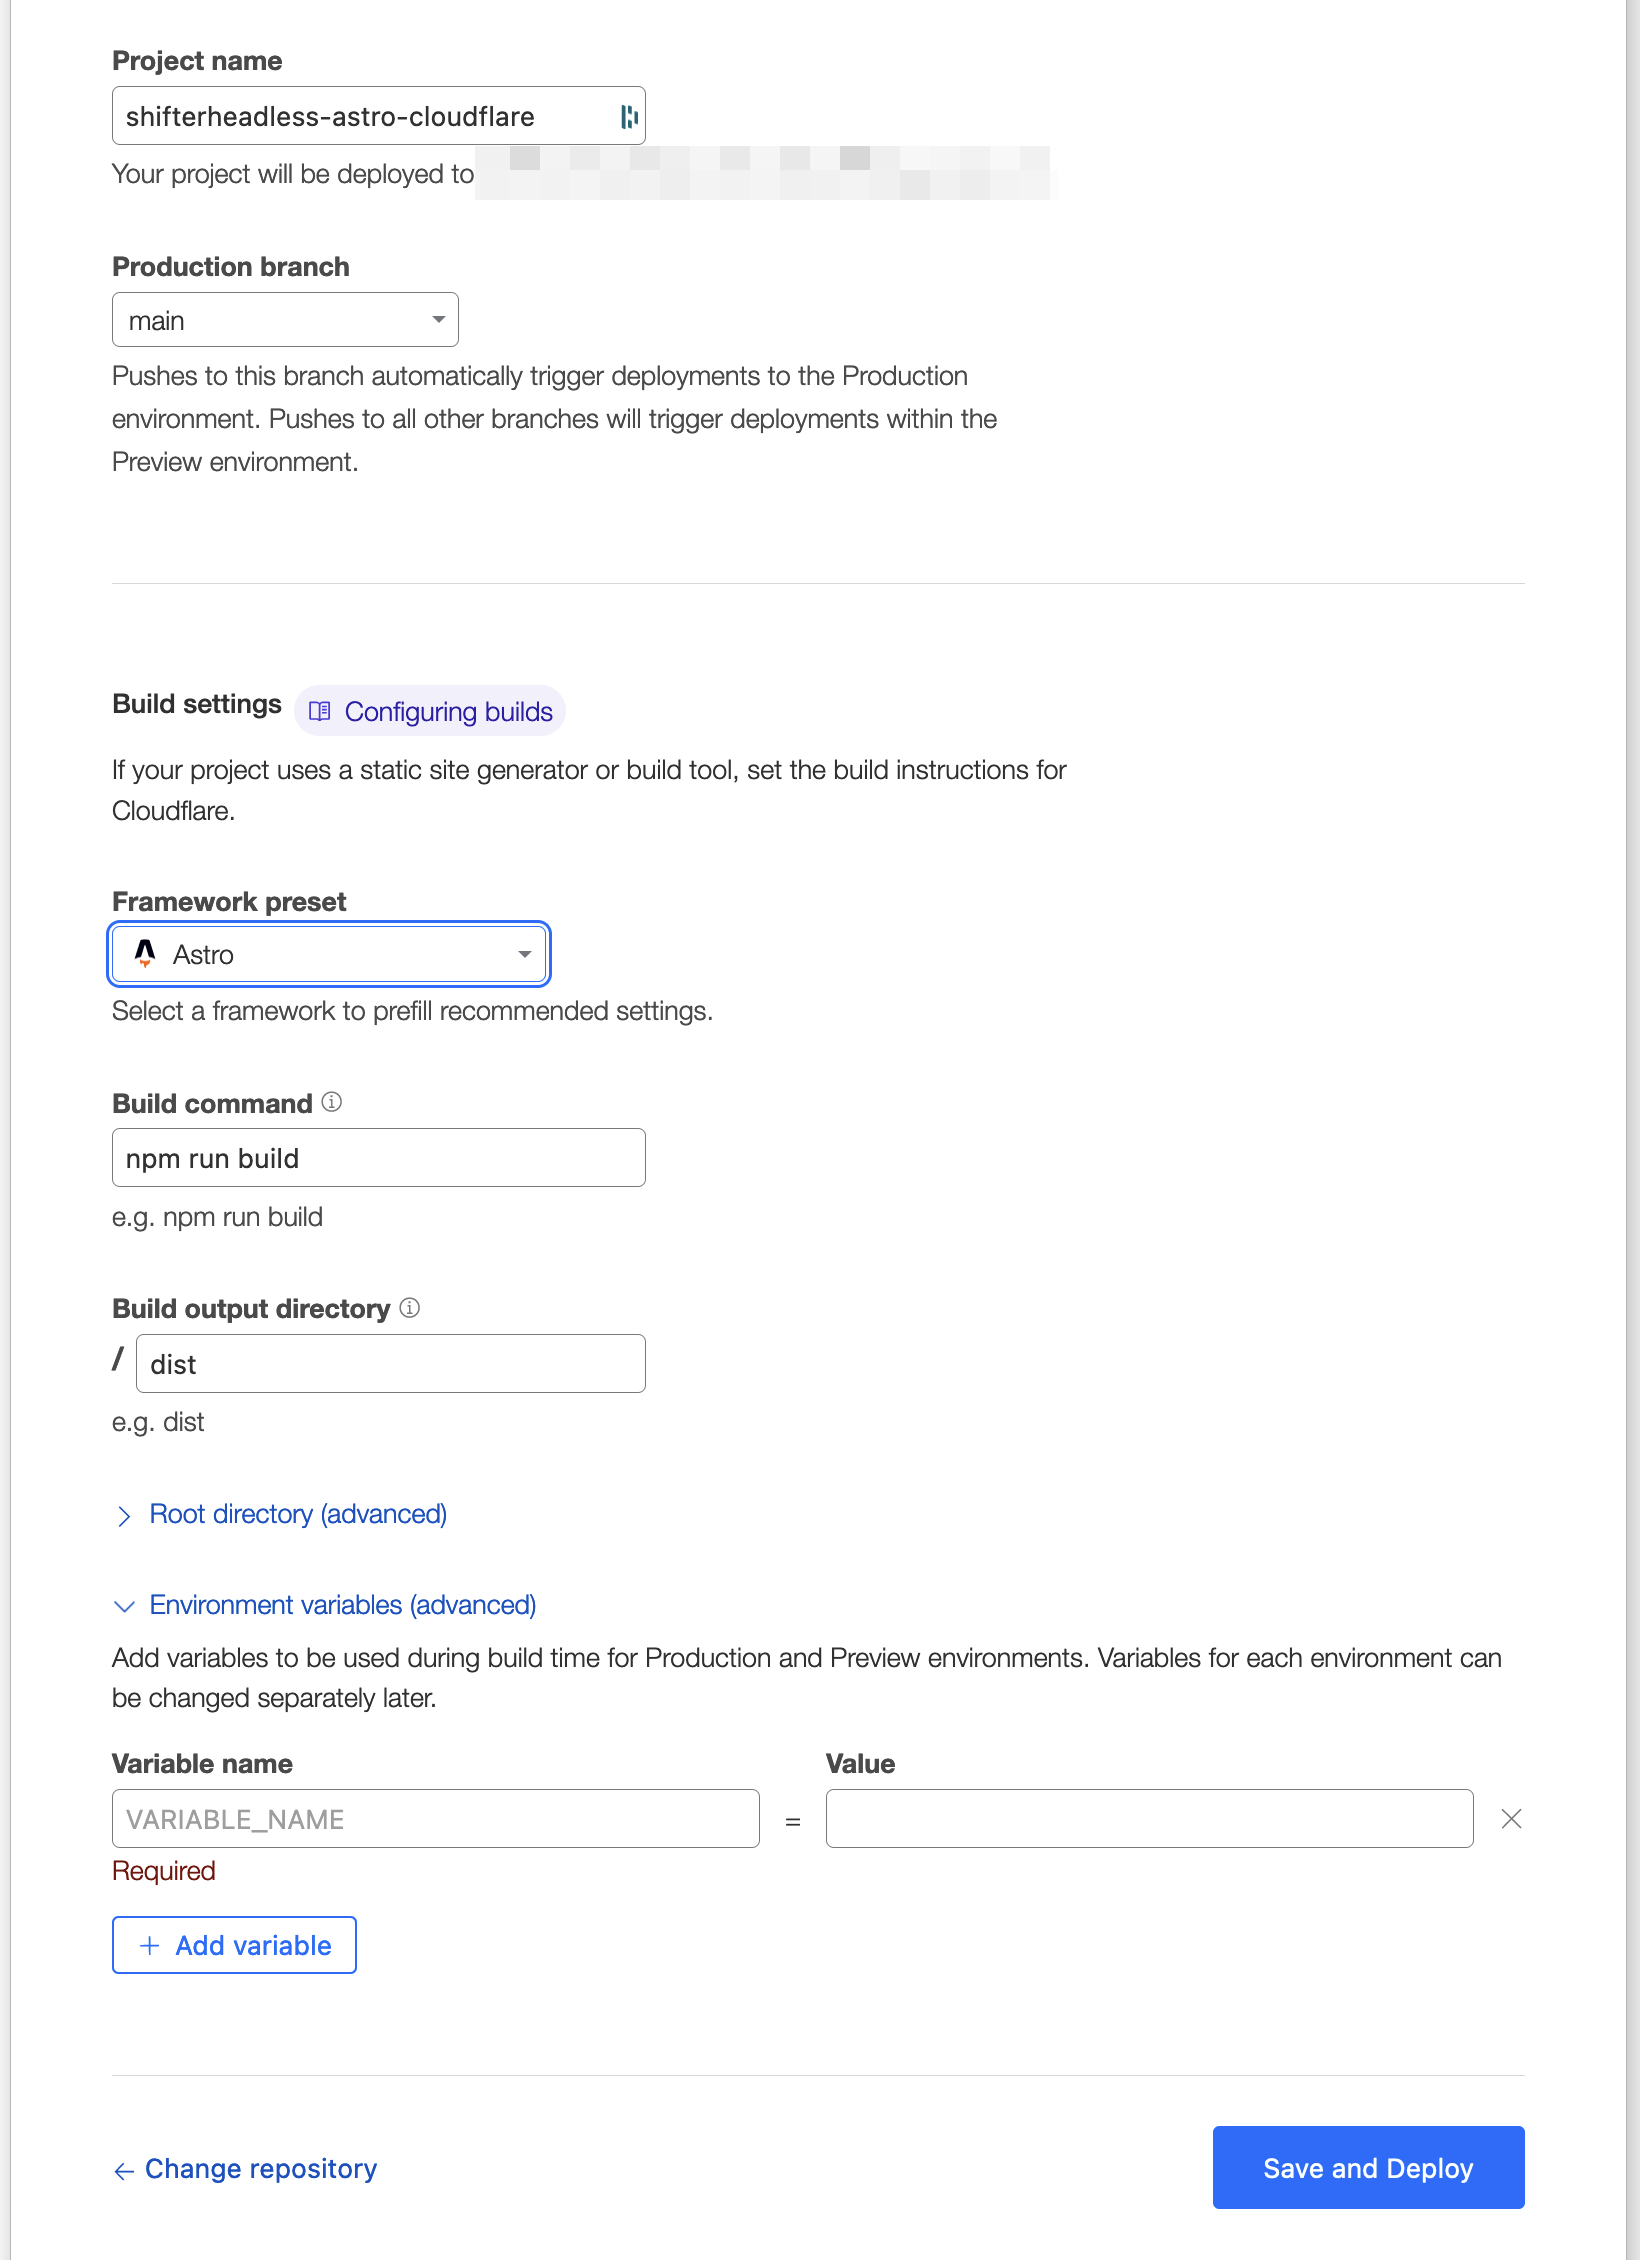
Environment variables
You can change the default version of node.js on the Cloudflare Pages by adding “Environment variables”
Astro requires Node.js version 16.12.0, so you’ll need to add the following:
Variable name: NODE_VERSION
Value: 20.2
5. Click [Save and Deploy] to continue.
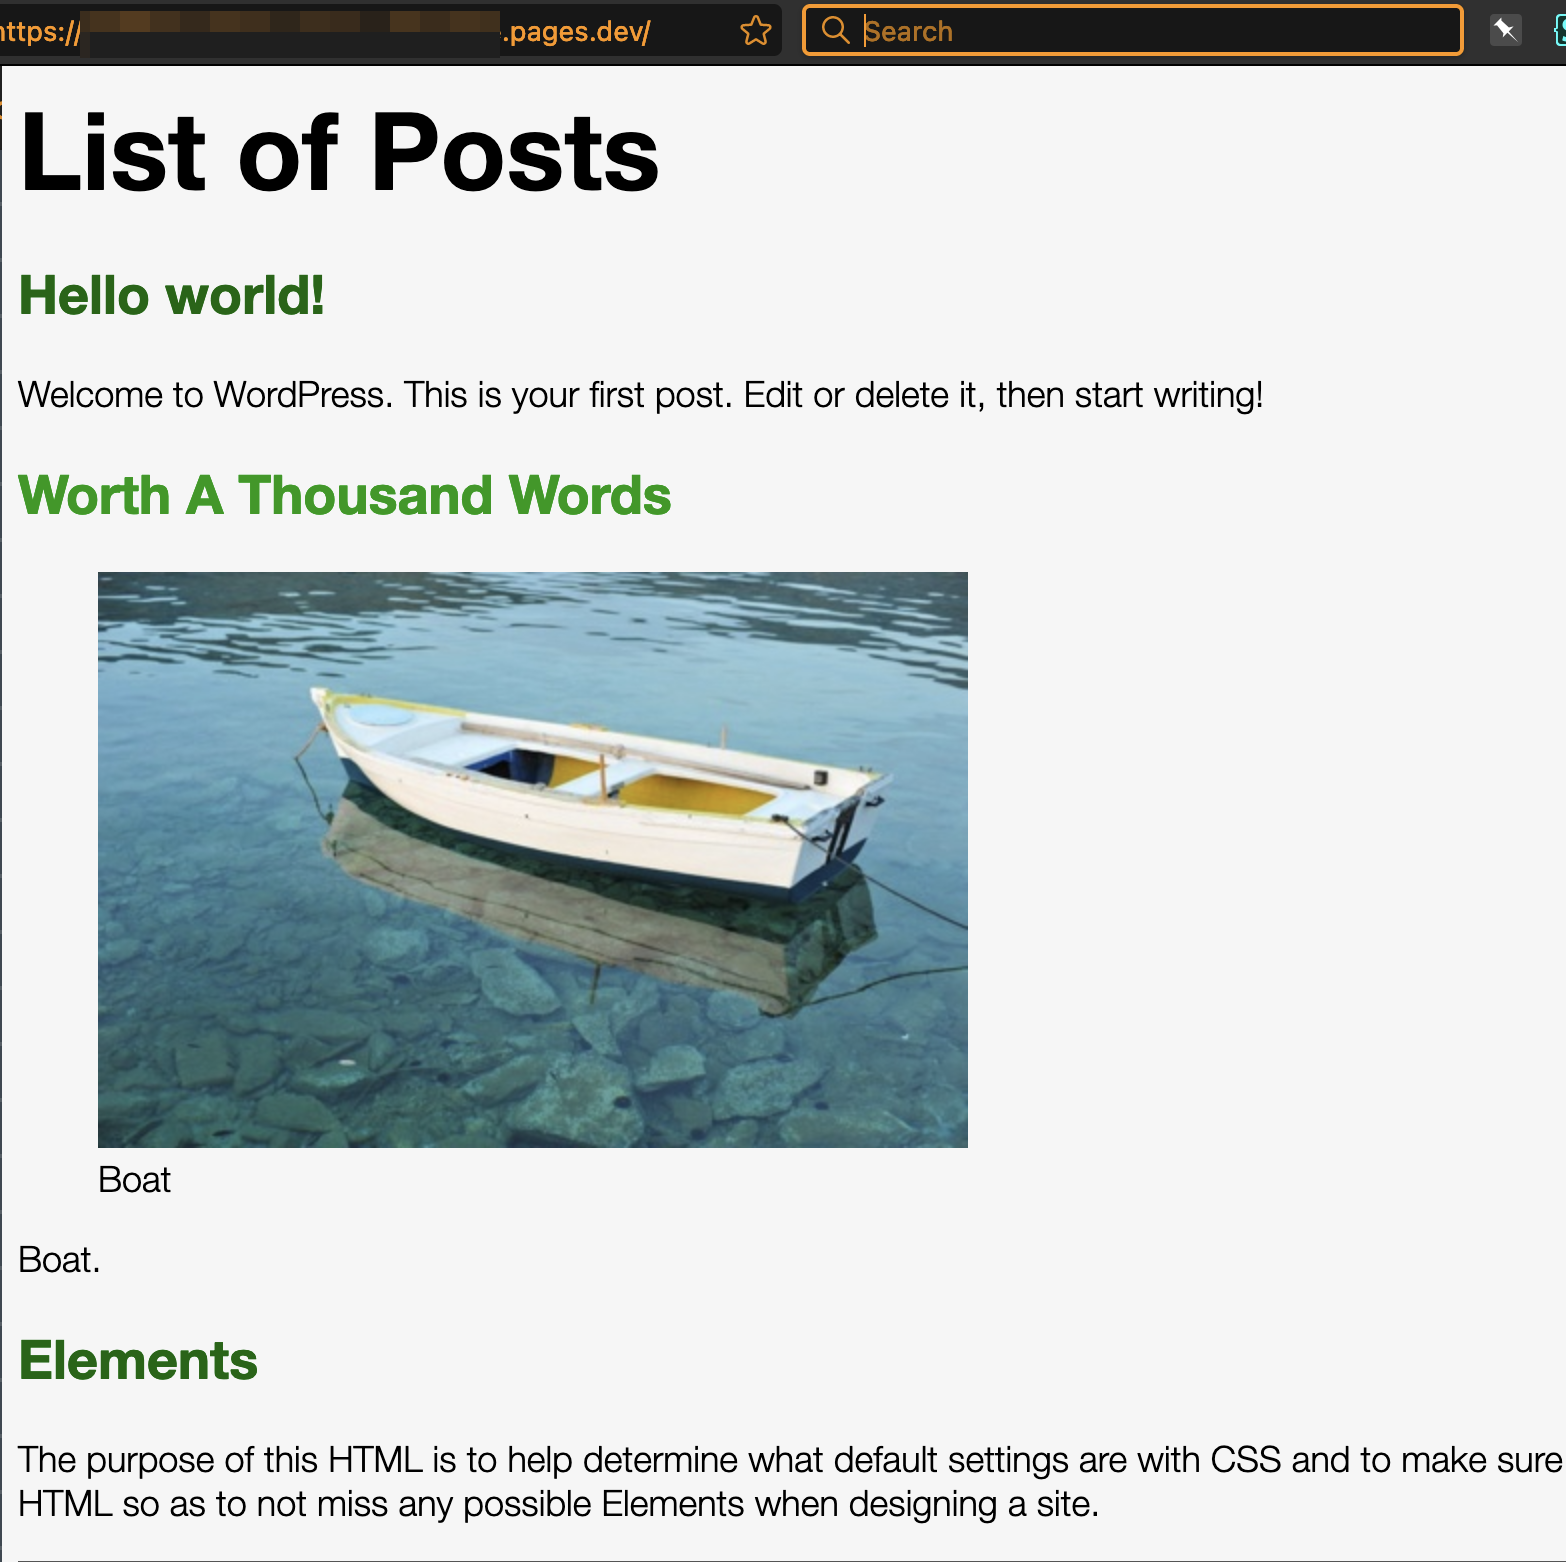
6. Cloudflare fetches the content and deploys it to the public
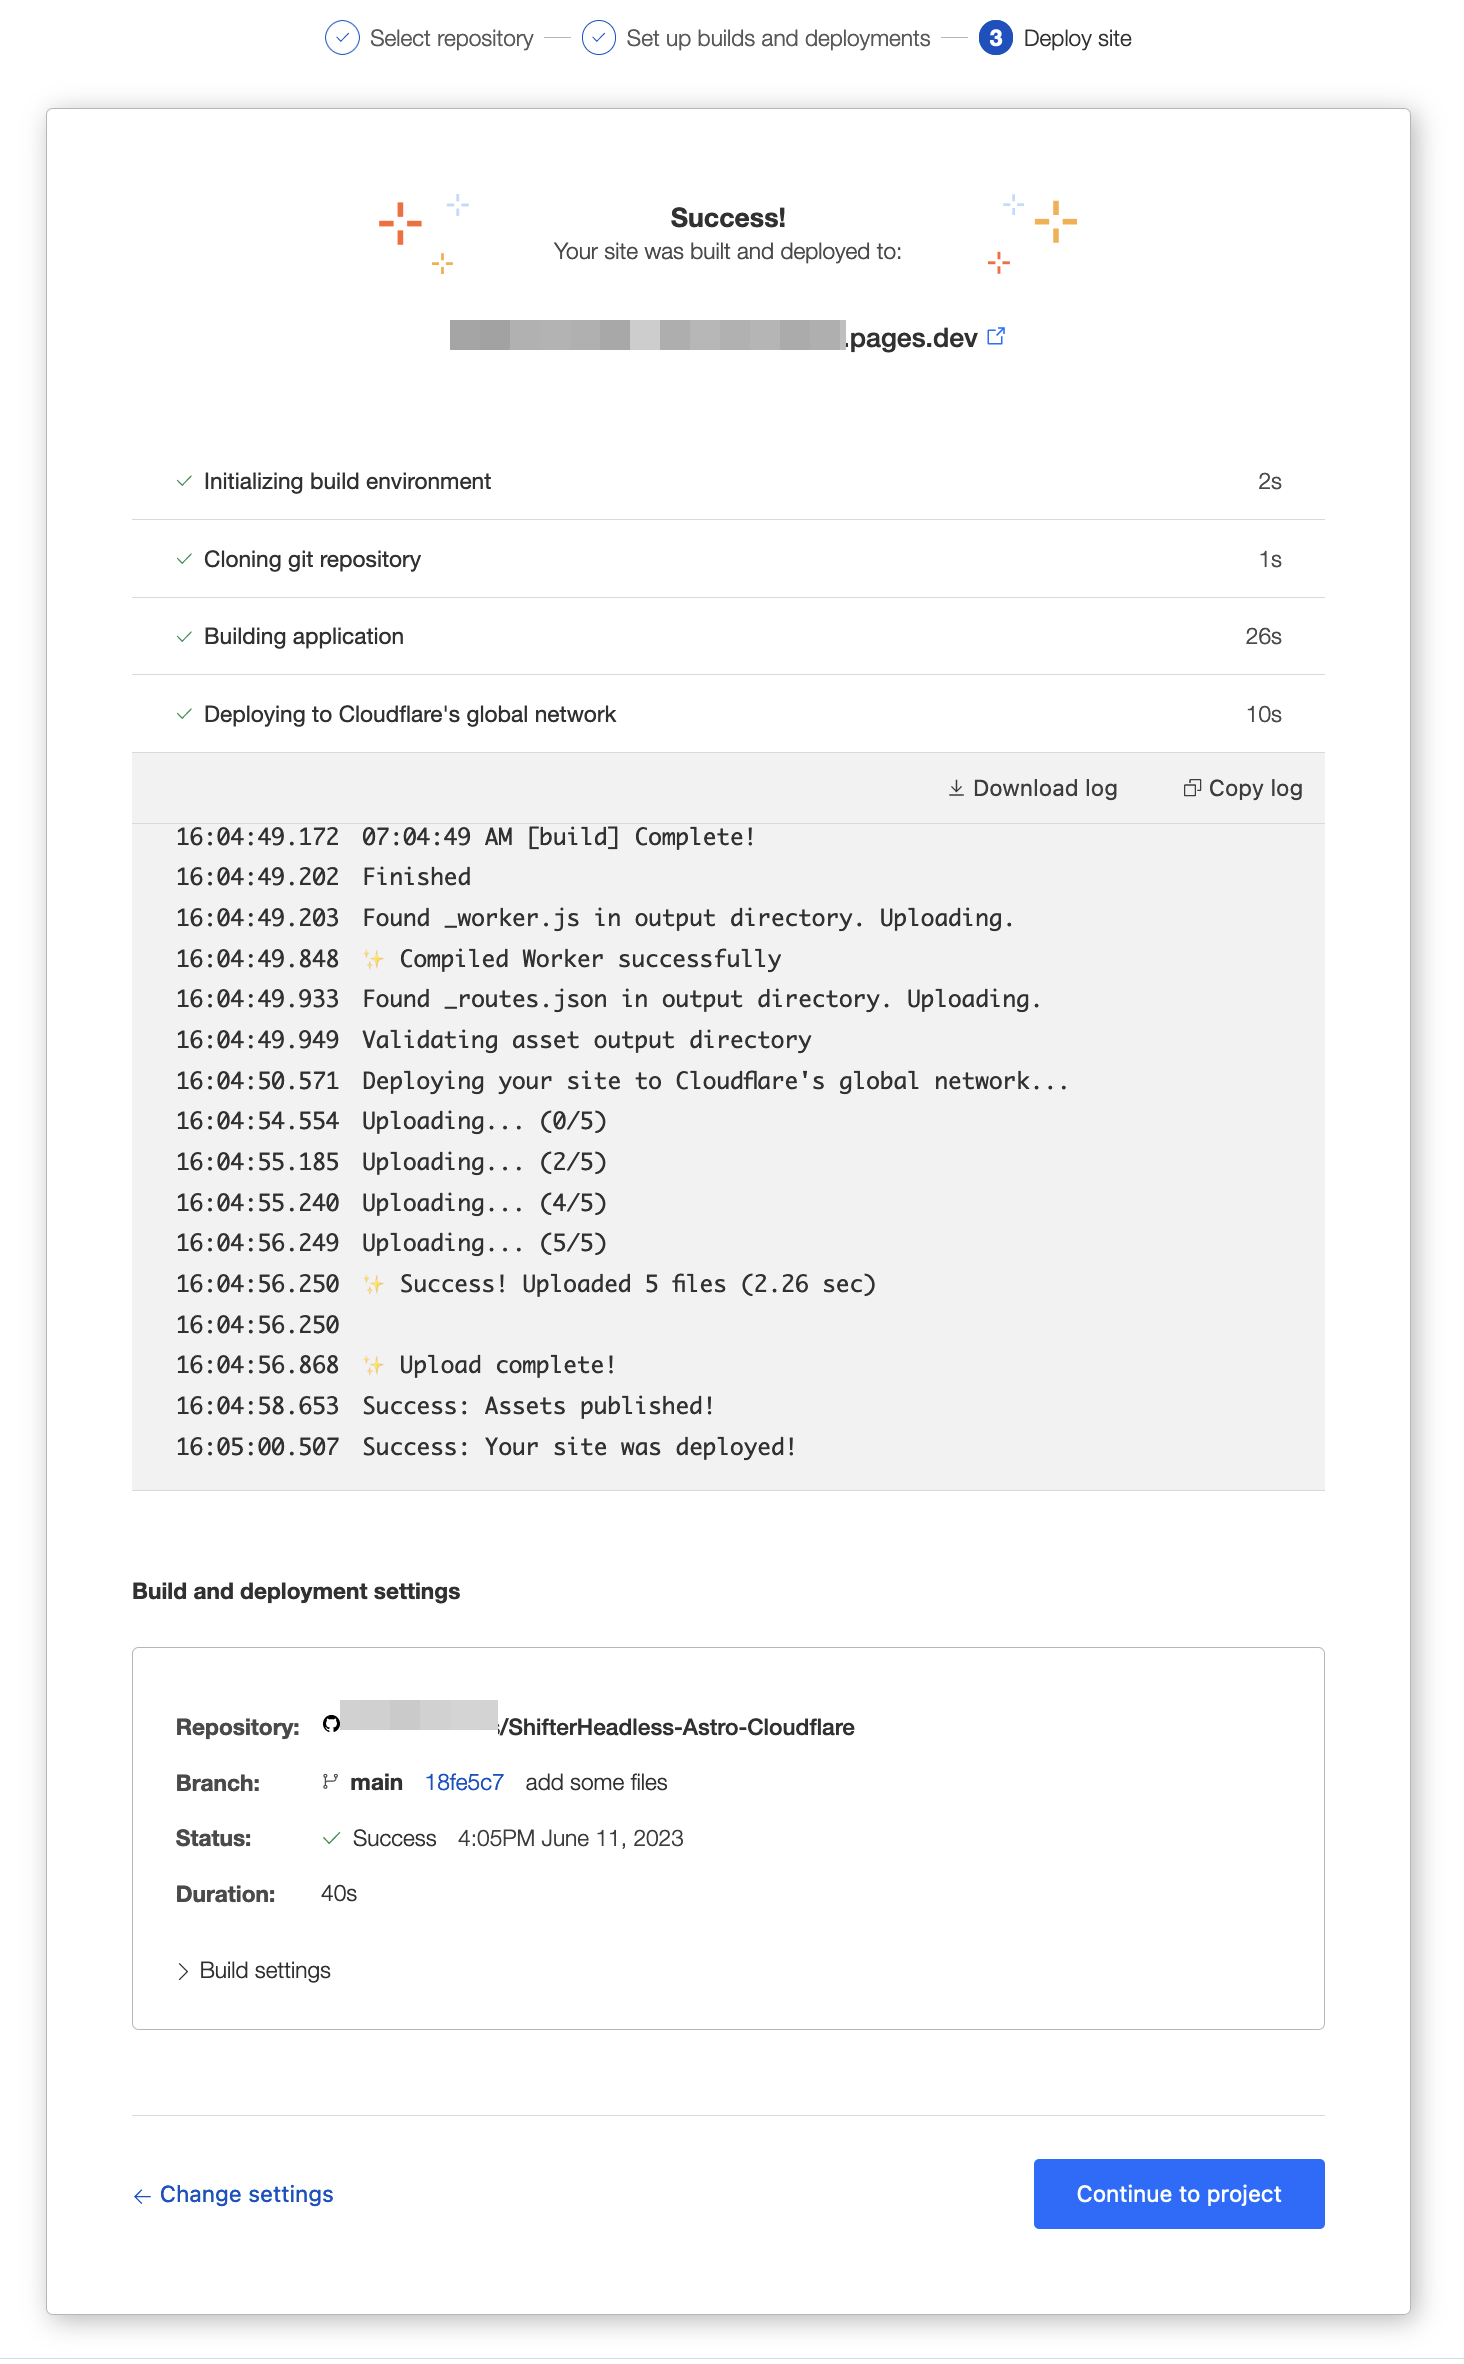
That’s all!