A walkthrough of each section and setting available on the Settings page of the Shifter dashboard.
Custom Domain
Custom Domain DNS Configuration
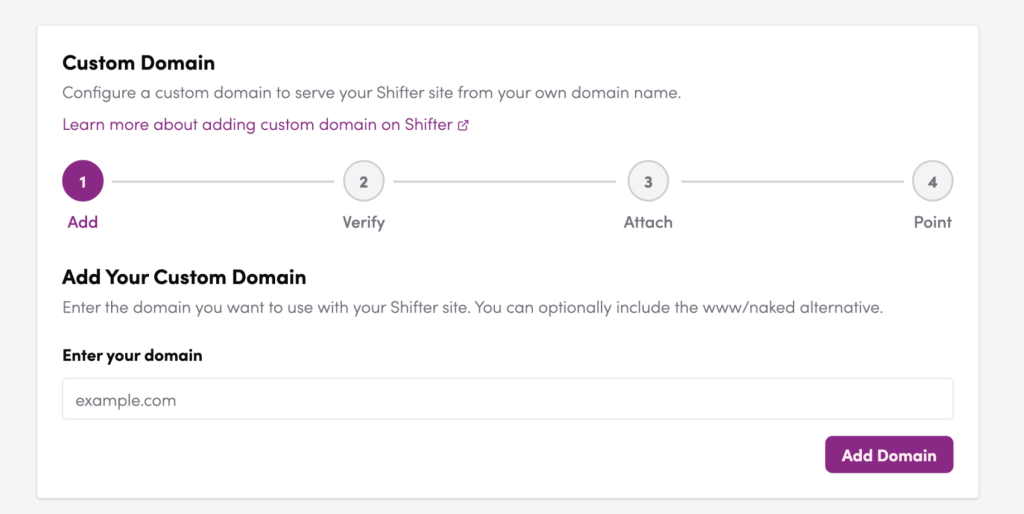
Configure a custom domain to serve your Shifter site from your own domain name.
Add Domain Click + Add Domain to register a new custom domain. The setup follows four steps:
| Step | Name | Description |
|---|---|---|
| 1 | Add | Enter your domain name |
| 2 | Verify | Confirm ownership of the domain |
| 3 | Attach | Link the domain to your Shifter site |
| 4 | Point | Update your DNS records to point to Shifter |
Domain Overview
Displays the status of your currently attached domains. The Primary domain is your main URL; the Alternate domain is typically the www variant. An Attached badge indicates the domain is connected successfully.
DNS Record Configuration
The DNS records required to point your domain to Shifter infrastructure are shown here.
| DNS Record Type | Name | Value |
|---|---|---|
| A (ALIAS) | @ (root domain) | CloudFront URL |
| CNAME | www | *.on.getshifter.io or CloudFront URL |
Auto Publish and Basic Authentication
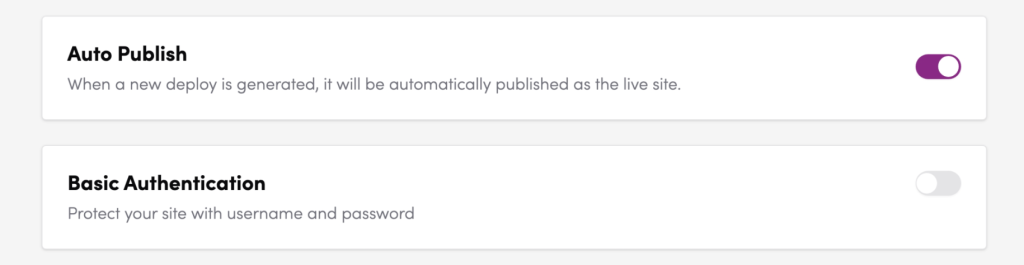
Auto Publish
Controls whether a newly generated deploy is automatically published as the live site.
- ON: The site goes live immediately upon deploy completion, with no manual step required.
- OFF (default): After a deploy is generated, you must manually click Publish to make it live.
Tip: For production sites, keeping this OFF is recommended to prevent unintended publishing.
Basic Authentication
Restricts access to the site with a username and password prompt. Useful for protecting sites under development or staging environments.
- ON: Visitors must enter credentials to access the site.
- OFF (default): The site is publicly accessible without authentication.
Username — The username for authentication. Use the Copy button to copy it to your clipboard.
Password — The password for authentication. Use the Copy button to copy it to your clipboard.
Note: The username and password are system-generated and cannot be changed manually.
Auto Backup, Delete Protection, Subdirectory Publishing, Algolia Search, and Media CDN
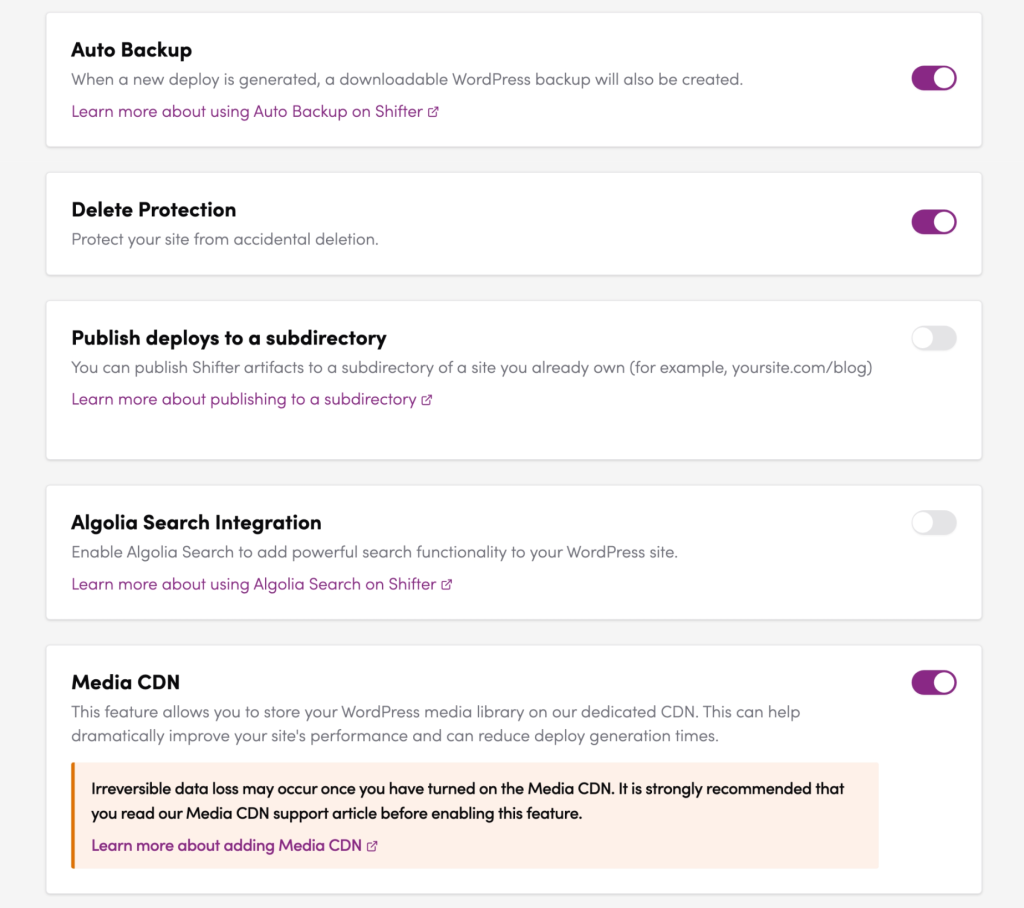
Auto Backup
Automatically creates a downloadable WordPress backup file each time a new deploy is generated.
- ON: A backup is generated with every new deploy.
- OFF (default): No automatic backup is created.
For more details, see Automating Your WordPress Backups.
Delete Protection
Prevents accidental deletion of your site.
- ON: The Delete Site button is locked and cannot be used.
- OFF (default): Site deletion is permitted.
Recommended: Always keep this ON for production sites.
Publish Deploys to a Subdirectory
Allows you to publish Shifter artifacts to a subdirectory of a domain you already own — for example, yoursite.com/blog.
- ON: Subdirectory publishing is enabled (additional configuration required).
- OFF (default): Artifacts are published to the root domain.
For more details, see Subdirectory Publishing.
Algolia Search Integration
Integrates Algolia’s hosted search service into your static WordPress site for fast, powerful full-text search.
- ON: Algolia Search is enabled on your site.
- OFF (default): Standard WordPress search is used.
For more details, see the Algolia documentation.
Media CDN
Stores your WordPress media library on Shifter’s dedicated CDN, which can significantly improve site performance and reduce deploy generation times.
- ON: Media files are migrated to the CDN. This action cannot be undone.
- OFF (default): Standard WordPress media storage is used.
⚠️ Important: Irreversible data loss may occur once you have turned on the Media CDN. It is strongly recommended that you read the Media CDN support article before enabling this feature.
Access Logs and Generate Notifications
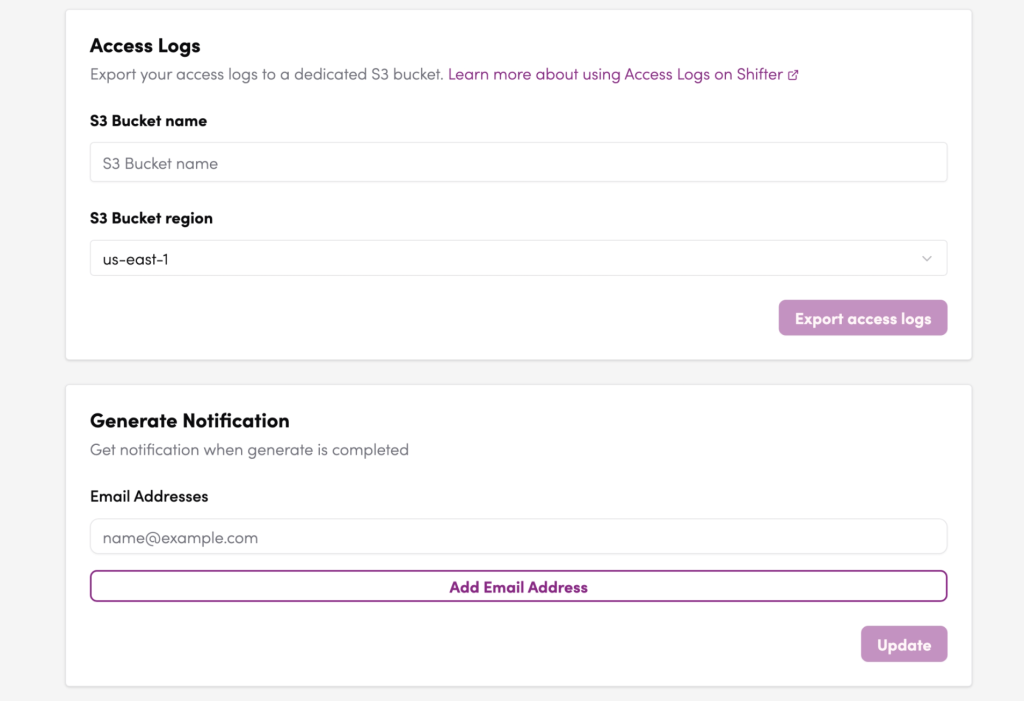
Access Logs
Exports your site’s access logs to a dedicated Amazon S3 bucket. Useful for traffic analysis and security auditing.
- S3 Bucket name — Enter the name of your S3 bucket as the export destination.
- S3 Bucket region — Select the AWS region of your S3 bucket from the dropdown (e.g.,
us-east-1,ap-northeast-1). - Export access logs — Click this button to begin exporting logs to the specified S3 bucket.
Generate Notification
Sends an email notification when a deploy (generate) has completed.
Email Addresses — Enter the email addresses to receive notifications. Click Add Email Address to register multiple recipients. Click Update to save your changes.
Webhooks
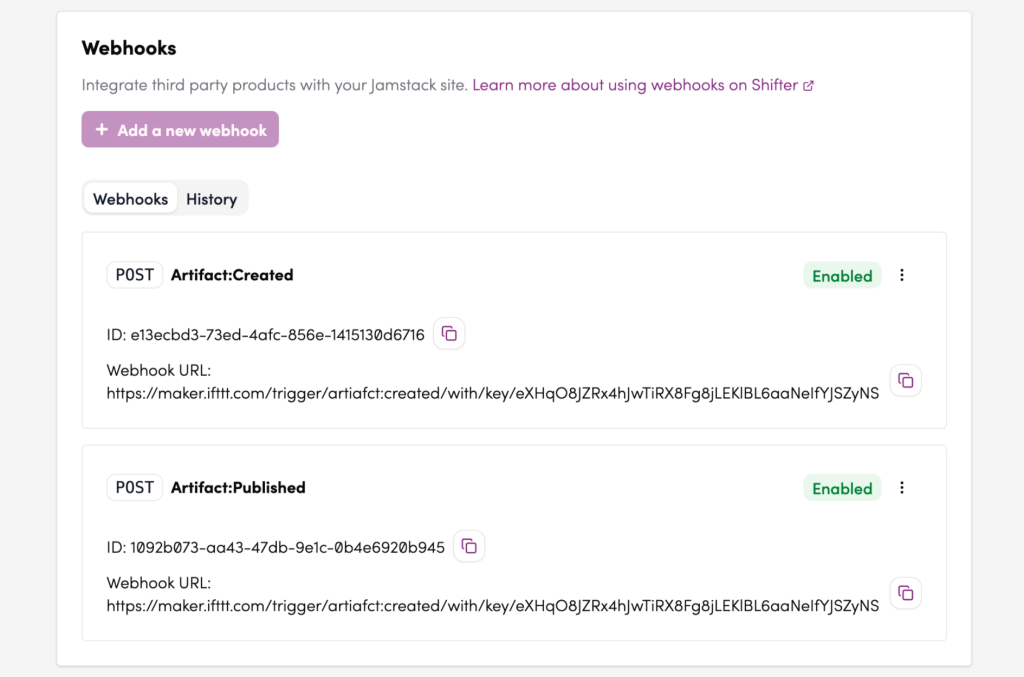
Webhook Integration
Connects third-party services to your Jamstack site by sending HTTP requests when specific events occur.
+ Add a new webhook — Click this button to create a new webhook.
The Webhooks tab lists all configured webhooks. Each entry shows:
- HTTP method (e.g.,
POST) - Event trigger (e.g.,
Artifact:Created,Artifact:Published) - Status (
Enabled/Disabled) - Webhook ID — a unique identifier for the webhook
- Webhook URL — the endpoint that receives the HTTP request
The History tab shows the delivery log for each webhook.
Site Transfer and Deletion
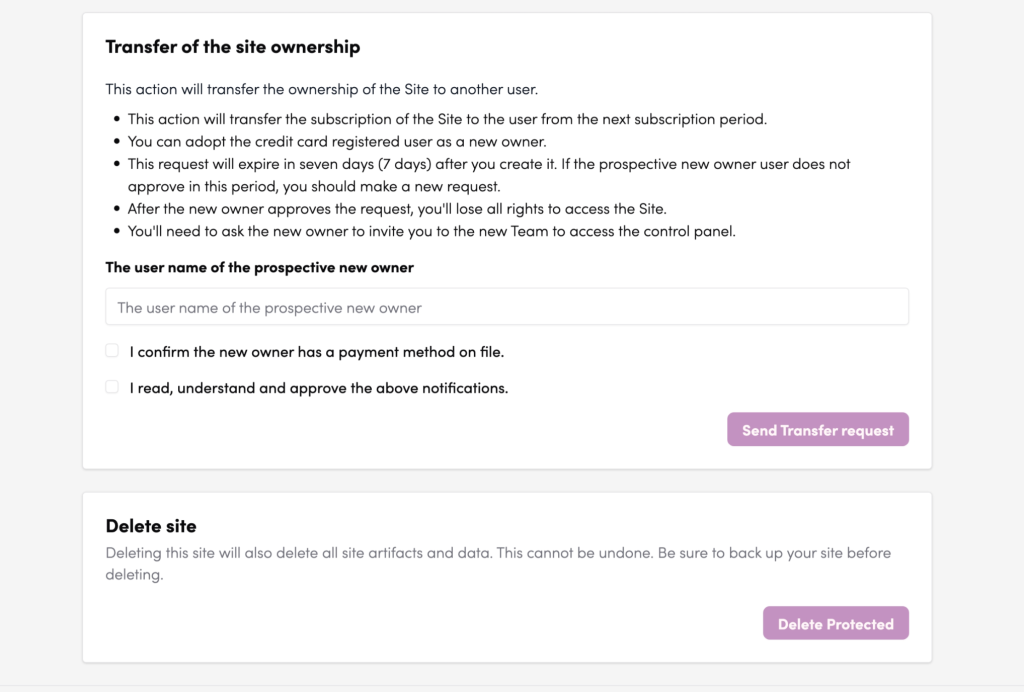
Transfer of Site Ownership
Transfers ownership of the site to another Shifter user. Note the following conditions before proceeding:
- The subscription transfers to the new owner at the start of the next billing period.
- The prospective new owner must have a payment method on file.
- The transfer request expires after 7 days if not approved. A new request must be submitted if it lapses.
- Once the new owner approves, you permanently lose all access rights to the site and team.
How to submit a transfer request:
- Enter the username of the prospective new owner in the text field.
- Check “I confirm the new owner has a payment method on file.”
- Check “I read, understand and approve the above notifications.”
- Click Send Transfer request.
Delete Site
Permanently deletes the site along with all its artifacts and data. This action cannot be undone.
⚠️ Warning: Always back up your site before deleting it. The Delete button is only available when Delete Protection is turned OFF.