
We’re continuing our series introducing you to different ways you can mix and match solutions with Shifter. We’ve showed you how frameworks like Ionic, Microsoft Azure, Frontity, and other frameworks can be used to create unique solutions that perfectly fit your Jamstack project needs.
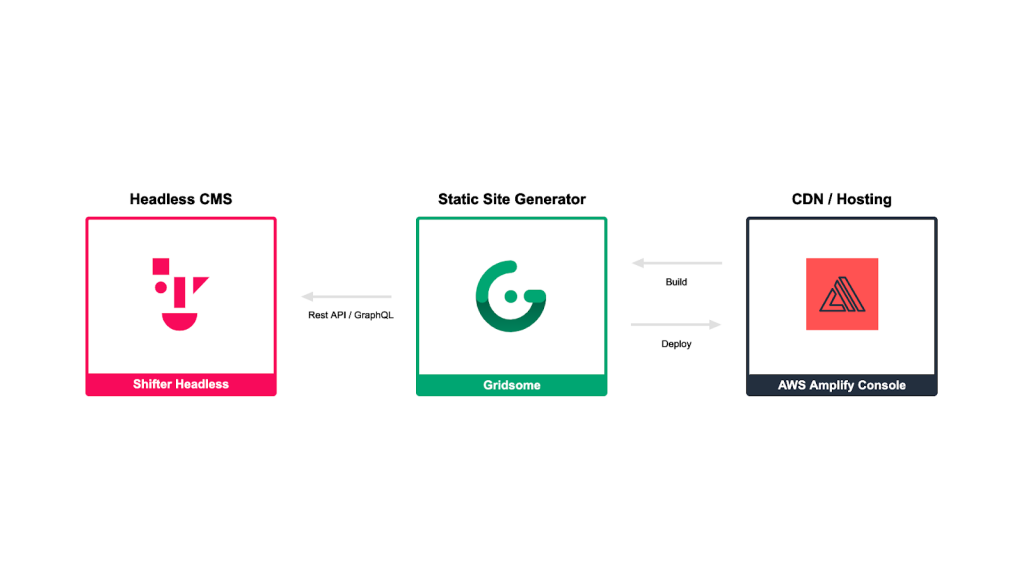
In this article, we’ll talk about another solution using Gridsome with Shifter Headless.
Gridsom is a static site generator built using Vue.js. Similar to Gatsby in the same way Gatsby is built on React. It’s a perfect example how extending JavaScript frameworks and solutions to create completely new tools and ecosystems is possible.
We’ll be using Gridsome for our front-end, Shifter Headless as our headless CMS, and AWS Amplify for hosting.
Before you start
We’ll be following along with the official support document for developing and Shifter Headless and Gridsome and deploying to AWS Amplify Console. Be sure to check the doc for full instructions and more details.
Before we begin, take some time to sign up and familiarize yourself with the following services.
Let’s try it out!
Start Shifter Headless and Prepare Your Data Source
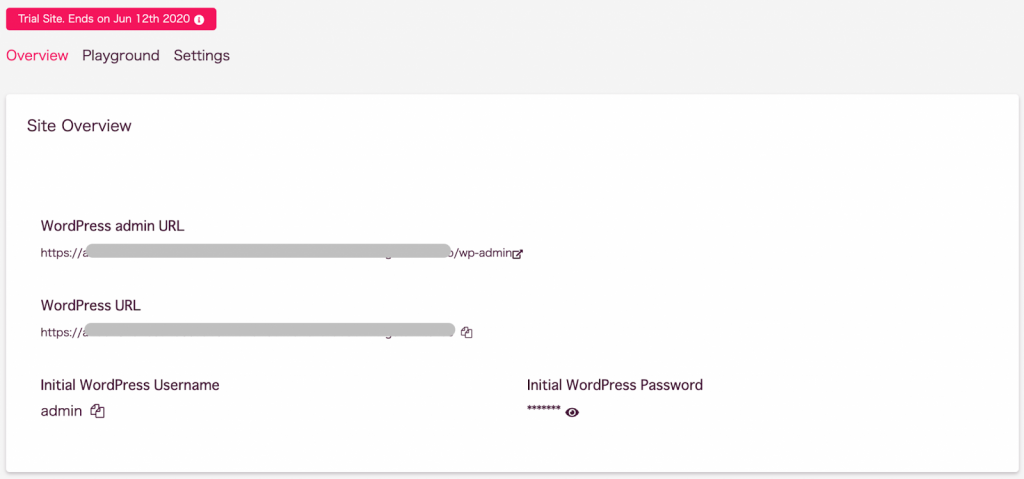
Choose an existing Shifter Headless site or create a new one. If you need to create a new site, you can find instructions on how to do so by using our official support guide.
Launch the site with Shifter Headless and click WordPress admin URL to start WordPress.
Since we’re going to be using Gridsome, go ahead and create a new post.
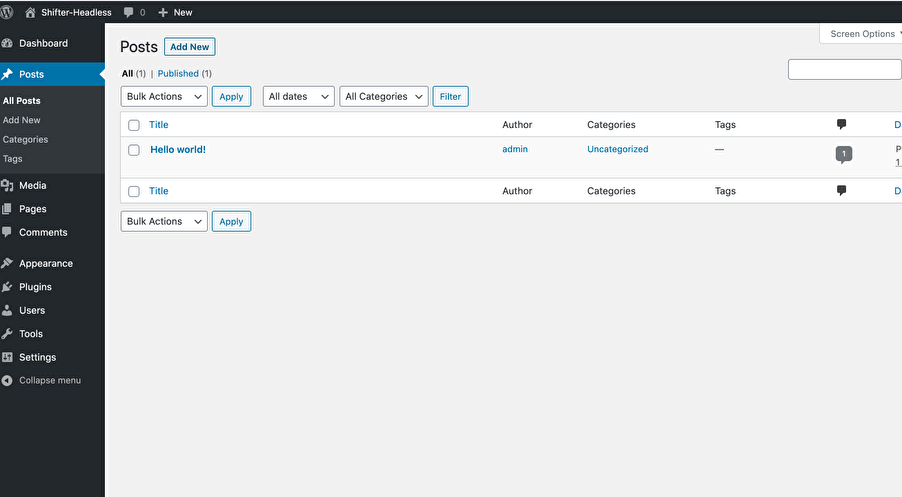
Make sure to set a tag and featured image for your new post. This is important because Gridsome requires these values when running a GraphQL query.
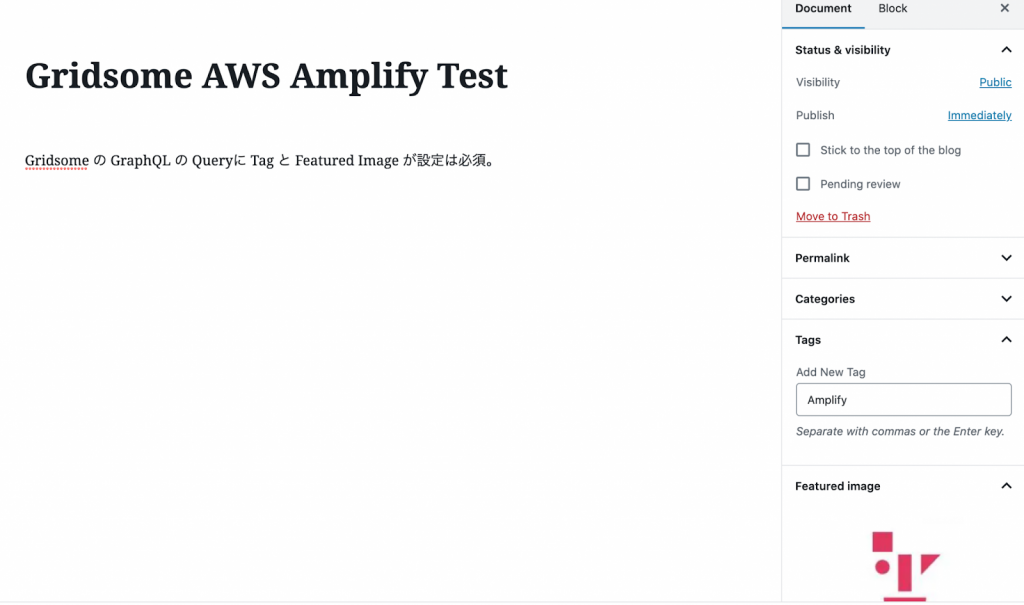
Once you’ve completed filling in the required information, publish your post.
Return to the Shifter Headless dashboard screen Copy your WordPress URL, you’ll need this to set up Gridsome.
Create a new GitHub repository
Go to GitHub and create a new repository.
You can name the repository anything you want, but for our example, we’ll follow the support documentation and use “shifterheadless- gridsome-aws-amplify”.
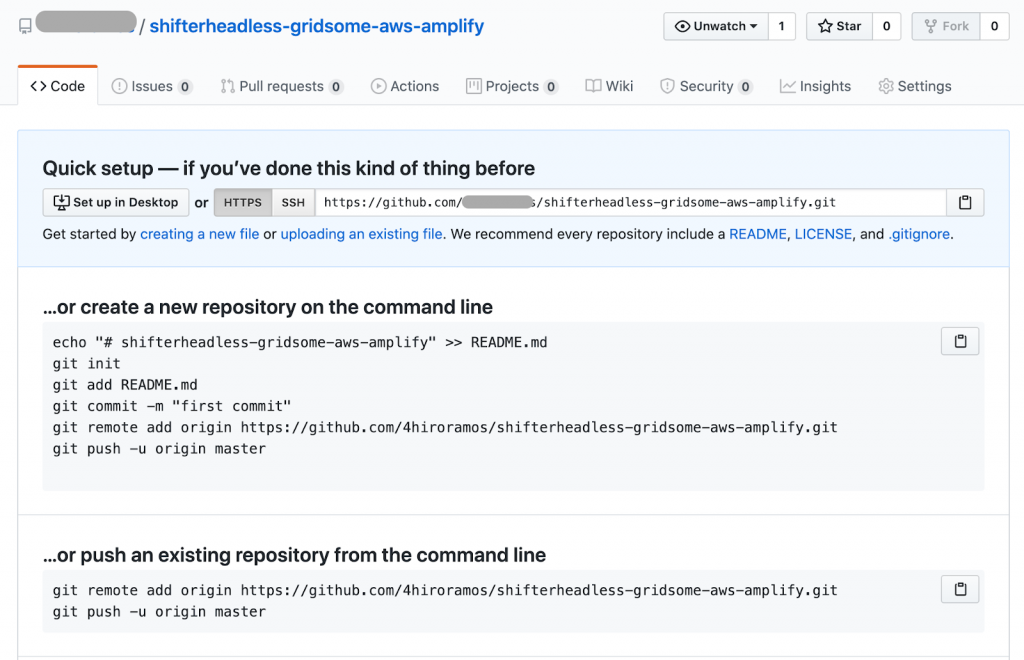
When you have finished creating your repository, copy the repository URL.
The repository URL should be
git@github.com:YOUR-GITHUB-ACCOUNT/ shifterheadless-gridsome-aws-amplify.git
or
https://github.com/YOUR-GITHUB-ACCOUNT/ shifterheadless-gridsome-aws-amplify.git
Create a new local Gridsome project.
Node.js is required to install the Gridsome CLI. If you do not have it installed, you’ll need to install it before you can continue.
There are a few ways you can install Node
Install via homebrew with nodebrew
When you’re ready, install the Gridsome CLI in your local environment with the following command.
$ npm install --global @gridsome/cliNext, create a new Gridsome project
$ gridsome create shifterheadless-gridsome-aws -amplify wordpressThe name of the project we used this time is “shifterheadless-gridsome-aws -amplify”, so we’ll run it here.
After running this command, navigate to the directory the project was created in
$ cd shifterheadless-gridsome-aws-amplifyNow, you can initialize and set up git for your project
$ git initNext, you need to add the remote URL as the origin of your repository.
Copy the url of the Github repository you created earlier and use it here.
$ git remote add origin git@github.com:YOUR- GITHUB-ACCOUNT/shifterheadless-gridsome-aws -amplify.gitor
$ git remote add origin https://github.com/YOUR- GITHUB-ACCOUNT/shifterheadless-gridsome-aws -amplify.gitIn your Gridsome project, you’ll find a file called gridsome.config. Open this file and look for the baseURL. We’re going to update this value in order to connect your Gridsome project to your WordPress backend. Use the WordPress URL that you copied from your Shifter dashboard and make the following changes.
module.exports = {
  siteName: 'Gridsome',
  siteDescription: 'A WordPress starter for Gridsome',
  templates: {
  WordPressCategory: '/category/:slug', // adds a route for the "category" post type (Optional)
   WordPressPost: '/:year/:month/:day/:slug', // adds a route for the "post" post type (Optional)
    WordPressPostTag: '/tag/:slug' // adds a route for the "post_tag" post type (Optional)
  },
  plugins: [ {}
    {
      use: '@gridsome/source-wordpress',
      options: {
    baseUrl: "https://YOUR-WORDPRESS-URL. getshifter.co",
        typeName: 'WordPress', // GraphQL schema name ( Optional)
      }
    }
  ]
}
When you have finished editing the file, save it and check it in your local version by running
$ gridsome developRun the deployment command and when it’s complete, you should see the following
Site running at:
– Local: http://localhost:8080/
– Network: http://192.168.3.2:8080/
Explore GraphQL data at: http://localhost:8080 /___explore
Use your browser and check http://localhost:8080/.
If everything looks ok, click the ctrl+C simultaneously to stop the server and then run the build command.
$ gridsome buildThen commit the file and push it to Git.
$ git add .
$ git commit -m "first deployment"
$ git push origin master
Deploy to the AWS Amplify Console.
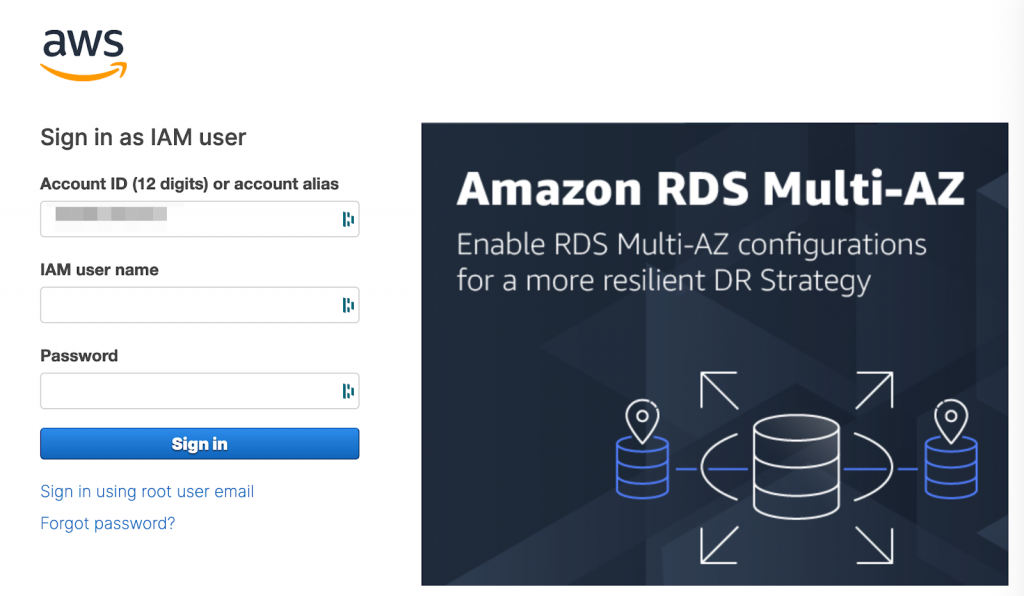
Click on “Connect Application” and login to the AWS console and log in.
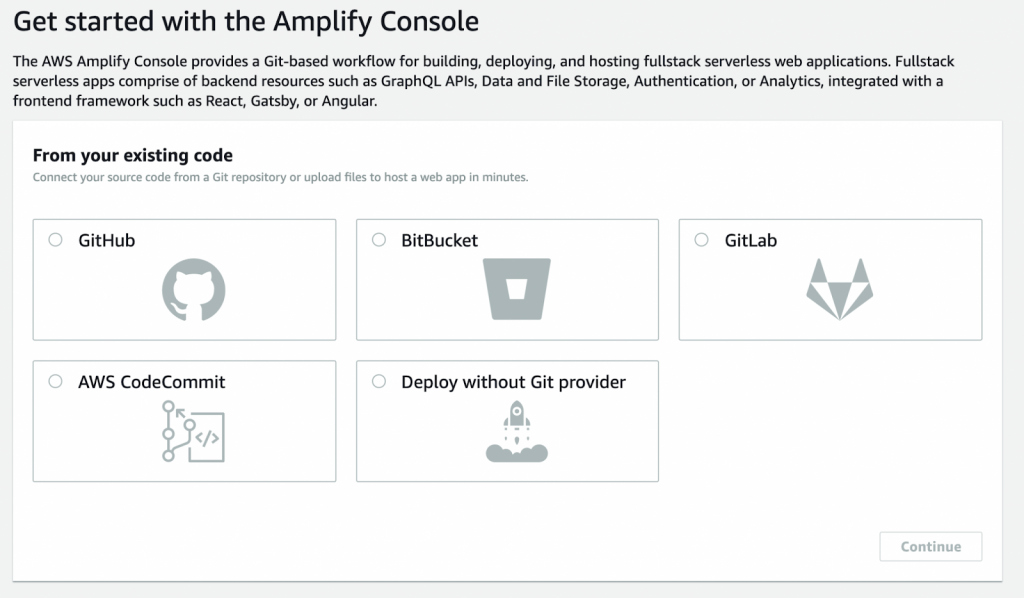
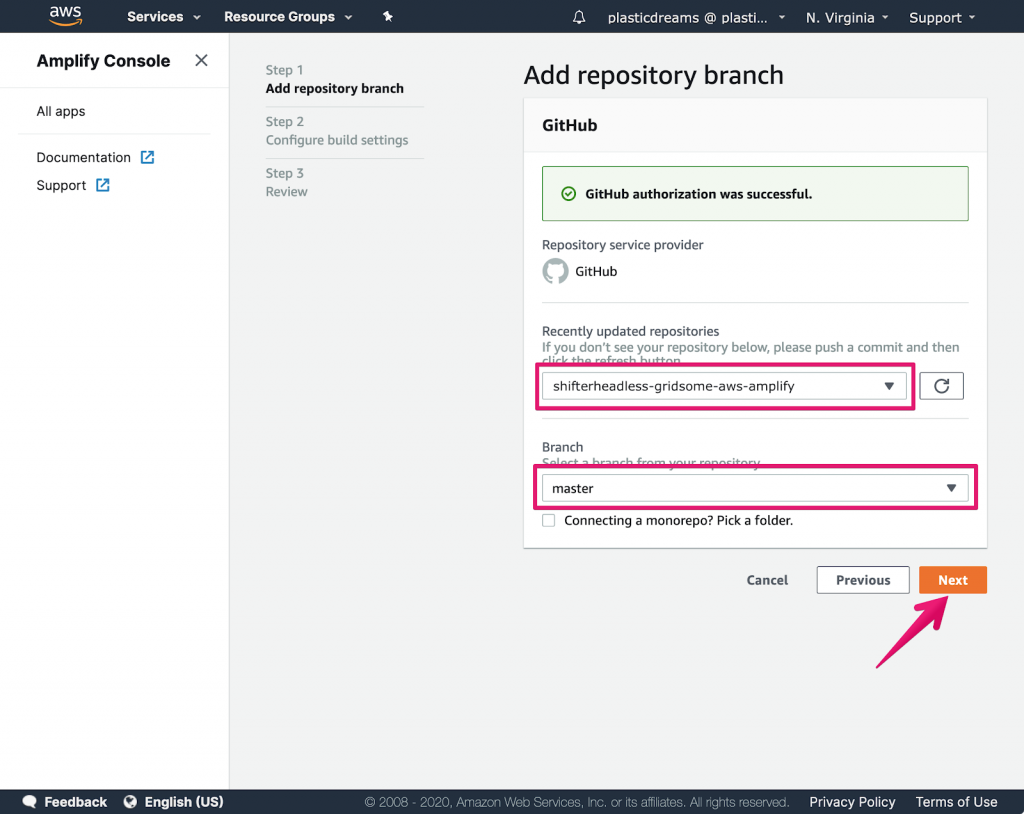
After logging in to the AWS console, you will be prompted to choose the connection destination, Choose Github and proceed with setup as prompted.
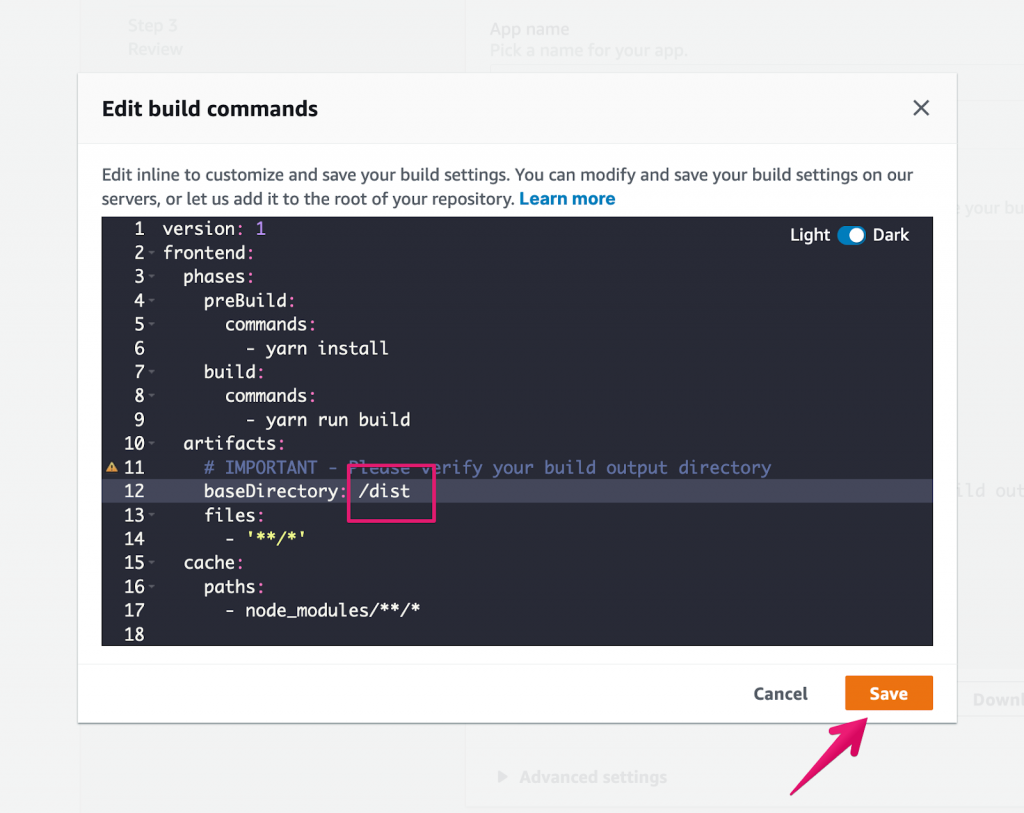
Click Edit and change “baseDirectory: /” to “baseDirectory Edit to : /dist”.
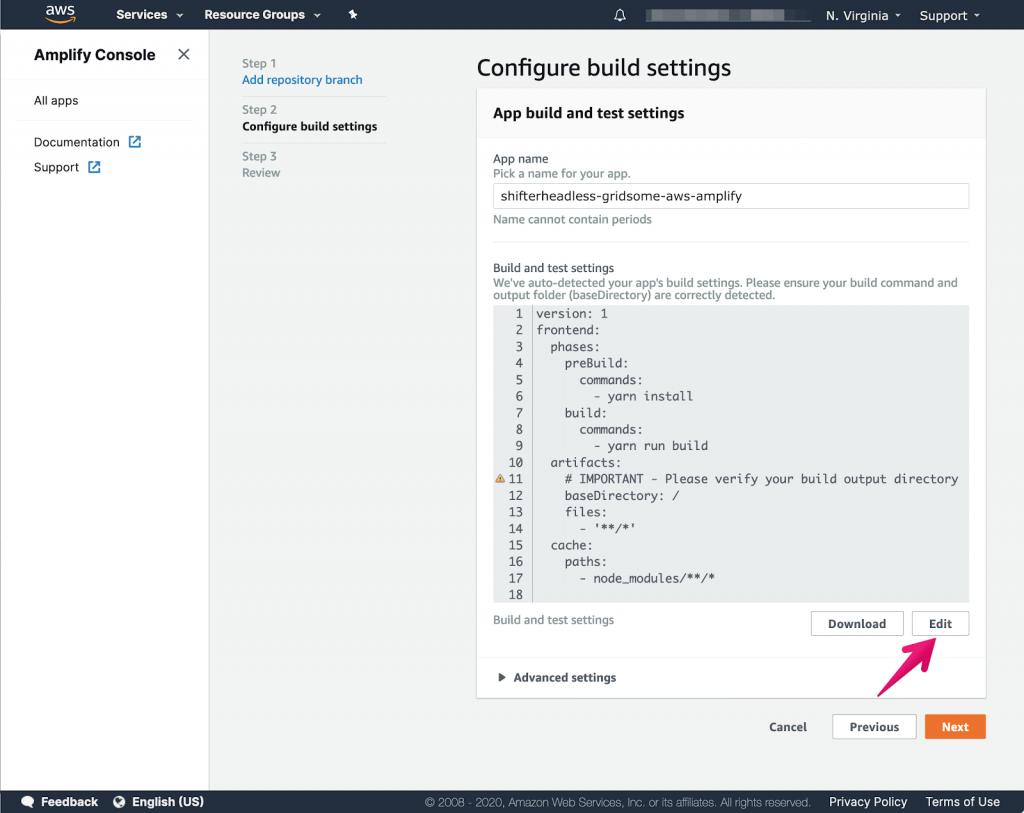
The reason we’re making this update is because all the data will be built under the dist directory.
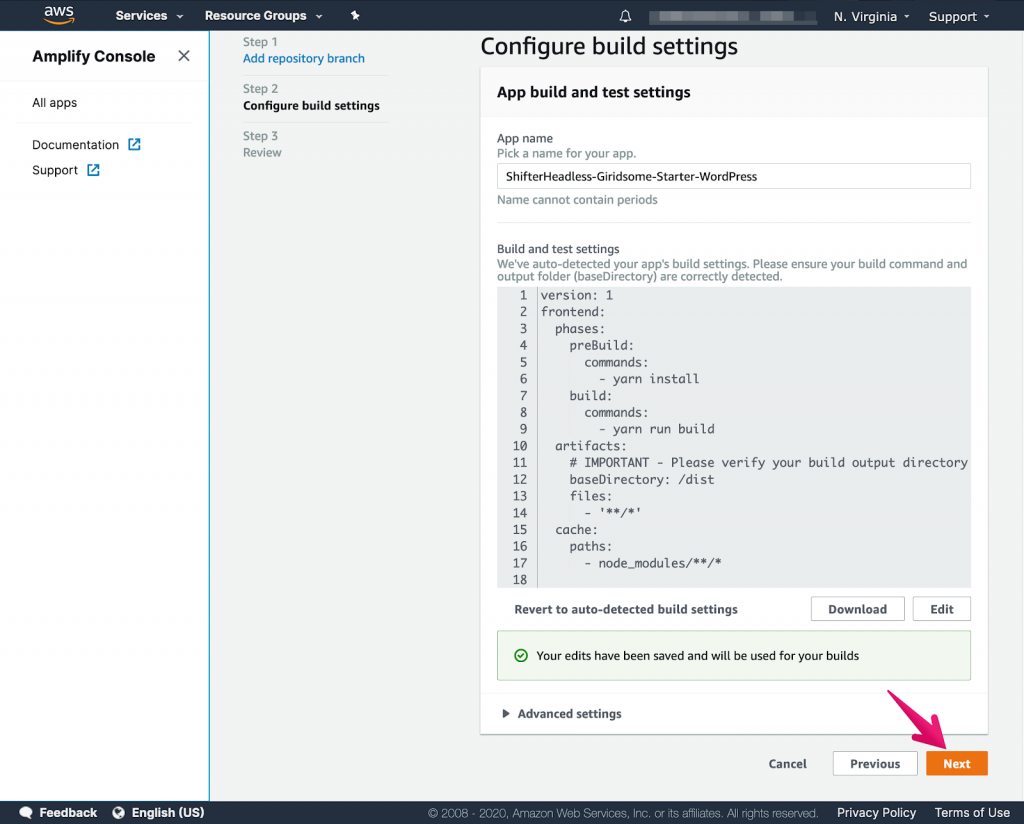
When you’re done, click Save and proceed.
Click Next
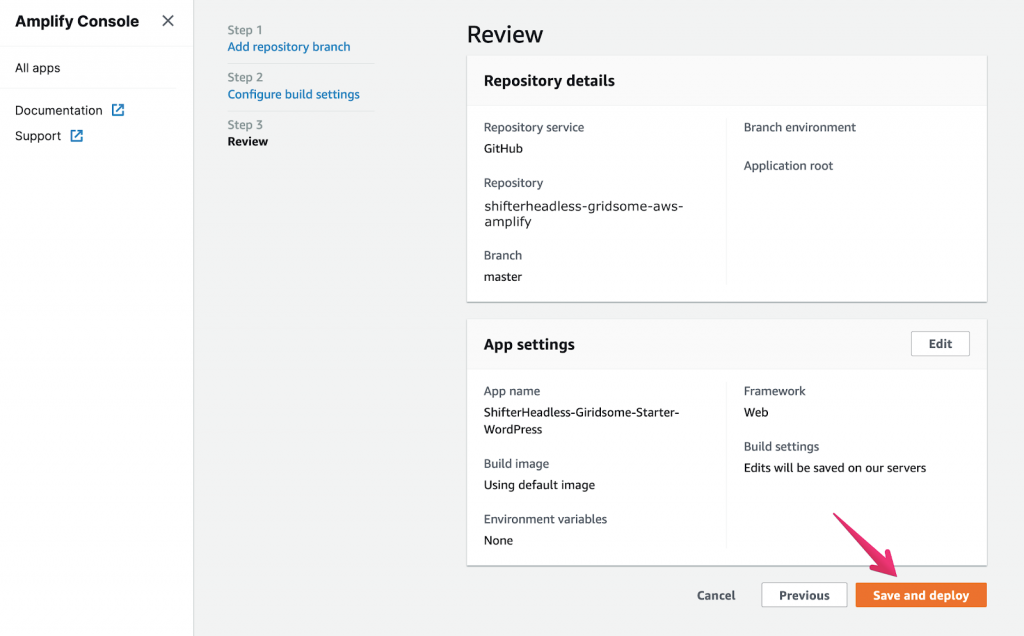
Click Save and Deploy
Amplify will begin to launch.
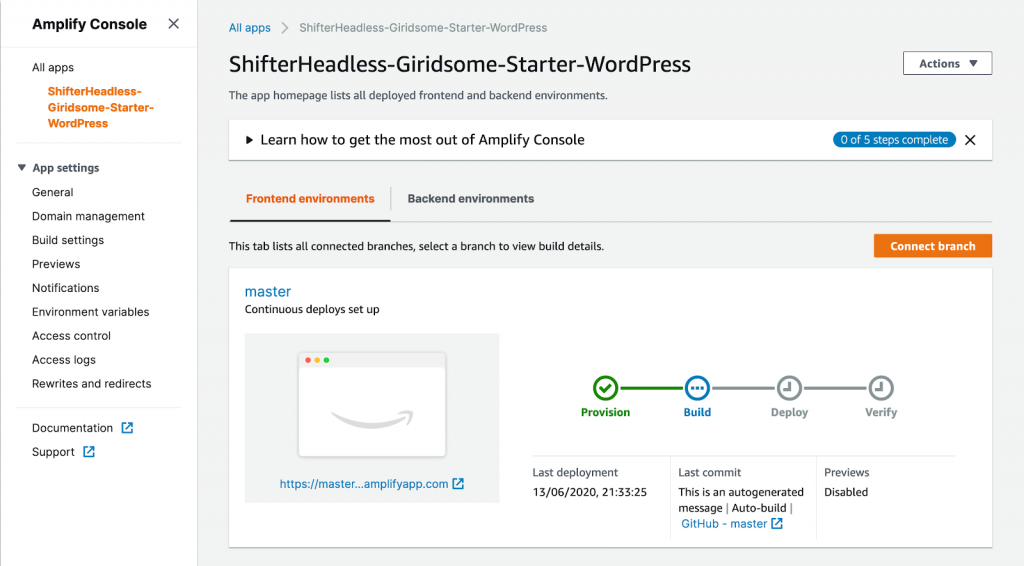
Wait for the verification process to complete. This will take 2-3 minutes.
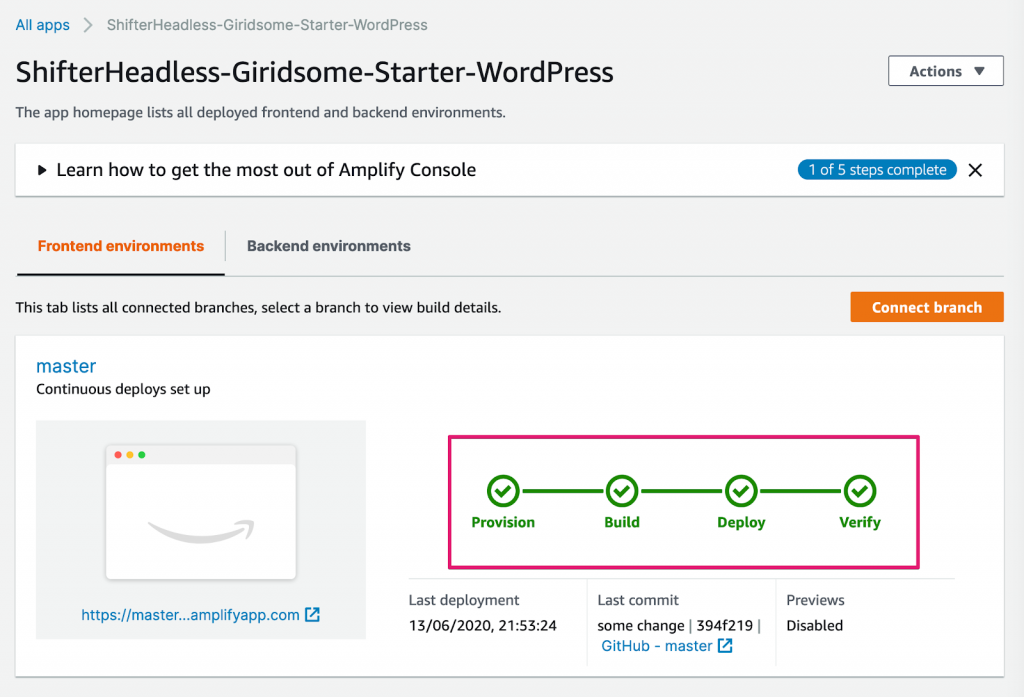
When the deployment is complete, click on the generated URL in the bottom left corner to check that it’s working.
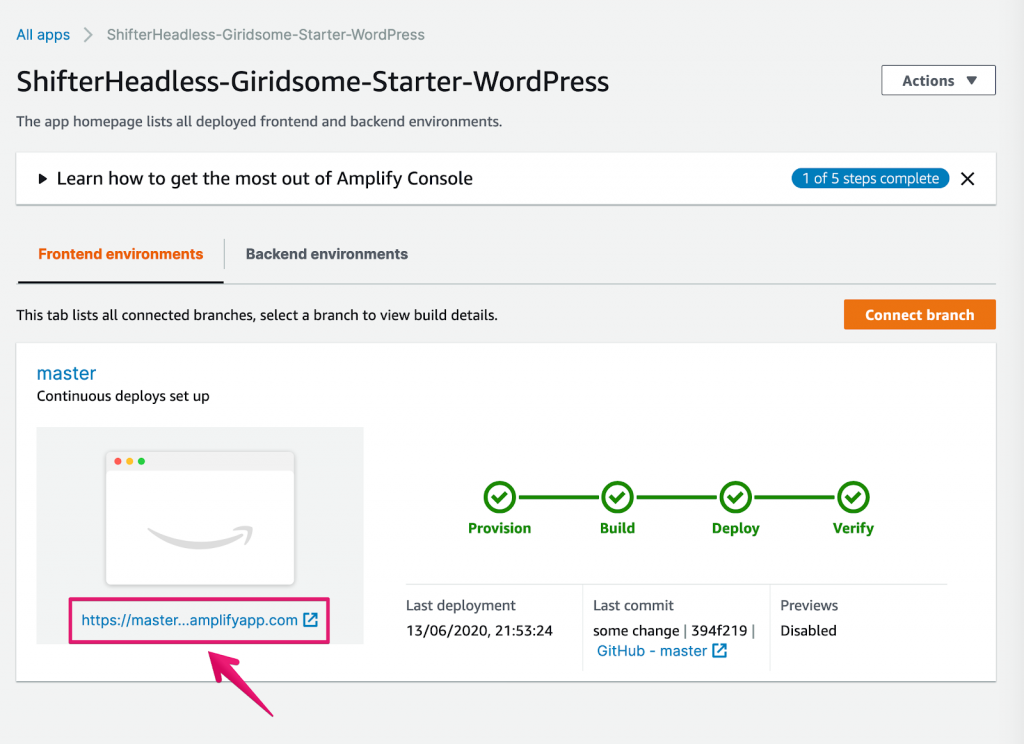
Congratulations! You now have a new static blog.
In conclusion
Although we’ve introduced you to one solution as example of the range of possibilities using shifter Headless Shifter Headless supports a full range of JS Frontends and we built it to be flexible enough to fit any project. AWS Console is a great fit for Shifter Headless because of its flexibility and we especially recommend it for those already using AWS products for their site’s back ends.
If you decide to give this a tutorial a try, or if you you’d like to experiment with Shifter Headless yourself, feel free to to reach out. We look forward to hearing from you.
