What is Frontity?
Frontity is a React framework for Headless WordPress that can be easily used to create a WordPress site using React.
Why Frontity?
When it comes to creating a website, there’s no shortage of JavaScript frameworks that will allow you to create beautiful and functional front ends. However, when it comes to running WordPress headless it can become easy to get bogged down with the particulars of WordPress and the process of fetching data using the WordPress API. That’s where Frontity comes in. Frontity is a framework that has been optimized to work perfectly with WordPress. Packages are automatically fetched from the WordPress API and are converted into data that can easily be handled in our React code leaving you more time to focus on your front end.
Let’s try it out!
Before we get started, make sure you are using Node.js on your local machine and that you’re running the latest version.
You can check your version with the following command.
% node -v
v12.9.1
If you’re using v9.x.x or earlier, you’ll need to download the latest version.
Installation
Let’s install Frontity from npm and select the starter theme from mars-theme and twentytwenty-theme.
 % npx frontity create frontity-example
? Pick a starter theme to clone: (Use arrow keys)
❯ @frontity/mars-theme (recommended)
  @frontity/twentytwenty-theme
When you create a new Project, the CLI will ask you to subscribe to their email list.
 Creating package.json.
 Creating frontity.settings.js.
 Cloning @frontity/mars-theme.
 Installing dependencies.
 Downloading favicon.ico.

Frontity project created.

? Do you want to receive framework updates by email? (y/N)
Finally, we get the following JavaScript files in your project directory.
$ cd frontity-example
% tree  -I node_modules .
├── favicon.ico
├── frontity.settings.js
├── package-lock.json
├── package.json
└── packages
    └── mars-theme
        ├── CHANGELOG.md
        ├── package.json
        └── src
            ├── components
            │   ├── featured-media.js
            │   ├── header.js
            │   ├── index.js
            │   ├── link.js
            │   ├── list
            │   │   ├── index.js
            │   │   ├── list-item.js
            │   │   ├── list.js
            │   │   └── pagination.js
            │   ├── loading.js
            │   ├── menu-icon.js
            │   ├── menu-modal.js
            │   ├── menu.js
            │   ├── nav.js
            │   ├── page-error.js
            │   ├── post.js
            │   └── title.js
            └── index.js

5 directories, 23 files
Run in local
Similar to other frameworks like Gatsby and Next.js, your site can be run locally. Simply run the command.
$ npx frontity dev

or
$ yarn run dev

or

$ npm run dev
This command will tell you your local site URL.
SERVER STARTED -- Listening @ http://localhost:3000
  - mode: development
  - target: module
Be sure to make a note of your local site URL.

Using your WordPress site
By default, the site’s data source is set to https://test.frontity.io. In this case, we want to use our own domain.
Let’s open frontity.settings.js. From here we can check the data source, menu settings, and more.
const settings = {
  "name": "frontity-example",
  "state": {
    "frontity": {
      "url": "https://test.frontity.io",
      "title": "Test Frontity Blog",
      "description": "WordPress installation for Frontity development"
    }
  },
  "packages": [
    {
      "name": "@frontity/mars-theme",
      "state": {
        "theme": {
          "menu": [
            [
              "Home",
              "/"
            ],
            [
              "Nature",
              "/category/nature/"
            ],
            [
              "Travel",
              "/category/travel/"
            ],
            [
              "Japan",
              "/tag/japan/"
            ],
            [
              "About Us",
              "/about-us/"
            ]
          ],
          "featured": {
            "showOnList": false,
            "showOnPost": false
          }
        }
      }
    },
    {
      "name": "@frontity/wp-source",
      "state": {
        "source": {
          "api": "https://test.frontity.io/wp-json"
        }
      }
    },
    "@frontity/tiny-router",
    "@frontity/html2react"
  ]
};

export default settings;
We can use our own WordPress site URL and replace the packages.state.source.api property like this.
...
    {
      "name": "@frontity/wp-source",
      "state": {
        "source": {
          "api": "https://central.wordcamp.org/wp-json"
        }
      }
    },
...
After we save our file and reload our site in the browser, we can see the WordCamp Central blog posts on the local site.

Changing the site Title and description
Next, we can change the site title and description by replacing state.frontity.title and state.frontity.description.
const settings = {
  "name": "frontity-example",
  "state": {
    "frontity": {
      "url": "https://test.frontity.io",
      "title": "WordCamp Central (Frontity example)",
      "description": "Frontity example site using WordCamp Central posts"
    }
  },
...
Build the application
We can easily create deployment packages by using the npm run buildcommand.
% yarn run build
yarn run v1.21.1
$ frontity build
mode: production

Building es5 bundle
Building module bundle
Building server bundle

  Done in 27.85s.
And we can check the site build by running the npm run servecommand.
% npx frontity serve


SERVER STARTED -- Listening @ http://localhost:3000
Deployment
One drawback to Frontity is that it does not support a static site generator mode yet. We still need a Node.js server environment to run the Frontity serve command and their team recommends using now.sh.
We strongly recommend this service as it is serverless, cheap, includes CDN, and is very easy to set up. This solution also supports the cache technique stale-while-revalidate (they happen to call it Serverless Pre-Rendering), a powerful way to improve your website speed.
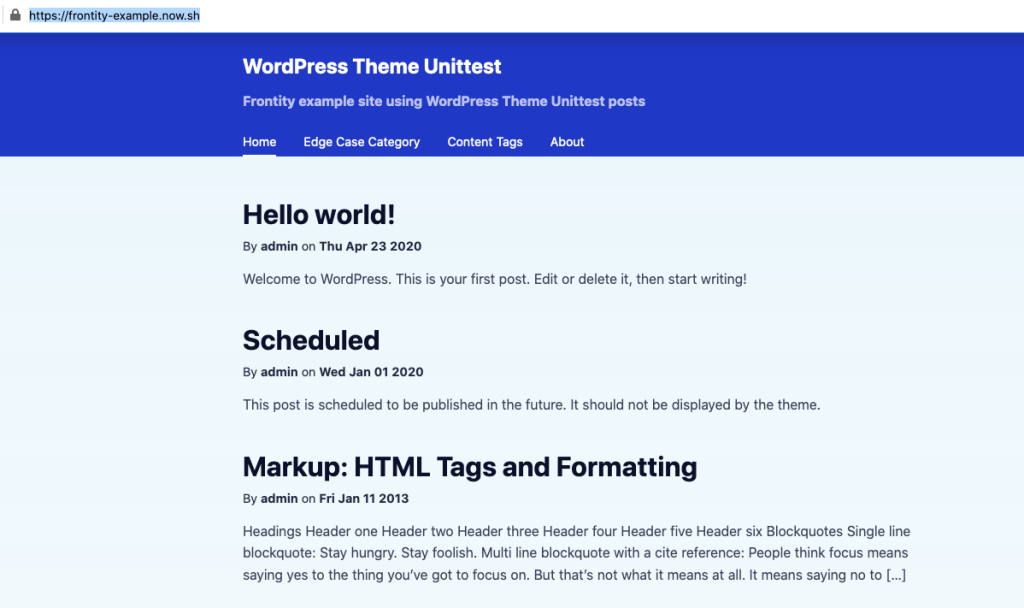
Demo site
Here is a demo site.

The site is using a following tools and services.
- Frontity: Frontend markup
- Vercel(formerly ZEIT): Front end server
- Shifter Headless: Data source (WordPress)
Check out our Github for the application source code..
Conclusion
Frontity is a great framework for creating a headless WordPress site.
The biggest difference between Frontily other frameworks like Gatsby, Next.js, or Ionic, is its complete focus on WordPress. We don’t have to write any code to fetch our WordPress site data from the WordPress API or GraphQL. Frontily handles it all for us.
However, if your project requires a static site generator, we recommend using Gatsby or Next.js for now.


